How to Transplant Acuminate cotoneaster?
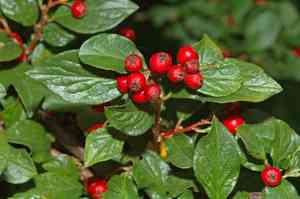
The optimal period for relocating acuminate cotoneaster spans from the onset of early spring's thaw through the threshold of summer's heat, facilitating root development prior to harsh climatic conditions. Choose a location bathed in sunlight with soil that drains effectively, and carefully introduce acuminate cotoneaster to its new environment.
What Preparations are Needed Before Transplanting Acuminate Cotoneaster?
What is the Ideal Time for Transplanting Acuminate Cotoneaster?
The optimal period for moving acuminate cotoneaster spans from early spring's thaw to the beginning of summer. This timeframe provides cool, moist soil, fostering root development without the strain of intense summer heat, thus giving your acuminate cotoneaster the best start in its new spot. Relocating acuminate cotoneaster during this interval enables it to leverage spring's gentle warmth and rainfall to recover from transplant shock and produce new growth. By selecting this prime transplanting window, you're setting up acuminate cotoneaster to flourish and enhance your garden's appeal with its lush, lasting foliage.
How Much Space Should You Leave Between Acuminate Cotoneaster Plants?
When preparing to transplant acuminate cotoneaster, ensure ample room for their branches to expand. Aim to space each plant approximately 5-6 feet (1.5-1.8 meters) apart. This will provide sufficient space for growth and healthy air circulation.
What is the Best Soil Mix for Acuminate Cotoneaster Transplanting?
Prior to transplanting acuminate cotoneaster, incorporating well-draining soil with some compost is an excellent starting point. A pH level ranging from slightly acidic to neutral is highly beneficial for acuminate cotoneaster. Add a balanced, slow-release fertilizer to provide your plants with a nutritional boost as they become established.
Where Should You Relocate Your Acuminate Cotoneaster?
Locate a sunny area in your garden that receives at least 6 hours of daily sunlight for your acuminate cotoneaster. They thrive with abundant light, but some afternoon shade in warmer regions will offer protection. This will ensure they have the energy to develop robustly and healthily.
What Equipments Should You Prepare Before Transplantation Acuminate Cotoneaster?
Gardening Gloves
To safeguard your hands while handling soil and plants.
Spade or Shovel
For excavating the plant from its original site and replanting it.
Garden Fork
To gently loosen the soil around the plant without harming its roots.
Pruning Shears
To trim any damaged or excessively long roots prior to transplanting.
Watering Can or Hose
To hydrate the acuminate cotoneaster before and after removal, as well as in its new location.
Wheelbarrow
To move the acuminate cotoneaster from one place to another without causing stress to the plant.
Stakes or Supports
If the acuminate cotoneaster is large or top-heavy, these might be necessary to stabilize the plant once transplanted.
Mulch
To help maintain soil moisture around the acuminate cotoneaster after transplantation.
How Do You Remove Acuminate Cotoneaster from the Soil?
How Do You Remove Acuminate Cotoneaster from the Soil?
From Ground: First, water the acuminate cotoneaster to moisten the soil, making excavation easier. Use a garden fork to loosen the soil surrounding the plant. Gently work a spade beneath the root ball to free it, then carefully lift it from the ground.From Pot: Begin by watering the acuminate cotoneaster to ensure the root ball is damp. Tilt the pot on its side and carefully extract the acuminate cotoneaster while supporting the base of the stem and root ball. If the plant is stuck, tap the pot's sides or gently press on the pot to loosen the root ball.From Seedling Tray: Moisten the soil to facilitate the removal of the acuminate cotoneaster seedlings. Gently dislodge the seedling from the tray with a fork or your fingers, taking care not to harm the delicate roots. Support the seedling by the root ball rather than by the stem.
Step-by-Step Guide for Transplanting Acuminate Cotoneaster
Preparing the New Site
Select a location that accommodates the acuminate cotoneaster in terms of spacing, without concern for sunlight or soil type. Dig a hole that is twice the width of the root ball and as deep as the root system.
Root Preparation
Inspect the acuminate cotoneaster's root ball, trimming any broken or overly long roots with pruning shears to encourage new growth.
Placing the acuminate cotoneaster
Position the acuminate cotoneaster in the center of the hole so that the top of the root ball is level with the surrounding soil surface. Spread the roots outwards.
Refilling the Hole
Backfill the hole with the excavated soil, gently tamping down around the acuminate cotoneaster to eliminate air pockets.
Watering
Water the acuminate cotoneaster generously to help settle the soil around the roots and to remove any remaining air pockets.
Mulching
Apply a layer of mulch around the base of the acuminate cotoneaster to retain soil moisture and regulate soil temperature.
Stabilizing the Plant
If the acuminate cotoneaster is large or top-heavy, insert stakes around the acuminate cotoneaster and loosely tie it to help maintain stability while it establishes new roots.
How Do You Care For Acuminate Cotoneaster After Transplanting?
Monitoring for Stress
Observe the acuminate cotoneaster for indications of transplant shock, such as wilting leaves, and adjust care as necessary.
Adjust Watering
Ensure the acuminate cotoneaster receives consistent moisture; modify watering based on weather conditions and the soil's moisture level.
Staking and Support
Regularly check any stakes or supports to confirm their effectiveness and ensure they are not impeding growth, adjusting as the acuminate cotoneaster develops.
Observing Growth
Look for new growth as a sign of successful transplantation, but be patient as some plants take longer to show new growth than others.
Troubleshooting Common Issues with Acuminate Cotoneaster Transplantation.
When is the best time to transplant acuminate cotoneaster?
The optimal period to relocate acuminate cotoneaster is in early to late spring, providing the plant ample time to establish itself.
How much space does acuminate cotoneaster require when transplanting?
Ensure to space acuminate cotoneaster approximately 5-6 feet (1.5-1.8 meters) apart to allow sufficient room for growth.
What's the ideal soil condition for transplanting acuminate cotoneaster?
Choose well-draining, fertile soil mixed with compost to give acuminate cotoneaster a healthy start.
How deep should the hole be for transplanting acuminate cotoneaster?
The hole should be twice as wide and the same depth as the root ball of acuminate cotoneaster.
Why is my acuminate cotoneaster wilting after transplant?
Wilting post-transplant may indicate shock. Ensure adequate water, avoid direct sunlight, and consider using a root stimulator.
How often should I water acuminate cotoneaster after transplanting?
Water acuminate cotoneaster thoroughly after transplanting, then regularly, allowing the soil to dry slightly between waterings.
What's the proper way to handle acuminate cotoneaster's roots when transplanting?
Handle roots gently, spread them out in the hole, and avoid bending to prevent damage.
Why are the leaves of acuminate cotoneaster turning yellow post-transplant?
Yellow leaves could signal overwatering, underwatering, or nutrient deficiency. Check soil moisture and adjust care accordingly.
Can I transplant acuminate cotoneaster on a hot day?
Transplanting acuminate cotoneaster on a mild day is best to prevent heat stress. Avoid transplantation during peak temperatures.
Should I fertilize acuminate cotoneaster right after transplanting?
Wait before fertilizing acuminate cotoneaster until it shows new growth, as early fertilization might harm fragile roots.



