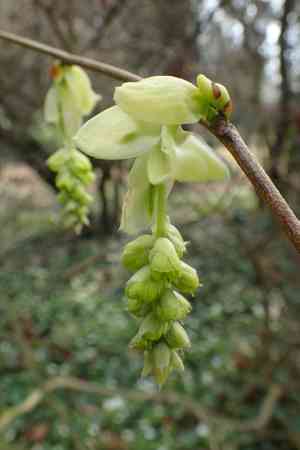
How to Transplant Winter hazel?
The most suitable period for transplanting winter hazel is during its dormant state, specifically as the chill of late fall gives way to the initial slumber of winter. This timing corresponds with the plant's natural development, facilitating a more seamless adjustment to a new location that satisfies its requirements for adequately drained earth and filtered light. A helpful tip: Select an area where winter hazel can thrive in indirect sunlight for optimal future growth.
What Preparations are Needed Before Transplanting Winter Hazel?
What is the Ideal Time for Transplanting Winter Hazel?
For winter hazel, the perfect time to relocate is during late autumn or early winter. This period allows roots to establish in the cooler, stable soil. Moving winter hazel now utilizes its natural dormancy, reducing plant stress and improving root development. Embrace this timing for a robust bloom cycle in spring. The cool, unfrozen ground supports root growth without summer's heat stress, setting winter hazel up for success.
How Much Space Should You Leave Between Winter Hazel Plants?
Begin by placing your winter hazel plants approximately 4-6 feet (1.2-1.8 meters) apart. This ensures each plant has ample room to expand and grow without obstruction. As a novice, be careful not to position them too closely!
What is the Best Soil Mix for Winter Hazel Transplanting?
Newcomers, rejoice! Winter hazel flowers are not particular. They prefer soil that drains well, with a pH that is slightly acidic to neutral. For a strong start, mix a basic fertilizer, such as a balanced 10-10-10, into your soil before planting.
Where Should You Relocate Your Winter Hazel?
Here's a tip: winter hazel thrives in partial shade! Aim to find a garden spot where it receives morning sun and afternoon shade. The correct balance of light and shade will help your winter hazel flourish.
What Equipments Should You Prepare Before Transplantation Winter Hazel?
Gardening Gloves
These will shield your hands from dirt and any sharp objects hidden in the soil.
Shovel
This tool will be used for digging the hole where you will plant winter hazel, and also for extracting winter hazel from its current spot.
Garden Trowel
Useful for removing smaller plants or seedlings and for loosening the soil around the plant.
Watering Can
It is crucial to thoroughly hydrate winter hazel both before and after its relocation.
Organic Compost
This will provide winter hazel with nutrient-rich soil when it is transplanted.
Mulch
This will help maintain soil moisture after winter hazel has been transplanted.
Garden Pruner
Use this to trim any damaged or broken roots from winter hazel before and after transplanting.
How Do You Remove Winter Hazel from the Soil?
How Do You Remove Winter Hazel from the Soil?
From Ground: Begin by watering winter hazel plant the day before you plan to move it. Then carefully dig a trench around the plant, at least 6 inches from the base to avoid root damage. Once the trench is deep enough, gently lift the plant with your shovel, ensuring the root ball stays as intact as possible.From Pot: If winter hazel is in a pot, start by watering it well, then tip the pot sideways and carefully slide the plant out, trying not to pull on the stem. Gently untangle the roots if they are tightly coiled.From Seedling Tray: If winter hazel is in a seedling tray, it's best to use a small garden trowel or even a spoon. Water the tray thoroughly before starting, then gently ease the seedlings out from the bottom, without tugging on the stem.
Step-by-Step Guide for Transplanting Winter Hazel
Ground Preparation
Dig a hole that is twice the width and the same depth as the root ball of winter hazel. Then mix organic compost into the excavated soil.
Installation
Place winter hazel into the hole gently, ensuring the top of the root ball is level with the surrounding soil. Backfill the hole with the prepared soil, lightly firming it around the plant's base.
Watering
Water your plant thoroughly immediately after transplanting to help settle the soil around the roots.
Mulching
Apply a layer of mulch around your plant to help conserve water and suppress weed growth, but keep the mulch away from the plant stem to prevent rotting.
How Do You Care For Winter Hazel After Transplanting?
Watering
After transplanting, water winter hazel thoroughly and then consistently for the next few weeks. Excessive watering can cause root rot, so ensure the soil is moist but not waterlogged.
Pruning
Any dead or yellow leaves should be trimmed to encourage healthy new growth.
Frost Protection
Winter hazel can be susceptible to frost, so if temperatures are expected to drop, provide some frost protection by covering the plant with horticultural fleece or bringing potted plants indoors.
Pest Control
Monitor the plant for any signs of pest infestation or disease. Intervene promptly with appropriate pest control measures when necessary.
Troubleshooting Common Issues with Winter Hazel Transplantation.
What is the best time of year to transplant winter hazel?
The ideal time to move winter hazel is in late summer to early fall (S9-S10). This provides ample time for root establishment before winter arrives.
How much space does winter hazel require after transplantation?
Winter hazel needs sufficient room to grow, ideally with a spacing of 4-6 feet (1.2-1.8 meters) between plants. This promotes optimal growth and overall plant health.
How deep should the hole be when transplanting winter hazel?
Dig a hole that's twice as wide and as deep as the root ball of your winter hazel. This aids the roots in easily spreading and growing into the new location.
What are some signs that my winter hazel is ready for transplanting?
If winter hazel is clearly outgrowing its current spot or showing signs of stress, it may be ready for relocation. Healthy roots and new growth are good indicators.
What kind of soil is preferred when transplanting winter hazel?
Winter hazel prefers well-draining soil rich in organic matter. Before transplanting, enrich the new site with compost to improve soil structure and nutrient content.
How much should I water winter hazel after transplanting?
Immediately after transplanting winter hazel, water thoroughly. Then, continue to provide deep, infrequent watering as this encourages strong root growth. Always avoid waterlogged conditions.
How can I ensure the survival of winter hazel after transplantation?
Proper care after transplant is vital. Keep the soil consistently moist, shield winter hazel from extreme weather, and apply a layer of mulch around the base.
What's the proper way to removal winter hazel from its original location?
When removing winter hazel for transplant, be careful not to harm its roots. Dig around the plant to loosen the soil, then gently lift it out, preserving as much of the root ball as possible.
What are some common problems after transplanting winter hazel?
Winter hazel may experience transplant shock, which can appear as wilting, yellowing, or leaf drop. It's crucial to provide proper care and regularly inspect the plant.
How to deal with transplant shock in winter hazel?
If winter hazel shows signs of transplant shock, maintain proper watering, avoid fertilizing until the plant recovers, and consider offering some shade protection during the hottest parts of the day.


