How to Transplant Greater pond-sedge?
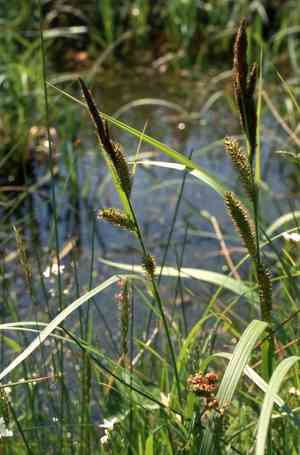
Relocating Carex riparia flourishes when performed as the chill diminishes, welcoming the revitalizing warmth of early to mid-spring. Select a damp, partially shaded location to emulate its native environment, and if required, preserve soil structure to foster root development.
What Preparations are Needed Before Transplanting Greater Pond-sedge?
What is the Ideal Time for Transplanting Greater Pond-sedge?
The optimal period for relocating greater pond-sedge is at the beginning or during the progression of spring. This timeframe allows sufficient opportunity for root establishment prior to summer's heat. Moving greater pond-sedge during this mild season encourages vigorous development, ensuring the plants acclimate well to their new spot and flourish. A helpful hint: spring transplantation sets the stage for a lush, thriving display!
How Much Space Should You Leave Between Greater Pond-sedge Plants?
When preparing to transplant greater pond-sedge, ensure each plant has ample room to expand. Aim for a spacing of approximately 3-4 feet (about 1-1.2 meters). This will help guarantee that every plant receives the necessary resources to thrive.
What is the Best Soil Mix for Greater Pond-sedge Transplanting?
Prior to transplanting greater pond-sedge, thoroughly prepare the soil. This species flourishes in loamy, sandy, or clay soil types. Incorporate a high-quality base fertilizer to enrich the soil and supply vital nutrients. Proper soil preparation enhances your plant's likelihood of success.
Where Should You Relocate Your Greater Pond-sedge?
Greater pond-sedge thrives in sunlight, so select a garden location that receives abundant light throughout the day. However, greater pond-sedge can also endure partial shade. Achieving the correct balance will ensure your greater pond-sedge plants remain healthy and robust.
What Equipments Should You Prepare Before Transplantation Greater Pond-sedge?
Gardening gloves
To keep your hands clean and protected when handling soil and the greater pond-sedge plant.
Shovel or garden spade
Needed to excavate the existing plant or prepare a new planting site.
Hand trowel
Useful for smaller digging tasks and precise hole creation.
Gardening Pruner
To trim off any dead or overgrown branches of the greater pond-sedge.
Watering Can
To hydrate the greater pond-sedge before and after the relocation.
Wheelbarrow or garden cart
Helpful for transporting the greater pond-sedge plant between areas, especially if the plant is large.
Organic compost
This is crucial for providing nutrients for the greater pond-sedge.
How Do You Remove Greater Pond-sedge from the Soil?
How Do You Remove Greater Pond-sedge from the Soil?
From Pot: First, water the greater pond-sedge plant to make the soil more pliable. Then, gently turn the pot on its side, supporting the plant's stem or lower leaves. If possible, avoid touching the stem or foliage. Tap the bottom and sides of the pot to loosen the root ball. If the plant is resistant, slide a knife around the pot's interior to free the roots. Once loose, you should be able to carefully slide your greater pond-sedge plant out of its container.From Ground: Begin by watering the greater pond-sedge plant to soften the earth. Use your shovel to dig a wide circle around the greater pond-sedge plant, being careful not to harm the roots. Dig deep enough to get beneath the root ball and then carefully lift the greater pond-sedge plant out of the ground.From Seedling Tray: Start by filling a watering can with lukewarm water and moisten the seedlings. Then carefully loosen the soil around the greater pond-sedge using a small gardening fork or a popsicle stick. Gently lift the greater pond-sedge plant from the tray by holding it by a leaf, never by the stem. If it resists, continue to loosen the earth until it's free from the tray.
Step-by-Step Guide for Transplanting Greater Pond-sedge
Digging a New Hole
Start by digging a hole that is twice as wide but the same depth as your greater pond-sedge plant's root ball. Ensure the sides of the hole are loose to aid root penetration.
Preparing the Plant
Gently shake off excess soil from the root ball of your greater pond-sedge plant and trim any damaged roots.
Planting
Place the greater pond-sedge plant into the hole, ensuring it is level with the ground. Backfill around the plant with soil, gently firming it around the base.
Watering
Thoroughly water the greater pond-sedge plant after planting. This helps the soil settle around the roots and assists in recovery from transplant shock.
Mulching
Applying a layer of organic mulch around your greater pond-sedge plant, keeping it away from the stem, can help retain soil moisture and regulate soil temperature.
How Do You Care For Greater Pond-sedge After Transplanting?
Watering
After transplanting, the greater pond-sedge requires consistent watering. The soil should remain damp but never saturated. Overwatering can be as detrimental as underwatering. Adjust irrigation based on weather conditions.
Pruning
Remove any dead, damaged, or diseased parts of the greater pond-sedge after its relocation. This promotes healthy and vigorous growth.
Monitoring
Observe your greater pond-sedge plant for signs of shock such as drooping or wilting. If this occurs, ensure the plant is adequately watered; it typically recovers within a few days.
Feeding
Following the initial application of organic compost, additional fertilization may not be necessary. However, if your soil is poor, a slow-release fertilizer could be beneficial.
Weeding
Keep the area around the greater pond-sedge free from weeds, as they compete with your plant for essential nutrients and water.
Troubleshooting Common Issues with Greater Pond-sedge Transplantation.
What's the best season to transplant greater pond-sedge?
The ideal time to transplant greater pond-sedge is during S1-S2. The plant thrives best in this period.
What is the ideal distance to plant greater pond-sedge from each other?
To ensure optimal growth, maintain a spacing of 3-4 feet (0.9-1.2 meters) between each greater pond-sedge transplant.
Why is my transplanted greater pond-sedge wilting?
Greater pond-sedge might wilt after transplanting due to shock. Keep it well-hydrated and limit sun exposure for a few days.
My transplanted greater pond-sedge isn't growing well. Why?
Verify if you've planted greater pond-sedge with adequate spacing to support its growth. Also, ensure sufficient organic matter in the soil.
Do I need to prune greater pond-sedge after transplanting?
Yes, trimming greater pond-sedge back after transplanting can encourage new growth and better adaptation to its new environment.
How do I water greater pond-sedge after transplanting?
Water greater pond-sedge immediately after transplanting and continue regular watering if there's no rainfall to prevent plant stress.
How much sunlight does a transplanted greater pond-sedge need?
Greater pond-sedge prefers full sun to partial shade. However, after transplanting, reduce sun exposure for a couple of days.
What type of soil is best for transplanting greater pond-sedge?
Greater pond-sedge will flourish best in well-draining soil enriched with organic matter. Avoid waterlogged conditions.
Should I fertilize greater pond-sedge after transplanting?
Yes, applying a liquid starter fertilizer after transplanting greater pond-sedge can help establish roots and promote growth.
Can I mulch around my newly transplanted greater pond-sedge?
Absolutely! Mulching helps retain soil moisture, keeps roots cool, and suppresses weed growth that could compete with greater pond-sedge.



