How to Transplant Rock harlequin?
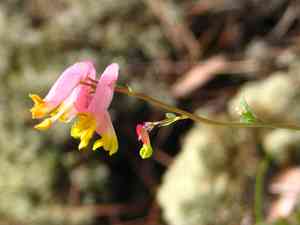
For rock harlequin, transplanting during the mild period of mid-to-late spring or the initial warmth of early summer is optimal, encouraging vigorous development. Position it in an area receiving filtered sunlight and having soil that drains effectively. Careful manipulation is crucial to safeguard its fragile root structure.
What Preparations are Needed Before Transplanting Rock Harlequin?
What is the Ideal Time for Transplanting Rock Harlequin?
The optimal period for relocating rock harlequin is from mid to late spring, as the ground warms and the danger of frost diminishes. This timeframe promotes root development, preparing rock harlequin for vigorous summer growth. Ensuring your rock harlequin is moved during this season maximizes its chances of thriving, benefiting from the perfect balance of mild weather and increasing daylight. A helpful hint â a spring relocation gives your rock harlequin ample time to adjust, strengthen its root systems, and get ready for a season of vibrant growth. Let's give your rock harlequin the best possible start in its new home!
How Much Space Should You Leave Between Rock Harlequin Plants?
Ensure each rock harlequin has adequate room to expand. Ideally, position them 1-3 feet (30-90cm) apart. Not too close to avoid competition for nutrients, and not too far to prevent isolation. This will provide them sufficient space to grow and flourish!
What is the Best Soil Mix for Rock Harlequin Transplanting?
For rock harlequin, prepare a well-draining soil with compost as a foundational fertilizer. Compost will enrich the soil with essential nutrients and ensure a good soil structure for proper root development. Also remember, rock harlequin prefers slightly acidic to neutral pH soil.
Where Should You Relocate Your Rock Harlequin?
Rock harlequin thrives in sunlight! Therefore, select a spot where it will receive full to partial sun throughout the day. However, a bit of shade during the most intense midday sun might be beneficial.
What Equipments Should You Prepare Before Transplantation Rock Harlequin?
Gardening Gloves
To safeguard your hands while handling the soil and rock harlequin plant.
Shovel or Garden Spade
To excavate the rock harlequin from its original spot without harming roots and to prepare the new planting site.
Gardening Trowel
This small-handled tool assists in removing the plant from a pot or seedling tray, ensuring minimal root disturbance.
Watering Can
To moisten the soil around the rock harlequin before and after its relocation.
Pruning Shears
To trim any damage to the plant during the move and ensure a healthy beginning in its new location.
How Do You Remove Rock Harlequin from the Soil?
How Do You Remove Rock Harlequin from the Soil?
From Ground: Initially, ensure the soil surrounding the rock harlequin plant is sufficiently hydrated. Use a shovel to carefully dig a wide area around the plant, so the majority of its root system remains undisturbed. Gradually work the shovel beneath the root ball, gently lifting it from its original position. Avoid yanking or roughly pulling the plant, which can damage the roots.From Pot: Begin by watering the rock harlequin plant to facilitate a smoother removal process. Tilt the pot sideways and lightly tap it to loosen the soil and roots. Gently slide out the plant, making sure to support its base as you do so.From Seedling Tray: Water the tray before moving the rock harlequin plant. Carefully use a gardening trowel or a similar tool to loosen the soil around the seedling. Ensure you're holding onto the base of the plant, not the stem, as you lift it out.
Step-by-Step Guide for Transplanting Rock Harlequin
Root Preparation
After removing rock harlequin from its initial location, gently shake off any excess soil from its root ball and, using pruning shears, snip off any dead or excessively long roots.
Hole Preparation
Dig a hole at the new site that is twice as wide and similar in depth to the root ball of rock harlequin. This allows the roots to comfortably spread within their new environment.
Placement
Position rock harlequin in the hole. Ensure the top of its root ball is level with the surrounding soil surface. Adjust the depth of the hole if necessary.
Completion
Backfill the hole with soil, gently firming it around the rock harlequin's base. Water the plant generously, to settle the soil around the roots and help the plant acclimate to its new location.
How Do You Care For Rock Harlequin After Transplanting?
Watering
After transplanting, ensure the rock harlequin plant receives adequate water; the soil should feel damp to the touch, but avoid waterlogging. Depending on the climate, watering in the early morning or late evening is usually best.
Pruning
Trim any damaged or excessively long branches using pruning shears to help the rock harlequin conserve its energy for growth in the new location.
Observation
Closely monitor the rock harlequin plant after transplanting. If you notice wilting or discoloration, it could indicate that the plant is not adapting well to its new environment. Taking corrective actions early can save your plant.
Troubleshooting Common Issues with Rock Harlequin Transplantation.
What's the ideal season for transplanting rock harlequin?
The optimal time to move the rock harlequin is between the second and fourth growth periods of the plant's life cycle.
How much space does rock harlequin need when transplanting?
Remember to space rock harlequin between 1-3 feet (30-91 cm) apart to ensure they have ample room to flourish.
My rock harlequin isnât thriving after the transplant. What might be the problem?
Ensure the rock harlequin is receiving sufficient water and sunlight post-transplant. Additionally, it might be struggling due to shock, which is a normal occurrence during a transplant.
How deep should the hole be when transplanting rock harlequin?
The transplant hole should be twice the size of the rock harlequin's root ball. This provides the roots plenty of space to grow.
Is it necessary to add fertilizer while transplanting rock harlequin?
Yes, incorporating some slow-release granular fertilizer can help the rock harlequin establish itself in the new location more effectively.
How often do I water rock harlequin post-transplant?
Water rock harlequin immediately after transplanting and then maintain regular watering, approximately once or twice a week, depending on the climate.
Why are the leaves on my transplanted rock harlequin turning yellow?
Yellow leaves could indicate over or underwatering, or a deficiency in nutrients. Check soil moisture and ensure it's following a healthy feeding regimen.
How to prevent shock in rock harlequin during transplanting?
Water the plant thoroughly before and after transplanting, and try to minimize damage to the roots and foliage to prevent transplant shock.
What type of soil is best for transplanting rock harlequin?
Rock harlequin prefers well-draining soil. Consider incorporating some compost or organic matter into the soil to enhance its structure and nutrient content.
Should I prune rock harlequin before transplanting?
Yes, light pruning helps reduce the plant's stress by decreasing the amount of foliage it needs to support during the transplanting process.



