How to Transplant Japanese false bindweed?
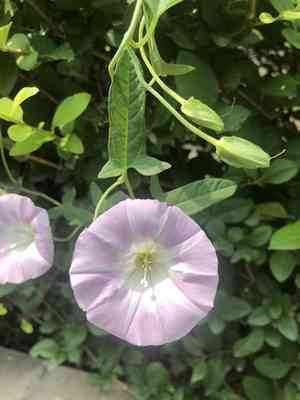
Relocate japanese false bindweed during the peak vigor of mid to late spring, leveraging ideal growing circumstances. Choose a location offering partial shade and damp, adequately draining earth. Carefully promote root expansion for strong establishment, guaranteeing japanese false bindweed's thriving beginning.
What Preparations are Needed Before Transplanting Japanese False Bindweed?
What is the Ideal Time for Transplanting Japanese False Bindweed?
Choose the rejuvenating period of mid to late spring for relocating japanese false bindweed. This timeframe guarantees a gentle beginning with mild temperatures and ample growth potential. By establishing japanese false bindweed during this season of renewal, you provide it with the perfect blend of warmth and moisture, encouraging robust root development and adaptation. This timing not only aligns with japanese false bindweed's natural growth cycle but also leverages the extended daylight hours, giving japanese false bindweed the best chance to flourish in its new spot.
How Much Space Should You Leave Between Japanese False Bindweed Plants?
To allow your japanese false bindweed ample room to expand, aim for a spacing of approximately 3-5 feet (0.9-1.5 meters) between plants. This might seem generous, but these plants appreciate their personal space, which will ensure proper development.
What is the Best Soil Mix for Japanese False Bindweed Transplanting?
Japanese false bindweed thrives in soil that is rich in nutrients and drains effectively. Begin with a compost-based soil mixture. Integrate a balanced granular fertilizer, such as a 10-10-10 formula, into the soil to establish a healthy nutrient foundation.
Where Should You Relocate Your Japanese False Bindweed?
Japanese false bindweed plants prefer a full day of sun but can endure some partial shade. Locate a position in your garden that receives 6-8 hours of sunlight daily. It will also perform well in areas that get morning shade and full afternoon sun.
What Equipments Should You Prepare Before Transplantation Japanese False Bindweed?
Gardening Gloves
To safeguard your hands while working with soil and handling the plant.
Gardening Shovel or Spade
For excavating a hole in the ground and extracting the plant from its current location.
Pruners
These are necessary for trimming back any unruly roots or foliage both before and after the transplant.
Watering Can or Garden Hose with a gentle spray setting
To keep the root ball moist during the process and to water the plant post-transplant.
Trowel
For more precise digging when a shovel or spade is too large.
Soil pH Tester
To verify the new site has the appropriate soil acidity for the japanese false bindweed plant.
Compost
To enrich the planting hole with essential nutrients for the japanese false bindweed plant's growth.
Mulch
To assist in retaining soil moisture after the transplant.
How Do You Remove Japanese False Bindweed from the Soil?
How Do You Remove Japanese False Bindweed from the Soil?
From Ground: To extract the japanese false bindweed plant from the ground, begin by hydrating the surrounding soil a day prior to transplanting. This will make the soil easier to manage. On the day of transplant, dig a wide trench around the plant, ensuring the root ball remains intact. Gradually work your way beneath the root ball with the spade or shovel, carefully lifting the plant with as many roots attached as possible.From Pot: Transplanting the japanese false bindweed plant from a container involves turning the pot on its side, grasping the plant at its base, and applying gentle pulls. If the plant doesn't release easily, tap the bottom of the pot to loosen the root ball.From Seedling Tray: For seedlings, gently grasp the japanese false bindweed plant's stem and use a trowel or spoon to scoop out the seedling along with its root soil. Handle the seedling delicately to prevent damage to its fragile roots.
Step-by-Step Guide for Transplanting Japanese False Bindweed
Preparation
Begin by assessing the pH level of the soil in the new location to confirm its suitability for japanese false bindweed plant. If needed, adjust the soil pH by adding lime to increase (if too acidic) or sulfur to decrease (if too alkaline). The next step is to excavate a hole that is twice as wide and the same depth as the japanese false bindweed plant's root ball. Amend the hole with some compost.
Transplanting
Position the plant in the hole, ensuring it is centered and level with the surrounding ground. Backfill with soil and gently firm the soil around the plant's base to eliminate any air pockets. Water the japanese false bindweed plant after transplanting to settle the soil around the roots.
Finalizing
Apply a 2-3-inch layer of mulch around the plant, keeping it a few inches away from the stem. This not only helps conserve moisture but also suppresses weeds.
How Do You Care For Japanese False Bindweed After Transplanting?
Watering
Ensure japanese false bindweed plant receives ample water after transplanting, but frequently check the soil to prevent it from becoming waterlogged. Excessive water can be as detrimental as insufficient water.
Pruning
Trim any damaged or overly long roots before planting and prune any broken or injured branches after planting. However, avoid pruning healthy top growth as the leaves produce food vital for growth and recovery.
Monitoring
Observe the plant closely for several weeks. If the japanese false bindweed plant appears to be wilting, it may require more water. Yellowing leaves typically indicate overwatering. Therefore, adjust your watering schedule as necessary.
Fertilizing
Wait at least one month before fertilizing the japanese false bindweed plant. Transplanting can be a shock to the plant, and fertilizing too soon can lead to additional stress.
Troubleshooting Common Issues with Japanese False Bindweed Transplantation.
When is the best time to transplant japanese false bindweed?
The optimal period to transplant japanese false bindweed is from late spring to midsummer (indicated as S2-S3). These seasons provide the plant sufficient time to acclimate before winter arrives.
What's the ideal distance for planting japanese false bindweed?
Allow ample room for japanese false bindweed to expand by spacing them approximately 3-5 feet apart (91-152 cm). This will also enhance air circulation, thereby reducing the risk of disease.
How deep should I plant the japanese false bindweed?
The roots should be buried at roughly the same depth as they were in the original container. Planting too deeply can cause root suffocation, while planting too shallowly can lead to dehydration.
How should I prepare the ground before transplanting japanese false bindweed?
Well-drained, fertile soil is most suitable for japanese false bindweed. Loosen the planting area to a depth of about 12 inches (30 cm) and incorporate organic matter. This enriches the soil and promotes root development.
How do I ensure my transplanted japanese false bindweed doesn't wilt?
Water japanese false bindweed generously both before and after planting. Consistent watering during the initial few weeks aids establishment. However, avoid over-watering to prevent waterlogging and root rot.
Should I prune japanese false bindweed before or after transplanting?
Light pruning can be performed before transplanting japanese false bindweed to minimize water loss. Nevertheless, refrain from extensive pruning until the plant has settled into its new location.
How do I handle roots when transplanting japanese false bindweed?
Handle roots with care to prevent damage. If the roots are densely packed, gently separate them. Broken or dead roots can be trimmed.
How to tackle failed transplantation of japanese false bindweed?
Ensure the plant receives adequate water, appropriate sunlight, and nutrients. Root shock can cause wilting, but the plant should recover once it adjusts to the new environment.
How frequently should japanese false bindweed be watered after transplanting?
Initially, water japanese false bindweed every other day. Gradually reduce the frequency to once a week or less, depending on the plant's water requirements and environmental conditions.
How soon can I expect to see growth in my transplanted japanese false bindweed?
Japanese false bindweed may require some time to establish and exhibit new growth; do not be alarmed if there are no immediate signs. Consistent care and patience are crucial for successful transplanting.



