How to Transplant Sea oxeye?
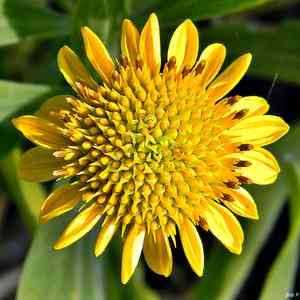
The ideal period for relocating sea oxeye is from the middle to the end of spring, capitalizing on vigorous growth phases. Select a bright location featuring soil that drains effectively; if sea oxeye is situated in an exposed area, offer some protection. Gentle handling guarantees a smooth adjustment.
Essential Preparations Before Relocating Sea Oxeye
When is the Best Time to Move Sea Oxeye?
The prime window for moving sea oxeye is during the period of rejuvenation and development, typically spanning from mid to late spring. This timing offers sea oxeye the benefit of warmer ground temperatures, crucial for root development, and a full growing season ahead to flourish. Transplanting sea oxeye at this point ensures strong growth and minimal shock, setting the stage for a vibrant display of leaves and blooms.
What is the Recommended Spacing Between Sea Oxeye Plants?
Position your sea oxeye approximately 18-24 inches (45-60 cm) apart. This provides ample room for expansion, ensuring each sea oxeye receives sufficient nutrients and sunlight to prosper.
Which Soil Mixture is Best for Transplanting Sea Oxeye?
Prepare a well-draining soil, rich in organic material, for your sea oxeye, and incorporate a slow-release fertilizer to give your plants a healthy start. Sea oxeye prefers soil that isn't overly saturated!
Where Should You Replant Your Sea Oxeye?
Locate a sunny spot for your sea oxeye as they thrive in full sunlight. A position that receives at least 6 to 8 hours of direct sun daily will keep your sea oxeye radiating with vitality!
Tools Required Before Transplanting Sea Oxeye
Gardening Gloves
To safeguard your hands while handling soil and plants.
Shovel or Spade
For excavating and lifting the root ball of sea oxeye from its original location.
Watering Can or Hose
To hydrate sea oxeye before and after the relocation process.
Wheelbarrow or Tarp
To transport the sea oxeye and maintain a tidy workspace.
Pruning Shears
To trim any damaged roots or foliage prior to transplanting.
Measuring Tape
To accurately gauge the distance between plants during relocation.
How to Extract Sea Oxeye from the Soil?
How to Extract Sea Oxeye from the Soil?
From Ground: First, water the sea oxeye plant to moisten the soil and lessen transplant shock. Using a shovel or spade, dig a wide circle around the plant, going deep enough to encompass the entire root ball. Gently pry the root ball from the soil and carefully lift the plant to minimize root damage.From Pot: Water the sea oxeye in its container to facilitate root ball removal. Tilt the pot sideways and gently tap to loosen the root ball. Support the plant by its base and carefully slide the root ball out.From Seedling Tray: Water the seedlings to make the soil pliable. Use a spoon or dibbler to gently lift each sea oxeye seedling along with the surrounding soil to prevent damage to delicate roots.
Step-by-Step Guide for Relocating Sea Oxeye
Prepare the New Location
Clear the designated area of weeds, rocks, and debris. Use a measuring tape to ensure adequate spacing between future sea oxeye plants.
Dig the Hole
Use a shovel or spade to excavate a hole that is twice as wide and just as deep as the sea oxeye root ball.
Placement
Carefully lower the sea oxeye root ball into the hole. Ensure the plant is upright and centered.
Backfill the Hole
Slowly fill in around the root ball with soil, gently tamping down to eliminate air pockets without compacting the soil too tightly.
Water Thoroughly
Water the sea oxeye deeply to settle the soil around the roots and hydrate the plant. Use a watering can or hose with a gentle flow.
Post-Transplant Care for Sea Oxeye
Monitoring
Inspect the sea oxeye daily for the initial couple of weeks, looking for signs of stress such as wilting or yellowing leaves. Adjust care as needed.
Stabilizing
Stake the sea oxeye if necessary, using soft ties to support it without harming the stems or branches.
Resolving Common Issues with Sea Oxeye Transplantation.
What's the ideal time to transplant sea oxeye for successful establishment?
The best transplanting period is from mid to late spring when the weather is mild.
How far apart should sea oxeye be spaced when transplanting?
Allow a distance of 18-24 inches (45-60 cm) between sea oxeye plants to ensure proper growth.
What soil conditions promote sea oxeye's growth after transplanting?
Select well-drained soil with moderate fertility for sea oxeye to flourish post-transplant.
How much should I water sea oxeye after transplanting?
Water sea oxeye generously after transplanting, then transition to moderate watering as it establishes.
What sunlight exposure is optimal for sea oxeye after transplanting?
Full sun to partial shade is ideal for sea oxeye to ensure vigorous growth post-transplant.
Can I transplant sea oxeye on a windy day?
Avoid transplanting sea oxeye on windy days; calm conditions will prevent desiccation and stress.
Why is sea oxeye wilting after transplanting?
Wilting may occur due to transplant shock; maintain consistent soil moisture and avoid full sun initially.
How deep should I plant sea oxeye's roots?
Plant sea oxeye's roots at the same depth as they were in the previous container.
What signs indicate that sea oxeye has rooted well after transplanting?
New growth and absence of wilting are signs that sea oxeye has developed a good root system.
How do I protect newly transplanted sea oxeye from frost?
Cover sea oxeye with frost blankets or move to a sheltered spot if unexpected frost is predicted.



