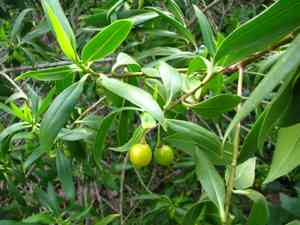
How to Transplant Wild olive?
The prime window for relocating wild olive falls from the close of spring to the heart of summer, capitalizing on ideal growing circumstances. This plant flourishes most effectively in sun-drenched spots featuring soil that drains efficiently. Verify that the chosen planting area provides sufficient room for its expansive root network.
Essential Preparations Before Relocating Wild Olive?
When is the Best Time to Move Wild Olive?
The prime period for relocating wild olive spans from late spring to mid-summer, when the soil is warmer, allowing the plant to readily establish its root system. Moving it during this window promotes quick development and stronger rooting before harsher seasons. This timing capitalizes on the natural peak growth phase, minimizing transplant shock and ensuring healthier long-term growth.
What Distance Should Be Maintained Between Wild Olive Plants?
When relocating wild olive, ensure each plant is spaced 4-6 feet (1.2-1.8 meters) apart. This spacing provides ample room for development and guarantees good air circulation, which helps prevent disease.
What is the Optimal Soil Blend for Wild Olive Relocation?
For wild olive, prepare a well-draining sandy or loamy soil. Enhance the soil with a phosphorus-rich base fertilizer to encourage robust root development. Incorporate compost or aged manure into the soil to boost its fertility.
Where Should You Replant Your Wild Olive?
Select a spot with ample sunlight for relocating wild olive. Aim for an area that receives at least 6-8 hours of direct sun daily, as this supports vigorous growth and vibrant foliage.
What Tools Are Necessary Before Relocating Wild Olive?
Gardening Gloves
To safeguard your hands while handling soil and the plant.
Shovel or Spade
For excavating around the plant and preparing the new planting site.
Trowel
For more precise digging tasks, useful for pots or seedling containers.
Garden Fork
To gently loosen the soil surrounding the plantâs root mass.
Watering Can or Hose
To thoroughly hydrate the plant before and after relocation.
Pruners
For trimming any damaged roots or branches.
Burlap or Old Blanket
To cover the root ball if moving the plant over a distance.
Mulch
To help maintain soil moisture post-relocation.
How Do You Extract Wild Olive from the Ground?
How Do You Extract Wild Olive from the Ground?
From Ground: First, water the wild olive plant to moisten the soil. Next, dig a wide trench around the plant using a shovel or spade, ensuring the plant's root ball remains intact. Carefully work the spade beneath the root ball to lift the plant from its original spot.From Pot: Water the wild olive plant thoroughly. Turn the pot on its side and gently tap the edges to loosen the soil. Carefully slide the plant out, supporting the base and root ball.From Seedling Tray: Water the wild olive seedlings lightly. Use a trowel to lift each seedling from the tray, keeping as much soil around the roots as possible.
Step-by-Step Guide for Relocating Wild Olive
Site Preparation
Prepare the new planting hole twice as wide and slightly deeper than the wild olive's root ball. Clear any weeds and debris from the area.
Relocation Time Selection
Relocate the wild olive during the cooler part of the day to minimize stress, ideally in early morning or late afternoon.
Plant Extraction
Follow the specific removal procedure for your wild olive based on its initial location.
Root Ball Examination
Examine the root ball for any damaged roots and trim them with pruners. Ensure the roots are not circling tightly, which can impede growth.
Planting
Place the wild olive in the prepared hole, ensuring it sits at the same depth as it was in its original spot. Fill the hole with soil, gently firming it around the root ball.
Watering In
Water the wild olive thoroughly to settle the soil and remove air pockets.
Mulching
Apply a layer of mulch around the base of the wild olive to help retain moisture and suppress weeds, keeping it a few inches away from the stem.
How Do You Care For Wild Olive After Relocation?
Watering
Keep the soil around the wild olive consistently moist, but not waterlogged, for the initial weeks after relocation to aid in strong root establishment.
Monitoring
Regularly check the wild olive for any indications of transplant shock, such as wilting or discolored leaves, and take corrective measures if necessary.
Protection
If the wild olive is relocated during a hot or windy period, provide temporary shade or wind protection to lessen stress.
Feeding
Avoid fertilizing immediately after relocation, as it can stress the wild olive. Wait until you observe new growth before feeding with a balanced fertilizer.
Addressing Common Issues with Wild Olive Relocation.
When is the best time to relocate wild olive?
Relocate wild olive ideally from late spring to mid-summer for optimal growth and establishment.
How much space should I leave between wild olive plants?
Space wild olive plants 4-6 feet (1.2-1.8 meters) apart to ensure proper growth and air circulation.
What soil type is best for relocating wild olive?
Well-draining, sandy or loamy soil is ideal for relocating wild olive to avoid root rot.
How deep should I plant wild olive when relocating?
Plant wild olive at the same depth it was growing in its original location.
How should I prepare the soil before relocating wild olive?
Loosen the soil and mix in organic compost to enrich the planting area for wild olive.
How often should I water wild olive after relocating?
Water wild olive thoroughly immediately after relocating, then maintain consistent moisture without waterlogging.
Do I need to prune wild olive before relocating?
Prune any damaged or dead branches before relocating to promote healthy new growth.
How can I minimize transplant shock for wild olive?
Gently handle roots, keep them moist, and relocate on an overcast day if possible.
Can I use fertilizer when relocating wild olive?
Apply a balanced, slow-release fertilizer around the base of wild olive after relocating.
What is the ideal temperature range for relocating wild olive?
Relocate wild olive when temperatures are between 60-75°F (15-24°C) for best results.


