How to Transplant Weeping baeckea?
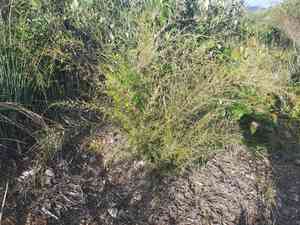
The most favorable period for relocating weeping baeckea is from late spring to early summer, utilizing the temperate conditions for root development. Select a bright spot with soil that drains effectively and apply a layer of mulch after the move to assist with adaptation.
What Preparations are Needed Before Transplanting Weeping Baeckea?
What is the Ideal Time for Transplanting Weeping Baeckea?
The optimal period for relocating weeping baeckea is when spring blooms mature or as early summer arrives. This timing allows weeping baeckea to establish itself firmly before the intense heat of midsummer, leveraging moderate temperatures and extended daylight for robust root development. Placing weeping baeckea during this supportive window maximizes its chances of thriving, as nature's cycle perfectly aligns with the plant's requirements, leading to a lush and healthy weeping baeckea. A positive and nurturing approach to this transplanting season will ensure your weeping baeckea gets the best start in its new spot.
How Much Space Should You Leave Between Weeping Baeckea Plants?
When transplanting your weeping baeckea, ensure ample room for growth. Aim for a spacing of approximately 2-3 feet (60-90 cm) between each plant. This provides sufficient area for them to thrive and prevents overcrowding.
What is the Best Soil Mix for Weeping Baeckea Transplanting?
For optimal results, prepare the soil for your weeping baeckea with a well-draining foundation. A sandy or loamy soil type, enriched with a bit of organic compost, will work perfectly. This will supply the necessary nutrients and regulate moisture.
Where Should You Relocate Your Weeping Baeckea?
Regarding its placement, weeping baeckea thrives with abundant sunlight. A garden spot receiving full sun or even partial shade would be ideal! Keeping it well-lit ensures your plant grows healthily and beautifully.
What Equipments Should You Prepare Before Transplantation Weeping Baeckea?
Gardening Gloves
These are crucial for safeguarding your hands when handling soil and the delicate roots of weeping baeckea.
Trowel
A convenient tool for digging and transplanting. It will be especially helpful for lifting smaller plants.
Spade
This will be useful for excavating larger holes for the weeping baeckea.
Hand Pruner
To trim the weeping baeckea before transplanting if necessary.
Watering Can
For hydrating before and after the transplant.
Garden Knife
Helpful for assisting in the removal of weeping baeckea from its current container or tray.
Garden Cart/ Wheelbarrow
Convenient for effortlessly moving the weeping baeckea plant to its new location.
Landscape Fabric
To inhibit the growth of weeds around weeping baeckea.
How Do You Remove Weeping Baeckea from the Soil?
How Do You Remove Weeping Baeckea from the Soil?
From Ground: First, hydrate the weeping baeckea plant to moisten the soil. Next, dig a wide trench around the plant using a spade, being careful not to harm the root ball. Gently work the spade beneath the root ball to lift the weeping baeckea from its current spot.From Pot: For potted weeping baeckea plants, water it generously the day before transplanting. Use a garden knife around the rim to help loosen the roots from the pot. Turn it sideways and tap gently to ease the plant out with its root ball. Avoid pulling the plant by its stem to minimize stress.From Seedling Tray: For seedlings, use a small trowel or even a fork to carefully scoop out the weeping baeckea seedling, ensuring you don't damage the tender roots during removal and handle the seedling by its leaf, not the stem.
Step-by-Step Guide for Transplanting Weeping Baeckea
Preparation
Ensure the new planting hole is prepared. It should be twice the width and the same depth as the root ball of your weeping baeckea. Loosen the soil at the base of the hole; this will aid quicker root establishment.
Placement
Carefully position the weeping baeckea in the hole, ensuring the top of the root ball is level with the ground surface.
Filling
Partially fill the hole with the native soil extracted during digging, making sure the soil does not cover the top of the root ball.
Watering
Water weeping baeckea after planting to settle the soil around the roots, reducing air pockets in the soil.
Final Filling
Continue to fill the hole, up to the level of the surrounding soil. Do not mound it around the stem of the weeping baeckea.
How Do You Care For Weeping Baeckea After Transplanting?
Regular Monitoring
Keep a close watch on your weeping baeckea after transplant, looking for any signs of stress like drooping leaves or wilting. These indicate it might not be receiving enough water or could be exposed to excessive sunlight.
Pruning
Lightly prune your weeping baeckea plant, if needed, once it starts recovering from transplant shock. This will encourage new growth.
Protection
Shield the plant from strong winds and pests for the initial few weeks, until it becomes well-established.
Troubleshooting Common Issues with Weeping Baeckea Transplantation.
When is the perfect time of the year for transplanting weeping baeckea?
The ideal time to transplant weeping baeckea is from late spring (S2) to early autumn (S4). Transplanting during these seasons ensures optimal growth.
What is the recommended distance between the weeping baeckea plants?
To ensure proper growth, maintain a distance of approximately 2-3 feet (60-90 cm) between each weeping baeckea plant during transplanting.
What should I do if weeping baeckea shows signs of wilt after transplantation?
If weeping baeckea wilts post-transplantation, water it sufficiently and frequently. Such wilting typically occurs due to root disturbance during transplanting.
How should I prepare the soil before transplanting weeping baeckea?
Before transplanting, enrich the soil with compost. Ensure the soil has good drainage as weeping baeckea dislikes waterlogged conditions.
What if weeping baeckea doesn't show new growth after transplantation?
Sometimes, plants require time to adapt to new surroundings. Don't worry, just ensure consistent watering and allow a few weeks for growth to appear.
Should I prune weeping baeckea before or after transplanting?
It's beneficial to prune weeping baeckea immediately after transplanting. This helps the plant focus on establishing its roots in the new location.
What should be the ideal depth while transplanting weeping baeckea?
For successful transplantation, dig a hole that's twice the width of weeping baeckea's root ball and the same depth as its current pot.
Is there anything that I should add to the planting hole when transplanting weeping baeckea?
Absolutely! Incorporate some compost or organic matter into the planting hole. It helps provide nutrients and aids in maintaining soil moisture.
What to do if yellow leaves appear on weeping baeckea after transplantation?
Yellow leaves could indicate transplant shock. Ensure consistent watering and avoid exposing the plant to direct sunlight immediately after the transplant.
How to water weeping baeckea after transplantation?
After transplanting, water weeping baeckea thoroughly until the soil is moist but not waterlogged. Continue routine watering based on the soil moisture level.



