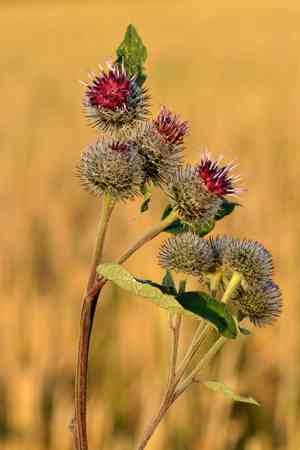
How to Transplant Woolly burdock?
For the biennial Arctium tomentosum, the optimal time for relocation extends from early spring through its peak. This guarantees the root system develops adequately prior to the summer's warmth. Choose a bright spot with soil that drains effectively. Careful handling is crucial to prevent upsetting the roots.
What Preparations are Needed Before Transplanting Woolly Burdock?
What is the Ideal Time for Transplanting Woolly Burdock?
The best period for relocating woolly burdock spans from early spring's onset to the brink of summer. This timing ensures the ground is sufficiently warm for root development, yet cool enough to prevent transplant shock. Moving woolly burdock during this interval leverages the start of the growing season, allowing the plant ample time to establish itself. This practice sets the stage for vigorous growth and robust development before the rigors of summer heat.
How Much Space Should You Leave Between Woolly Burdock Plants?
Ensure woolly burdock has ample room to expandâaim for a separation of approximately 18-24 inches (45-60 cm) between each specimen. This will provide sufficient space for their growth over the subsequent two years, given their biennial nature.
What is the Best Soil Mix for Woolly Burdock Transplanting?
Prior to planting woolly burdock, enrich the planting site with well-draining soil, ideally a loamy type. Incorporating some organic compost as a foundational fertilizer will supply woolly burdock with the necessary nutrients for immediate vigorous growth.
Where Should You Relocate Your Woolly Burdock?
Select a sunny location for woolly burdock, as it thrives in bright conditions! A spot receiving at least 6 hours of direct sunlight daily would be perfect. This will aid your woolly burdock in developing strong and healthy.
What Equipments Should You Prepare Before Transplantation Woolly Burdock?
Gardening Gloves
To safeguard your hands while handling soil and plants.
Shovel or Spade
For excavating around and beneath the plant to extract it from the ground or container.
Watering Can or Hose
To hydrate the plant before and after relocation, ensuring adequate moisture.
Pruning Shears
For trimming any impaired roots or foliage prior to transplanting.
Measuring Tape
To determine the correct spacing between plants during transplantation.
Wheelbarrow or Garden Cart
To move the plant and soil.
Trowel
For managing the plant during transfer to prevent root damage.
How Do You Remove Woolly Burdock from the Soil?
How Do You Remove Woolly Burdock from the Soil?
From Ground: Hydrate the woolly burdock plant to moisten the earth. Utilize a shovel or spade to excavate a broad trench around the plant, taking care not to harm the root ball. Gently lift the plant with the spade's assistance, keeping the root system intact.From Pot: Water the woolly burdock thoroughly. Invert the pot sideways, tap the base, and carefully extract the plant by its base, maintaining the soil around the roots.From Seedling Tray: Water the seedlings to make the soil damp. Use a trowel or your fingers to gently push the seedling from the cell's bottom, holding the plant by its leaves, not the stem, to transfer it without root damage.
Step-by-Step Guide for Transplanting Woolly Burdock
Preparation
Prepare the new planting site by loosening the soil to a depth of at least twice the root ball's length.
Hole Digging
Using a shovel, excavate a hole that is twice as wide as the root ball and equally deep to promote root growth.
Plant Placement
Carefully position the woolly burdock in the hole's center. The top of the root ball should be level with the surrounding soil surface.
Fill In
Gently backfill the hole with soil around the root ball. Avoid compacting the soil too firmly, which can impede root growth.
Water Thoroughly
After transplanting, irrigate the woolly burdock to help settle the soil and eliminate any air pockets around the roots.
How Do You Care For Woolly Burdock After Transplanting?
Monitoring
Regularly inspect the woolly burdock for indications of stress such as wilting or leaf discoloration and address them promptly.
Support
Stake the woolly burdock if it is tall or in a windy location, to prevent it from leaning or becoming uprooted.
Mulching
Apply a layer of organic mulch around the base of the woolly burdock to retain moisture and suppress weeds.
Pruning
Trim any damaged or excessive growth to encourage a stronger, more resilient woolly burdock.
Pest Control
Inspect for and manage any pest issues that may arise, utilizing appropriate control methods.
Troubleshooting Common Issues with Woolly Burdock Transplantation.
When is the best time to transplant woolly burdock?
The optimal period to relocate woolly burdock is during the cooler temperatures of early to late spring.
How far apart should I space woolly burdock while transplanting?
Allow a spacing of 18-24 inches (45-60 cm) to provide each woolly burdock ample room to flourish.
Why is my woolly burdock wilting after transplanting?
Wilting post-transplant may be due to root shock. Ensure careful handling and sufficient watering.
What soil conditions favor woolly burdock transplantation?
Transplant woolly burdock into well-drained soil, rich in organic matter, to encourage successful establishment.
How do I water woolly burdock after transplanting?
Water the base gently to moisten the soil without over-saturating and causing root rot.
Can I transplant woolly burdock on a hot day?
Avoid hot days. Transplant woolly burdock on a cloudy day or late afternoon to reduce transplant stress.
How deep should I plant woolly burdock during transplanting?
Plant woolly burdock at the same depth as the growing container to avoid stem burying or exposure.
How to protect woolly burdock after transplanting?
Apply mulch around woolly burdock, leaving space around the stem, to retain moisture and regulate soil temperature.
What should I do if woolly burdock's leaves are yellowing?
Yellowing may indicate over/under-watering or nutrient deficiency. Check moisture level and consider a balanced fertilizer.
Is it necessary to prune woolly burdock after transplanting?
Pruning isnât usually necessary after transplanting woolly burdock, but you can remove any damaged or dead material.


