How to Transplant Spring pheasant's eye?
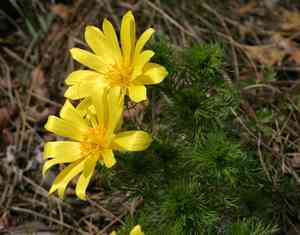
The optimal time to relocate Adonis vernalis is when the ground begins to warm in spring, typically from early spring until its midpoint. To ensure robust development, choose a location with good drainage, receiving ample sunlight to partial shade. Carefully managing the root system during transplantation guarantees a smooth adaptation.
Preparations Required Before Relocating Spring Pheasant's Eye
Optimal Period for Moving Spring Pheasant's Eye?
The best time to move spring pheasant's eye is when winter recedes and spring takes hold. Transplanting spring pheasant's eye as the cold diminishes ensures the soil is thawing and warming, which is crucial for root establishment. This season offers significant growth potential, as longer days and mild temperatures create an ideal environment for spring pheasant's eye to recover from transplant shock and root comfortably before summer heat arrives. The gentle spring weather, with its occasional rain, provides a nurturing setting that supports the development of spring pheasant's eye's root systems, leading to a flourishing growth period.
Recommended Spacing Between Spring Pheasant's Eye Plants?
To allow your spring pheasant's eye ample room to thrive, aim for a spacing of 15-18 inches (38-45 cm) between them. This ensures sufficient space for growth and prevents competition for resources.
Ideal Soil Mixture for Spring Pheasant's Eye Relocation?
Prepare a suitable bed for your spring pheasant's eye by selecting well-drained soil, rich in organic material. Before planting, incorporate a balanced, slow-release fertilizer to give your plants a healthy start.
Choosing a New Location for Your Spring Pheasant's Eye?
Your spring pheasant's eye will flourish in a sunny to partially shaded spot. Choose a location where they will receive at least 6 hours of daily sunlight, but also benefit from some afternoon shade during hot periods.
Equipment Needed Before Transplanting Spring Pheasant's Eye?
Gardening Gloves
To safeguard your hands while handling soil and plants.
Shovel or Spade
For carefully excavating the plant from its original spot.
Garden Trowel
Used for digging smaller holes and refining the planting area.
Garden Fork
To loosen the soil around the plant's roots during removal.
Watering Can or Hose
To hydrate the plant before and after transplanting, ensuring adequate moisture.
Pruning Shears
For trimming any dead or damaged roots or foliage.
Wheelbarrow or Garden Cart
To transport the spring pheasant's eye and soil without straining your back.
Method for Extracting Spring Pheasant's Eye from the Soil?
Method for Extracting Spring Pheasant's Eye from the Soil?
From Ground: Start by watering the spring pheasant's eye to make the soil easier to manage. Using a shovel or garden fork, carefully dig a wide circle around the plant, maintaining a generous distance to avoid damaging the root system. Gently pry beneath the rootball and lift the spring pheasant's eye from its position.From Pot: Water the spring pheasant's eye and allow it to settle. Tilt the pot sideways and tap the bottom to loosen the roots. Carefully pull out the spring pheasant's eye by the base of its stem, supporting the root ball with your other hand.From Seedling Tray: Moisten the soil in the seedling tray. Use a garden trowel or your hands to gently ease the seedling out of its compartment, carefully supporting the soil and roots to prevent damage.
Detailed Steps for Transplanting Spring Pheasant's Eye
Preparation
Before removing the spring pheasant's eye from its initial location, ensure all necessary tools are at hand and prepare the new planting site by loosening the soil and clearing debris.
Root Ball Care
Inspect the root ball of the spring pheasant's eye once it's removed, trimming any broken or dead roots. This encourages healthy growth post-transplant.
Placement in Ground
Dig a hole in the new spot that is twice the width of the spring pheasant's eye's root ball and of equal depth. Position the plant in the hole and adjust it for correct orientation and depth.
Filling the Hole
Backfill the hole with soil, gently firming it around the spring pheasant's eye's root ball to ensure stability and eliminate any air pockets.
Post-Transplant Watering
After planting, thoroughly water the spring pheasant's eye to help the soil settle around the roots and provide essential hydration for recovery.
Plant Support
If needed, use supports like stakes to help the spring pheasant's eye remain upright and stable in windy conditions or if the stems are particularly tall or heavy.
Post-Transplant Care for Spring Pheasant's Eye
Monitoring
Observe the spring pheasant's eye closely in the days and weeks following, looking for signs of transplant shock such as wilting or discolored leaves.
Care Adjustments
Modify care routines based on the spring pheasant's eye's reaction to the transplant. Verify if it requires more or less water than initially anticipated, especially with changing weather.
Mulching
Apply a layer of mulch around the base of the spring pheasant's eye to help retain soil moisture and regulate temperature, but avoid piling mulch against the stem or leaves.
Protection
Shield the newly transplanted spring pheasant's eye from harsh conditions like strong winds or intense afternoon sun for the initial few weeks as it adapts to its new environment.
Resolving Common Issues with Spring Pheasant's Eye Transplantation.
When is the best time to transplant spring pheasant's eye?
Optimal transplanting occurs during early to late spring, when temperatures are mild and the plant's growth cycle is commencing.
What spacing should be used when transplanting spring pheasant's eye?
Aim for a generous distance of 15-18 inches (38-45 cm) to provide each spring pheasant's eye ample room to flourish.
What if spring pheasant's eye wilts after transplanting?
Ensure spring pheasant's eye receives sufficient water and check for adequate sunlight. Minor wilting is normal; it should recover with proper care.
How deep should the hole be for transplanting spring pheasant's eye?
The hole should match the depth of the root ball and be twice as wide to encourage root expansion.
Can spring pheasant's eye be transplanted on a hot, sunny day?
It's best to transplant spring pheasant's eye on a cloudy day or in the late afternoon to prevent heat stress.
What soil type is ideal for transplanting spring pheasant's eye?
Well-draining soil enriched with compost or organic matter is perfect for the optimal growth of spring pheasant's eye.
How should I water spring pheasant's eye after transplanting?
Water generously to settle the soil around the roots but avoid waterlogging. Maintain consistent moisture levels.
What if spring pheasant's eye doesn't bloom after transplanting?
Be patient, as spring pheasant's eye may need time to establish before blooming. Ensure proper care and avoid excessive fertilization.
How can I protect spring pheasant's eye from transplant shock?
Minimize root disturbance during transplanting, water thoroughly, and provide shade for a few days if temperatures are high.
Can I divide spring pheasant's eye while transplanting?
Yes, division is possible during transplanting if the plant is mature enough. Ensure each division has roots and shoots for successful growth.



