How to Prune Jerusalem thorn?
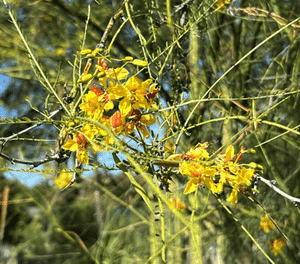
Distinguished by its vibrant yellow blossoms and fine leaves, jerusalem thorn requires trimming in early spring or late winter. Essential methods involve reducing dense branches and eliminating deceased or compromised wood to foster vigor and contour. When pruning, make cuts directly above leaf nodes at a 45-degree incline. Trimming boosts bloom production, curbs excessive growth, and preserves an attractive shape. In areas prone to high winds, pruning additionally lessens the chance of harm to the primary framework.
What Are the Benefits of Pruning Jerusalem Thorn?
What Are the Benefits of Pruning Jerusalem Thorn?
Trimming jerusalem thorn promotes robust development and helps keep its desired form. This routine upkeep improves air circulation, lowering disease risk and fostering new, healthy shoots.
What Is the Best Time for Pruning Jerusalem Thorn?
What Is the Best Time for Pruning Jerusalem Thorn?
Trimming jerusalem thorn in late winter or early spring is optimal as this period precedes the plant's active growth phase, allowing it to recover quickly and direct its energy towards new growth. This timing also minimizes stress on jerusalem thorn, as the plant is still somewhat dormant. Furthermore, removing dead or damaged branches before spring growth begins helps prevent the spread of disease and pests, which are more active and potentially more harmful in warmer weather. Pruning before spring also preserves the plant's flowering potential, as jerusalem thorn typically blooms on new wood; thus, pruning too late could reduce the number of flowers. Lastly, the clear visibility of the plant's structure without leaves simplifies the removal of unwanted branches and contributes to a healthier, aesthetically pleasing shape once foliage returns.
What Tools Do I Need to Prune Jerusalem Thorn?
Hand Pruners
Suitable for cutting slender branches and for shaping the plant. They provide clean cuts without harming the smaller branches of jerusalem thorn.
Loppers
Ideal for reaching elevated branches and cutting through thicker branches of jerusalem thorn. They offer leverage and extended reach, crucial for the treeâs height.
Pruning Saw
Essential for removing larger branches that hand pruners and loppers cannot manage. Jerusalem thorn may develop thicker limbs requiring a saw for effective pruning.
Pole Pruner
Useful for cutting branches at high elevations without needing a ladder. Since jerusalem thorn can grow tall, a pole pruner offers safety and convenience.
Protective Gloves
Hand protection when pruning jerusalem thorn, which may possess thorns or spines.
Safety Goggles
Eye protection against any debris or thorns that might be dislodged during the pruning process of jerusalem thorn.
How to Prune Jerusalem Thorn
Step1: Timing for Dormancy Pruning
Select the appropriate time to prune jerusalem thorn, typically late winter or early spring before new growth starts. This is when the plant is inactive and less vulnerable to stress or illness.
Step2: Prepare Pruning Tools
Gather the necessary tools for pruning jerusalem thorn, including sharp, clean pruning shears, loppers, and a pruning saw. Sanitize the tools before use to prevent disease transmission.
Step3: Identifying Dead Wood
Examine jerusalem thorn for dead wood, which will appear dry, brittle, and lifeless. Dead wood is usually lighter in color or has a different texture than healthy wood.
Step4: Making Cuts on Dead Wood
Make precise cuts to remove dead wood. Cut back to the point of origin or to a healthy lateral branch. Ensure cuts are made at a slight angle, away from the bud, to promote proper healing and water runoff.
Step5: Spotting Diseased Limbs
Identify diseased limbs on jerusalem thorn by looking for abnormalities in color, texture, or the presence of pests. Signs may include cankers, rot, or unusual growth.
Step6: Pruning Diseased Limbs
Prune diseased limbs by cutting them back to healthy wood, well below any diseased portions. Again, use clean cuts and disinfect your tools after cutting diseased material to prevent spreading pathogens.
Step7: Removing Damaged Branches
Look for damaged branches on jerusalem thorn that may have been broken by weather or mechanical injury. Damaged branches should be removed to prevent tearing and to encourage wound closure.
Step8: Cutting Back Damaged Branches
Cut damaged branches back to the point of healthy wood, ensuring not to leave stubs as this can prevent proper healing and may lead to pest and disease problems.
Step9: Assessing Plant Shape
After removing dead, diseased, and damaged branches, step back and assess the shape of jerusalem thorn. Remove any crossing or rubbing branches to promote a strong, healthy structure.
Step10: Thinning Dense Canopy
Thin out the canopy of jerusalem thorn if it is too dense by removing some of the interior growth. This will improve air circulation and light penetration throughout the plant.
Step11: Final Shaping Cuts
Perform any final shaping cuts to maintain or improve the overall form of jerusalem thorn if necessary. However, be careful not to remove more than 25-30% of the canopy at one time as this can stress the plant.
Step12: Pruning Debris Cleanup
Clean up all the debris from pruning jerusalem thorn and dispose of it properly, especially diseased material, to keep the area around the plant clean and reduce the risk of disease spread.
Step13: Post-Pruning Monitoring
Monitor jerusalem thorn after pruning for signs of new growth and recovery, ensuring the plant is healthy and not showing signs of stress or further disease.
Post-Pruning Care for Jerusalem Thorn
Post-Pruning Care for Jerusalem Thorn
Immediately after trimming jerusalem thorn, water it to alleviate stress and encourage recovery. Position jerusalem thorn to receive full sunlight, ensuring moderate humidity and temperatures between 25-30°C for optimal growth. Apply a balanced fertilizer to replenish nutrients; however, avoid over-fertilization which can harm jerusalem thorn. Regularly inspect for wilting or discoloration as signs of stress or infection. If present, reduce watering and consult a plant health specialist. Maintaining these conditions will support jerusalem thorn's robust recovery.
Common Pruning Mistakes with Jerusalem Thorn
Avoid Over-pruning: Prevents Stress and Poor Growth
Excessive pruning, which can stress jerusalem thorn and lead to poor growth or reduced flowering.
Use Clean and Sharp Tools for Healthy Cuts
Using dull or dirty tools, which can result in jagged cuts and potential disease entry.
Prune with Purpose to Maintain Plant Form
Trimming without a clear objective, causing unintended damage to the plant's structure or aesthetic form.
Don't Ignore Dead Branches to Sustain Health
Neglecting dead or diseased branches, which can compromise the overall health of jerusalem thorn.
Prevent Damaging the Branch Collar During Cuts
Cutting branches too close to the trunk, which can remove the branch collar and inhibit proper healing.
Common Pruning Tips for Jerusalem Thorn
Clean Cuts with Sharp Tools for Better Healing
Utilize clean, sharp pruning tools to make precise cuts that jerusalem thorn can heal from more effectively.
Define Pruning Goals for Desired Outcomes
Determine the objective of pruning, such as shaping the plant, removing deadwood, or encouraging blooms, to guide the process.
Selective Pruning for Shape and Health
Prune judiciously, focusing on removing only what's necessary to maintain a healthy and aesthetically pleasing shape.
Angle Cuts Above Buds to Direct Growth
Make pruning cuts at a slight angle about a quarter inch above a bud or branching point to encourage proper growth direction.
Promptly Remove Dead or Diseased Branches
Regularly inspect jerusalem thorn for dead, diseased, or damaged branches, and remove them promptly to maintain plant health.
Use Three-Cut Technique for Large Limb Removal
Follow proper branch removal techniques, such as the three-cut method for larger limbs to prevent bark tearing.
Limit Pruning to One-Third of Foliage to Avoid Shock
Avoid pruning too many branches at once to prevent shocking jerusalem thorn; removing no more than one-third of the foliage at a time is a good rule of thumb.


