How to Prune Tropical ash?
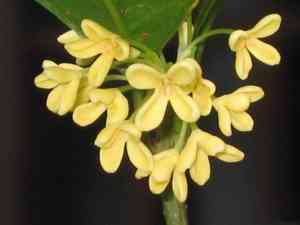
Originating from Mexico, the tropical ash is known for its swift development and thick foliage. Ideal trimming involves reducing congested branches and eliminating lower boughs for improved access. Perform pruning in late winter or early spring, prior to the emergence of fresh shoots. Pruning while the plant is dormant lessens strain and encourages robust spring development. Thoughtful shaping preserves structural soundness and boosts air circulation, diminishing the likelihood of illness. Prune with discretion to prevent over-stimulation of growth.
What Are the Benefits of Pruning Tropical Ash?
What Are the Benefits of Pruning Tropical Ash?
Trimming tropical ash encourages robust development and maintains its desired form. By selectively removing parts of tropical ash, gardeners promote a strong framework and attractive shape, crucial for its vitality and landscape role.
What Is the Best Time for Pruning Tropical Ash?
What Is the Best Time for Pruning Tropical Ash?
Pruning in late winter is optimal as tropical ash is typically dormant, minimizing plant stress and reducing disease risk through pruning cuts. Trimming before new growth in early spring allows rapid healing and directs energy to new, healthy growth. This timing also avoids removing developing flowers or fruit, vital for the plant's natural reproductive cycle.
What Tools Do I Need to Prune Tropical Ash?
Hand Pruners
Perfect for cutting slender stems and branches of tropical ash, typically under 3/4 inches in diameter, enabling precise cuts with comfortable handling.
Loppers
Suitable for trimming thicker branches (up to approximately 2 inches in diameter) of tropical ash, providing necessary leverage and reach without harming the tree or the gardener.
Pruning Saws
Designed for cutting large branches over 2 inches in diameter, these saws facilitate effective management of mature tropical ash growth.
Pole Pruners
Useful for reaching higher branches of tropical ash from the ground, reducing the need for ladders and enhancing safety during pruning.
Hedge Shears
Beneficial for shaping and maintaining the dense foliage of tropical ash, allowing for uniform and aesthetically pleasing cuts over larger areas.
Pruning Gloves
Essential for protecting hands from scratches and sap while pruning tropical ash, ensuring gardener safety and comfort.
Cleaning Solution
Crucial for sterilizing tools after pruning tropical ash to prevent disease spread and maintain tool longevity.
How to Prune Tropical Ash
Step1: Timing for Pruning
Determine the appropriate time of year to prune tropical ash, typically late winter or early spring before new growth begins. Pruning at this time helps prevent disease spread and allows the tree to recover quickly.
Step2: Sterilization of Equipment
Sanitize your pruning tools before starting and after each cut on diseased wood to prevent pathogen transmission. Use a solution of one part bleach to nine parts water, or specialized gardening disinfectants.
Step3: Identification of Dead Wood
Inspect tropical ash for any signs of dead wood, which appear as branches lacking buds, being brittle, and having a dry, dark look. These branches will not bend easily and may snap when flexed.
Step4: Removal of Dead Branches
Carefully remove dead wood by cutting where the dead branch meets healthy tissue, using clean, sharp shears or a saw, depending on branch thickness. The cut should be just outside the branch collar to promote proper healing.
Step5: Excision of Diseased Limbs
Identify and remove diseased branches, recognizable by discolored bark, cankers, or fungal growths. Ensure cuts extend well into healthy tissue to completely eliminate diseased sections.
Step6: Assessment of Weak Branches
Look for weak branches that lack vigor, have poor attachment angles, or compete with stronger branches for space and light. These often have a narrow 'V' shaped crotch instead of a strong 'U' shape.
Step7: Thinning and Heading Back
Prune weak branches using thinning cuts to remove entire limbs at their origin point or by heading back the branch to a lateral branch at least one-third the diameter of the limb being removed.
Step8: Overall Shape Evaluation
After removing dead, diseased, or weak branches, step back and evaluate the overall shape of tropical ash. If further shaping is needed for size control or aesthetics, proceed with selective pruning to maintain its natural form.
Step9: Directional Pruning Technique
Make all additional cuts at a 45-degree angle to the branch, facing away from the bud to allow water runoff and encourage growth in the desired direction.
Step10: Cleanup and Disposal
After pruning, clear all debris and properly dispose of any diseased material to prevent further infection. Do not compost diseased branches.
Step11: Post-Pruning Care
Monitor the tree for signs of stress and provide appropriate care, such as adequate watering and mulching, to ensure quick recovery from the pruning process.
Post-Pruning Care for Tropical Ash
Post-Pruning Care for Tropical Ash
After pruning tropical ash, water immediately to alleviate stress. Ensure it receives filtered sunlightâbright, but indirectâmaintaining mild temperatures and high humidity to aid recovery. Fertilize with a balanced, slow-release formula to support new growth. Regularly check for wilted leaves or bark damage as stress indicators. At signs of infectionâoozing, discolorationâpromptly apply a fungicide. Consistent application of these care steps is vital for tropical ash's post-pruning health.
Common Pruning Mistakes with Tropical Ash
Improper Cutting Damages Collar
Cutting too close or flush to the main branch when removing limbs, which can harm the collar and hinder proper healing.
Excessive Foliage Removal Stresses Plant
Removing too much foliage at once; pruning over 25% of the total canopy in a single session can stress tropical ash.
Dull or Unclean Tools Harm Plant
Using dull or unsanitized tools, which can lead to jagged cuts and increase the risk of disease and pest infestation for tropical ash.
Indiscriminate Topping Weakens Growth
Topping the tree or making random cuts which can result in weak new growth and reduce the structural integrity of tropical ash.
Overlooking Dead or Diseased Branches
Failing to remove dead, diseased, or crossing branches that can lead to a decline in the overall health and appearance of tropical ash.
Common Pruning Tips for Tropical Ash
Sterilize Tools to Prevent Disease
Sanitize pruning tools before use to prevent the spread of disease among tropical ash plants.
Angle Cuts for Healthy Outward Growth
Make pruning cuts at a 45-degree angle, about a quarter inch above an outward-facing bud, to encourage growth away from the plant's center.
Thin Canopy for Light and Health
Thin out the canopy to improve light penetration and air circulation, which helps reduce disease likelihood and promotes healthy growth in tropical ash.
Prune to Retain Natural Shape
Maintain the natural shape of tropical ash while pruning, avoiding over-manicuring or creating unnatural forms which can weaken the plant.
Use Saw and Three-Cut Method on Thick Branches
Prune limbs and branches with a diameter larger than your thumb with a saw using a three-cut method to avoid stripping bark and injuring tropical ash.
Spot-Prune Yearly for Plant Health
Spot-prune throughout the year to remove any diseased, damaged or dead branches as soon as they are noticed to maintain the health of tropical ash.



