How to Prune Eastern Enchanter's Nightshade?
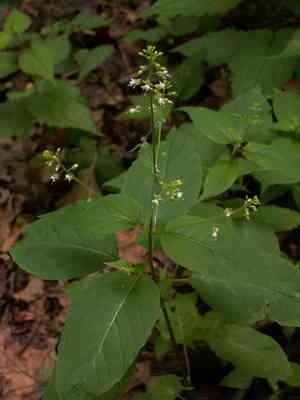
A forest perennial, eastern Enchanter's Nightshade flourishes in shaded environments, characterized by its unique small, white blossoms. Trimming should concentrate on deadheading to encourage additional blooms and eliminating withered stalks to preserve a neat look. The most suitable times for trimming are during spring and summer, aligning with its periods of vigorous development. Regular pruning aids eastern Enchanter's Nightshade by boosting its vitality and deterring undesirable self-propagation, which can result in widespread growth within garden spaces.
What Are the Benefits of Pruning Eastern Enchanter's Nightshade?
What Are the Benefits of Pruning Eastern Enchanter's Nightshade?
Trimming eastern Enchanter's Nightshade promotes robust development and preserves its form, crucial for a dense and attractive look. Strategic cuts enhance air flow, lowering disease risk and fostering strong vitality.
What Is the Best Time for Pruning Eastern Enchanter's Nightshade?
What Is the Best Time for Pruning Eastern Enchanter's Nightshade?
Pruning or trimming eastern Enchanter's Nightshade from late spring to early summer is optimal, aligning with its post-flowering phase. Eastern Enchanter's Nightshade finishes blooming in spring, and pruning soon after flowers fade prevents the plant from expending energy on seed production. This redirects energy to healthier foliage and root growth. Additionally, this timing minimizes harm to new spring growth and allows ample recovery time before winter. Pruning during this period also coincides with the plant's active growth, when eastern Enchanter's Nightshade's recovery and regrowth are maximal, aiding cut healing and ensuring vigorous return next season.
What Tools Do I Need to Prune Eastern Enchanter's Nightshade?
Hand Pruners
Ideal for clean, precise cuts, hand pruners (secateurs) are perfect for shaping and trimming eastern Enchanter's Nightshade. They offer close control and are suitable for stems up to ¾ inches thick.
Pruning Snips
Essential for deadheading and delicate pruning, snips are designed for precision. They easily navigate eastern Enchanter's Nightshade's foliage without unnecessary damage.
Garden Scissors
Though less robust than hand pruners, garden scissors offer a simple way to quickly trim soft stems of eastern Enchanter's Nightshade. They are easy to use and good for snipping off diseased or dead foliage with minimal effort.
Pruning Saw
For removing larger branches or stems over an inch in diameter, a pruning saw is necessary. Use this tool carefully to prevent tearing and ensure clean cuts for eastern Enchanter's Nightshade's health.
How to Prune Eastern Enchanter's Nightshade
Remove dead stems
Identify and remove all dead stems from eastern Enchanter's Nightshade using clean, sharp pruning shears. Cut at a 45-degree angle just above a healthy leaf node or set of leaves to encourage new growth.
Eliminate diseased shoots
Inspect eastern Enchanter's Nightshade for any signs of disease in shoots, such as discoloration or abnormal growth. Carefully prune away affected shoots well below the diseased parts to prevent spread. Dispose of these clippings away from healthy plants.
Prune damaged roots
During transplanting or repotting eastern Enchanter's Nightshade, gently remove any damaged or rotted roots with sterile scissors. Ensure cuts are clean to promote healthy root regeneration.
Cleanup
Once pruning is complete, clear all removed plant material from around eastern Enchanter's Nightshade. This helps reduce the risk of pests or diseases harboring in the debris.
Disinfect tools
Disinfect all pruning tools after use to minimize the risk of transferring pathogens to eastern Enchanter's Nightshade or other plants. Use a solution of one part bleach to nine parts water for effective sterilization.
Common Pruning Mistakes with Eastern Enchanter's Nightshade
Over pruning
Removing too much foliage from eastern Enchanter's Nightshade can weaken the plant and reduce its vigor. Itâs essential to be cautious and not exceed removing more than one-third of the plant's total growth in a pruning session.
Improper cut sites
Making cuts in the wrong places can lead to damage and increase the risk of disease. It's important to make clean cuts just above a leaf node or bud, ensuring that the remaining stem does not die back unnecessarily.
Using dull tools
Pruning eastern Enchanter's Nightshade with dull or unclean tools can damage the stems and create jagged cuts that are more susceptible to disease. Always use sharp, clean pruning shears.
Neglecting dead material
Failing to remove dead or dying foliage from eastern Enchanter's Nightshade can impede healthy growth. Regularly check the plant for any material that needs to be removed to maintain its health.
Ignoring plant shape
Indiscriminate pruning without consideration for eastern Enchanter's Nightshade's natural shape can lead to an aesthetically unpleasing and biologically unhealthy plant. Aim to maintain the natural form when pruning.
Common Pruning Tips for Eastern Enchanter's Nightshade
Selective pruning
Carefully select which stems to prune based on the overall shape and health of eastern Enchanter's Nightshade. Focus on removing only dead or damaged material, and thin out dense areas to improve air circulation.
Clean cuts
Make clean and precise cuts at a 45-degree angle near a bud to promote healthy regrowth in eastern Enchanter's Nightshade. This technique also helps to reduce the chance of disease.
Tool sanitation
Disinfect pruning tools before and after use on eastern Enchanter's Nightshade to prevent the spread of disease. Use a solution of one part bleach to nine parts water or rubbing alcohol for effective sanitization.
Monitor recovery
After pruning eastern Enchanter's Nightshade, monitor the plantâs recovery, ensuring that it is showing new growth. This observation can inform future pruning sessions and help in understanding the plant's response.
Moderate pruning
While pruning eastern Enchanter's Nightshade, aim for moderation to avoid stressing the plant. Pruning should help to maintain its overall health, not compromise it by removing too much growth at once.


