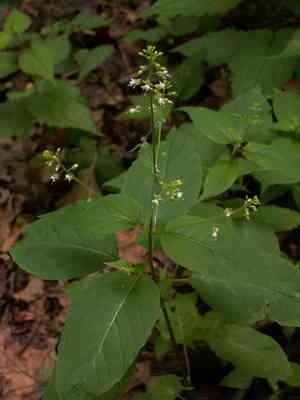
How to Propagate Eastern Enchanter's Nightshade?
Eastern Enchanter's Nightshade is most effectively propagated in the spring, mainly by planting seeds. It is quite simple to advance its growth once roots or sprouts become apparent, indicating successful propagation. Maintaining damp soil throughout the germination phase is vital for robust development.
Optimal Period for Eastern Enchanter's Nightshade Propagation
Propagation Method
Seeding
Propagation Period
Spring
Tools Utilized in Eastern Enchanter's Nightshade Propagation
Seed trays
Seed trays are shallow containers divided into cells where individual eastern Enchanter's Nightshade seeds can be sown for germination in a controlled setting. These trays help maintain consistent moisture and simplify handling young seedlings.
Sterile potting mix
A sterile potting mix is crucial for sowing eastern Enchanter's Nightshade seeds to prevent fungal issues and ensure robust root development. A high-quality, well-draining mix offers the ideal balance of aeration and water retention for germination.
Misting bottle
A misting bottle is employed to gently irrigate eastern Enchanter's Nightshade seeds without disturbing them. A fine mist ensures the soil stays moist without becoming saturated, which can be detrimental to seed germination.
Heat mat
A heat mat gently warms the soil from below, encouraging more consistent and rapid germination of eastern Enchanter's Nightshade seeds, particularly in cooler climates or during colder seasons.
Grow lights
Grow lights supply the necessary light spectrum for the germination and initial growth of eastern Enchanter's Nightshade seedlings, especially when natural sunlight is insufficient, such as in indoor environments.
Seedling labels
Seedling labels aid in identifying eastern Enchanter's Nightshade seed trays, especially when multiple species are being propagated simultaneously. Proper labeling ensures accurate monitoring and care throughout the germination process.
Pruners
Clean, sharp pruners are required for taking cuttings from mature eastern Enchanter's Nightshade plants if vegetative propagation is desired. Appropriate pruning tools minimize damage and promote faster healing at the cutting site.
How to Propagate Eastern Enchanter's Nightshade?
Propagation Type
Seeding
Difficulty Level
Easy
Caring for Your Newly Propagated Eastern Enchanter's Nightshade
Caring for Your Newly Propagated Eastern Enchanter's Nightshade?
After Propagation Care: Maintain consistent soil moisture without waterlogging. Provide eastern Enchanter's Nightshade with partial to full shade, mimicking their natural woodland environment. Apply a layer of mulch to help the soil retain moisture and provide nutrients as it breaks down. Prune any dead or damaged foliage to encourage healthy growth. Monitor for pests and diseases, though eastern Enchanter's Nightshade typically experiences few issues. Over time, eastern Enchanter's Nightshade may spread via rhizomes to form a larger colony, so allow space for expansion or manage its growth as desired.
Common Errors to Avoid When Propagating Eastern Enchanter's Nightshade
Overwatering
Excessive watering can lead to root rot for eastern Enchanter's Nightshade, as the plant prefers moist but well-drained soil. Too much water can suffocate the roots, hindering their ability to absorb oxygen and nutrients effectively.
Inadequate soil preparation
Failure to incorporate organic matter into the soil can be detrimental for eastern Enchanter's Nightshade. This plant thrives in rich, loamy soil, and insufficient soil amendment can impede root growth and nutrient uptake.
Ignoring rhizome health
Eastern Enchanter's Nightshade primarily propagates through rhizomes. Planting damaged or diseased rhizomes can significantly reduce the chances of successful propagation, as they are less likely to establish and grow robustly.
Planting depth errors
Planting the rhizomes too deep or too shallow can be problematic for eastern Enchanter's Nightshade. Incorrect planting depth can either cause the rhizomes to suffocate or prevent them from establishing a strong root system.
Neglecting humidity
Eastern Enchanter's Nightshade requires a humid environment to thrive. Neglecting the need for maintaining adequate humidity around the propagation site can impede the plant's growth and health.
Tips For Propagating Eastern Enchanter's Nightshade
Soil moisture balance
Maintain consistent moisture levels in the soil without making it waterlogged. A well-draining soil amended with organic matter will help eastern Enchanter's Nightshade rhizomes establish more successfully.
Healthy rhizome selection
When propagating eastern Enchanter's Nightshade, choose healthy, disease-free rhizomes. Ensure they are firm to the touch and show no signs of decay or damage.
Appropriate planting depth
Plant eastern Enchanter's Nightshade rhizomes at a depth that allows the growing points to be just below the soil surface. This encourages optimal growth and root development.
Humidity control
To provide the best environment for eastern Enchanter's Nightshade, create a humid microclimate during the initial stages of propagation. This can be achieved by using a humidity dome or by misting the plants regularly.
Gentle separation
When dividing eastern Enchanter's Nightshade for propagation, carefully tease apart the rhizomes to minimize root damage. This promotes a quicker recovery and better overall plant health post-transplant.


