How to Prune Japanese chestnut?
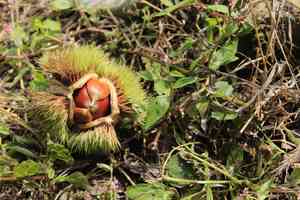
Originating in Japan, this fruiting tree is prized for both its palatable nuts and decorative attributes. To achieve peak vitality and output, japanese chestnut necessitates trimming to preserve its form, eliminate deceased branches, and foster air circulation. The most suitable period for pruning is in late winter or early spring, prior to the emergence of new shoots. Thinning cuts alleviate congestion, whereas heading cuts stimulate denser development. Meticulous pruning guarantees robust nut yields, safeguards against ailments, and maintains structural integrity, thereby extending the lifespan and enhancing the visual appeal of japanese chestnut.
Advantages of Trimming japanese chestnut
Advantages of Trimming japanese chestnut
Trimming japanese chestnut encourages robust development and assists in preserving the plant's desired form. Proper cuts eliminate dead wood, enhance air circulation, and sculpt the plant for visual appeal and yield.
Optimal Period for Trimming japanese chestnut
Optimal Period for Trimming japanese chestnut
Trimming japanese chestnut in late winter or early spring is ideal as the plant remains dormant before its new growth phase. This timing minimizes stress and allows japanese chestnut to recover from cuts without diverting energy from developing leaves and flowers. Furthermore, during dormancy, japanese chestnut's structure is more visible for precise trimming. Avoid trimming japanese chestnut when leaves are fully developed or in autumn, as this can heighten disease risk and reduce resources for nut production in the subsequent season.
Necessary Tools for Trimming japanese chestnut
Hand Pruners
Perfect for making clean cuts on small branches and twigs of japanese chestnut, ensuring minimal harm to plant tissues.
Loppers
These are essential for reaching higher branches and cutting through thicker stems that hand pruners cannot manage, due to japanese chestnut's height and branch density.
Pruning Saw
This tool is crucial for cutting through branches exceeding 1.5 inches in diameter, which is typical for mature japanese chestnut trees.
Pole Pruner
Recommended for trimming branches out of reach without a ladder, improving safety and efficiency when pruning taller japanese chestnut specimens.
Hedge Shears
Useful for shaping and managing japanese chestnut's growth when maintained as a hedge or for aesthetic purposes.
Gloves
Offer hand protection from sharp thorns and rough bark that japanese chestnut might possess.
Cleaning Solution
To prevent disease spread, it is vital to sanitize all tools before and after use on japanese chestnut.
How to Trim japanese chestnut
Sanitize Tools
Before beginning the trimming process, ensure all cutting implements are sterilized to prevent disease transmission to japanese chestnut.
Remove Dead Branches
Identify and carefully remove any dead branches by cutting them at their base where they meet healthy wood, ensuring clean cuts to promote quick healing for japanese chestnut.
Cut Diseased Branches
Locate diseased branches on japanese chestnut and prune them back to healthy tissue, cutting well below any discolored or affected areas to prevent further infection.
Disinfect After Cutting
After each cut, especially when removing diseased branches, disinfect trimming tools to avoid spreading pathogens to other parts of japanese chestnut or to other plants.
Clear Debris
Post-trimming, clear away and properly dispose of all removed dead and diseased branches to maintain a clean environment around japanese chestnut and minimize disease risks.
Common Trimming Errors with japanese chestnut
Excessive Trimming
Removing too much of japanese chestnut's canopy at once can stress the tree, hindering its growth and fruit production.
Incorrect Cut Placements
Making cuts too close to the trunk or leaving too large a stub can lead to poor wound closure and disease entry.
Tearing Bark
Improper cutting techniques can cause bark to tear, providing entry points for pests and diseases.
Removing Large Branches
Cutting off large branches of japanese chestnut can create significant wounds that take longer to heal, making the tree more vulnerable to infections.
Trimming To Shape
Attempting to force japanese chestnut into an unnatural shape can weaken the tree's structure and health.
Neglecting Sanitation
Failing to sterilize trimming tools between cuts can spread pathogens from infected to healthy parts of japanese chestnut.
Ignoring Weak Branches
Not removing weak or diseased branches that might be more prone to breakage can pose a risk to japanese chestnut's overall health.
General Trimming Advice for japanese chestnut
Proper Cutting Technique
Make clean cuts at a 45-degree angle away from the bud to ensure rapid healing and reduce disease chances for japanese chestnut.
Tool Sterilization
Sterilize trimming tools before and after working with japanese chestnut to prevent disease spread.
Focused Trimming
Concentrate on removing dead, diseased, or crossing branches to maintain japanese chestnut's health and structure.
Timely Trimming
Although the season is not to be mentioned, ensure trimming is done strategically to avoid disrupting japanese chestnut's natural growth cycles.
Balanced Trimming
Trim japanese chestnut evenly around the canopy to maintain stability and encourage symmetrical growth.
Minimal Trimming
Avoid excessive trimming; remove only what is necessary for japanese chestnut's health and maintenance of shape and size.
Water Sprouts And Suckers
Regularly remove water sprouts and suckers from japanese chestnut as they do not contribute to the desired form or fruiting.


