How to Propagate Blue orchid?
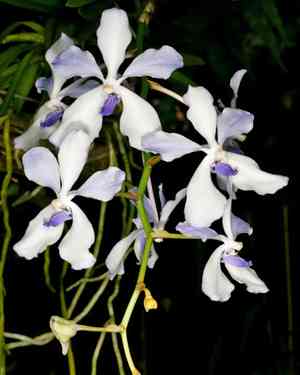
Celebrated for its captivating azure blooms, blue orchid can be successfully multiplied using the division method. This process entails gently detaching the plant's offsets or keikis once their root systems have formed. Cultivators ought to sustain elevated humidity levels and guarantee suitable illumination to encourage robust development. While not absolutely essential, applying rooting stimulant can be advantageous for improving successful integration. Post-division, the newly separated portions should be placed in a suitable orchid substrate and provided meticulous care throughout the crucial first few weeks after detachment.
Optimal Period for Blue Orchid Propagation
Propagation Method
Division
Propagation Season
Spring,Autumn
Essential Tools for Blue Orchid Propagation
Sterilized Cutting Tools
Instruments like sharp secateurs, scalpels, or scissors are vital for making clean, precise cuts when dividing blue orchid. Sterilization prevents disease transmission between plants, which is crucial for maintaining the health and viability of blue orchid during propagation.
Potting Mix
A well-draining and appropriate potting medium, typically composed of bark, charcoal, and perlite, supports the specific growth needs of blue orchid. The chosen mix ensures adequate air circulation and moisture retention, essential for new divisions to establish and flourish.
Trays or Pots
New blue orchid divisions require individual containers that provide optimal growing conditions. Small pots or trays are perfect for maintaining suitable humidity and temperature, factors that significantly impact the successful establishment of each division.
Rooting Hormone
Applying a rooting hormone to the cut surfaces of blue orchid can significantly boost root development and establishment. It encourages faster adaptation and recovery from the stress of division, thereby improving the overall success rate of propagation.
Labels and Markers
To track propagation details such as the division date and specific care requirements, labels and markers are indispensable. Proper labeling aids in monitoring growth progress and necessary maintenance for each blue orchid division.
How to Propagate Blue Orchid?
Propagation Type
Easy
Caring for Your Newly Propagated Blue Orchid
Caring for Your Newly Propagated Blue Orchid?
Blue orchid needs high humidity, consistent watering, and bright, indirect light. Post-propagation, keep the soil moist but not waterlogged and maintain high atmospheric moisture. Fertilize with a balanced orchid food as per package instructions, typically monthly. Ensure good air circulation to prevent fungal issues. As blue orchid grows, stem support may be necessary. Avoid cold drafts and sudden temperature shifts.
Common Errors to Avoid When Propagating Blue Orchid
Inadequate light
Insufficient light can result in poor growth or a lack of blooms, as blue orchid requires bright, diffused light to thrive.
Excessive watering
Blue orchid is prone to root rot if left in waterlogged media. This is particularly true during propagation, where humid conditions are often necessary.
Incorrect potting medium
Using an unsuitable medium can hinder root development. A coarse, well-draining mix is vital for blue orchid, mimicking their natural tree-dwelling habit.
Unsuitable humidity level
Maintaining either excessively high or low humidity can impede rooting. Blue orchid prefers a balanced environment that supports growth without encouraging fungal diseases.
Poor Cutting Technique
Making improper cuts or using unsterilized tools for cuttings can harm blue orchid and introduce pathogens, which is detrimental to successful propagation.
Tips For Propagating Blue Orchid
Appropriate light conditions
Ensure blue orchid receives ample indirect light during propagation to promote healthy growth without scorching the young plants.
Regulated watering
Water blue orchid just enough to keep the medium slightly moist and ensure that pots or other containers allow for proper drainage and air flow around the roots.
Specialized potting mix
Utilize a potting mix specifically formulated for orchids, which typically includes bark pieces, perlite, and charcoal, providing blue orchid with the correct aeration and drainage.
Maintenance of humidity
Maintain a moderate humidity level that supports rooting without encouraging disease, possibly by using a humidity tray or a light misting system.
Sterile cutting tools
Always use clean, sterilized cutting tools when taking cuttings of blue orchid to reduce the risk of infection and ensure the best chance of healthy growth.


