How to Propagate Japanese elm?
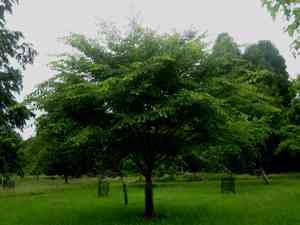
The Japanese elm, a robust deciduous tree, is highly valued for its elegant form and immunity to Dutch elm disease. For propagating Japanese elm, a useful technique involves taking semi-hardwood cuttings when the plant is actively growing. Make sure each cutting possesses a healthy node and several leaves to aid in photosynthesis. Insert the cuttings into a well-draining, neutral to slightly acidic soil blend, keeping it uniformly moist but not waterlogged. Employing a rooting stimulant can encourage superior root formation. After rooting, move the young Japanese elm plants into separate containers to allow for the development of a robust root structure before transplanting them into the landscape.
Optimal Time for Japanese Elm Propagation
Propagation Method
Cutting
Propagation Period
Autumn,Winter
Equipment for Japanese Elm Propagation
Sharp Pruning Shears
These are crucial for obtaining clean, precise cuts from japanese elm. The keenness of the blades minimizes harm to both the parent plant and the cutting, vital for new root development.
Rooting Hormone
This chemical assists in stimulating root formation at the severed end of the cutting. Applying rooting hormone to japanese elm cuttings boosts the likelihood of successful root growth, improving overall propagation success.
Sterile Potting Mix
A well-draining, pathogen-free potting medium offers the perfect environment for japanese elm cuttings to develop roots. It lowers the risk of soil-borne diseases, which could otherwise jeopardize the cutting's health during critical root formation stages.
Plant Pots with Drainage Holes
These containers are used for planting cuttings after hormone treatment. The drainage holes are essential for preventing waterlogging, which can harm root development in japanese elm cuttings.
Plastic Covers or Humidity Domes
These items help maintain a high humidity level around japanese elm cuttings, crucial for preventing desiccation before roots can establish. The dome also aids in regulating temperature around the cuttings.
Propagating Japanese Elm Guide
Propagation Difficulty
Moderately Difficult
Caring for Your Newly Propagated Japanese Elm
Caring for Your Newly Propagated Japanese Elm
Once roots are established, gradually introduce japanese elm to drier conditions by removing the plastic cover for longer durations daily over a week. Replant the rooted cutting into a larger container or directly into the ground, in a spot receiving full to partial sun and sheltered from strong winds. Keep the soil consistently moist and apply a balanced, slow-release fertilizer during the growing season to encourage robust growth. Regular trimming will help maintain a desired shape and promote vigorous development.
Common Errors to Avoid When Propagating Japanese Elm
Excessive watering during rooting
Providing too much moisture can lead to root rot, which is harmful as japanese elm's roots are especially vulnerable to fungal infections in waterlogged conditions.
Using unsterilized tools
Propagation failures often stem from infections introduced by dirty tools. For japanese elm, this can hinder the successful establishment of new plants from cuttings or seeds.
Insufficient cutting size
Taking cuttings that are too small can result in inadequate energy reserves to support the growth of japanese elm, leading to a lower survival rate.
Advice for Propagating Japanese Elm
Utilize healthy, semi-hardwood cuttings
Selecting robust and disease-free cuttings from japanese elm increases the probability of rooting and successful propagation.
Maintain consistent moisture
Keeping the soil uniformly moist but not saturated supports healthy root development in japanese elm without the danger of root rot.
Employ rooting hormone
Applying a rooting hormone to japanese elm cuttings can significantly boost the chances of successful root development and overall plant vitality.


