How to Propagate Necklacepod?
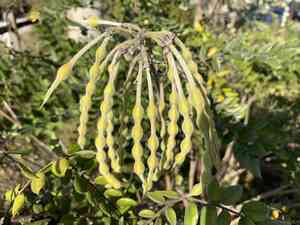
Necklacepod can be successfully multiplied using stem sections. To ensure proper root development, choose robust, partially matured stems. Cut these stems to include multiple nodes, and strip off the bottom leaves to reveal the nodes. Applying a rooting stimulant can improve the likelihood of successful propagation. Insert the prepared sections into a free-draining potting blend, making sure the nodal region is adequately buried. Maintain consistent moisture in the soil and offer diffused light until the sections have established roots and exhibit fresh development.
Optimal Period for Necklacepod Propagation
Propagation Method
Cutting
Propagation Period
Autumn,Winter
Tools for Necklacepod Propagation
Sharp Pruning Shears
These are crucial for making clean, precise cuts when taking stem cuttings from necklacepod. Clean cuts help prevent disease and ensure a higher success rate for root development.
Rooting Hormone Powder
This hormone stimulates root growth from necklacepod cuttings. It encourages quicker root initiation, enhancing the overall propagation success rate.
Sterile Potting Mix
Used to plant necklacepod cuttings, this medium must be free of pathogens to prevent disease. A well-draining and nutrient-rich mix supports the growth of new roots.
Misting Bottle
Essential for maintaining moisture levels around necklacepod cuttings. Regular misting helps prevent the cuttings from drying out before they can establish roots.
Propagation Tray with Dome
This tool is vital for creating a controlled humidity environment ideal for the root development of necklacepod cuttings. The dome helps retain moisture and warmth, promoting faster rooting.
How to Propagate Necklacepod?
Propagation Difficulty
Moderately Difficult
Caring for Newly Propagated Necklacepod
Caring for Newly Propagated Necklacepod
After rooting, gradually acclimate new necklacepod plants to less humid conditions to prevent shock. Transplant rooted cuttings into larger pots or directly into the ground, ensuring well-draining soil. Water regularly, allowing the soil to dry slightly between waterings. Provide full sun to partial shade, and apply a balanced fertilizer during the growing season for optimal growth and health. Regular pruning will help maintain shape and encourage bushier growth.
Common Mistakes to Avoid When Propagating Necklacepod
Incorrect soil mixture
Using a soil mix that doesn't drain well can lead to waterlogging, which is detrimental for necklacepod as it prefers well-draining sandy soils. Poor drainage can cause root rot and fungal infections.
Overwatering
While it might seem beneficial to keep the soil constantly moist, necklacepod is adapted to drier conditions. Overwatering can suffocate the roots, reducing oxygen availability and increasing the likelihood of disease.
Deep planting of seeds
Planting seeds too deeply can hinder germination for necklacepod because its seeds require light to germinate effectively. Deeply buried seeds might not receive enough light, leading to poor or failed germination.
Tips For Propagating Necklacepod
Use well-draining soil
Select or prepare a soil mix that has good drainage and is slightly sandy. This mimics necklacepod's natural growing conditions and promotes healthy root growth, preventing water retention issues.
Moderate watering
Maintain a balance in soil moisture by ensuring the soil is moist but not waterlogged. Wait for the top layer of soil to dry out slightly before watering again. This practice will support healthy root development without the risks associated with overwatering.
Surface sowing
For successful seed propagation, scatter the seeds lightly on the surface of the soil and press them in gently. This exposure to light will enhance the germination rate of necklacepod's seeds.



