How to Propagate Yellow Fringed Orchid?
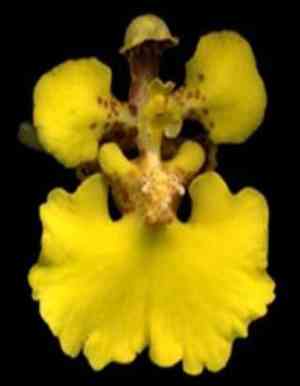
The Yellow Fringed Orchid flourishes when reproduced via separation, a technique highly compatible with its developmental patterns. Meticulously separate the root mass into smaller portions, making certain that every new piece possesses multiple pseudobulbs to foster robust development. This strategy promotes revitalization and effectively multiplies the plant count. Manage the root structure delicately to avoid harm, and promptly re-establish in an appropriate substrate that emulates its native, damp, free-draining habitat. This method aids in preserving the orchid's vigor and aesthetic charm.
Optimal Period for Yellow Fringed Orchid Propagation
Propagation Method
Splitting
Propagation Period
Spring,Autumn
Tools Required for Yellow Fringed Orchid Propagation
Sharp, sterile pruning shears or knives
These implements are crucial for safely and efficiently separating the rhizomes of yellow Fringed Orchid. Their sharpness ensures clean cuts, minimizing tissue damage, promoting faster healing, and lowering infection risks. Sterilization prevents disease transmission between plants during division.
Rooting hormone powder or gel
This product is applied to encourage root growth on newly separated yellow Fringed Orchid divisions. Using a rooting hormone can significantly boost the success rate of divisions by stimulating root development, which is vital for new plant establishment.
Potting mix specifically formulated for orchids
Such substrates offer the essential aeration and drainage that yellow Fringed Orchid needs. An orchid-specific potting mix often contains materials like bark and perlite, which help replicate yellow Fringed Orchid's natural growing conditions and support robust root development.
Humidity trays or covers
Maintaining high humidity is essential during the initial phases of propagating yellow Fringed Orchid. Humidity trays or covers assist in creating an ideal moist environment that promotes healthy growth and prevents new divisions from drying out.
Labels and a permanent marker
Labeling each division with details such as the propagation date and any specific care instructions is important for tracking progress and ensuring consistent post-propagation care. This practice aids in the effective management and monitoring of newly propagated plants.
How to Propagate Yellow Fringed Orchid?
Propagation Type
Simple
How to Care for Your Newly Propagated Yellow Fringed Orchid?
How to Care for Your Newly Propagated Yellow Fringed Orchid?
Post-propagation, yellow Fringed Orchid requires consistent moisture without saturation, partial shade to mimic its native environment, and temperatures between 60-80°F. Fertilize every two months with a balanced orchid fertilizer. Regularly check for pests and diseases to ensure vigorous growth.
Common Errors to Avoid When Propagating Yellow Fringed Orchid
Excessive Watering
Overwatering yellow Fringed Orchid can lead to root rot due to its preference for well-draining conditions. Waterlogged soil hinders proper root function and plant respiration, severely impacting health and increasing disease susceptibility.
High Sun Exposure
Yellow Fringed Orchid thrives in partially shaded environments. Exposing it to direct, full sun can cause leaf scorch, dehydration, and reduced flowering potential, negatively affecting its growth and overall vitality.
Using Regular Potting Soil
Yellow Fringed Orchid requires a specific substrate type that emulates its natural habitat. Standard potting soils may not provide the necessary drainage or nutrient profile, leading to suboptimal growth and potential root problems.
Advice for Propagating Yellow Fringed Orchid
Adequate Shade
Provide partial shade to imitate yellow Fringed Orchid's natural woodland setting. This shading helps maintain appropriate moisture levels and shields the plant from excessive direct sunlight.
Specialized Soil Mix
Utilize a blend of loam, leaf mold, and perlite or sand to create a well-draining yet nutrient-rich soil environment suitable for yellow Fringed Orchid. This mix supports healthy root development, which is crucial for robust growth.
Regular Monitoring
Inspect yellow Fringed Orchid frequently for signs of stress or disease, and adjust care routines as necessary. Early detection of issues like pest infestations or fungal diseases can prevent more severe damage and increase propagation success.



