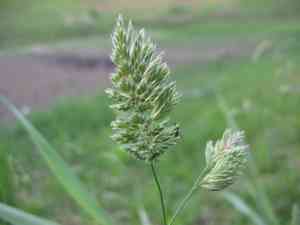
How to Propagate White wood-rush?
White wood-rush flourishes when multiplied via separation, an uncomplicated technique ideal for novice horticulturists. Gently divide its clusters during initial growth periods to guarantee successful rooting. This approach enables each segment of the plant to renew effectively, fostering more robust, widespread development. It serves as an effective means to enrich garden aesthetics or revitalize aging groupings.
Optimal Period for White Wood-rush Propagation
Propagation Method
Division
Propagation Period
Spring,Autumn
Tools Required for White Wood-rush Propagation
Garden Trowel
A garden trowel is vital for carefully excavating around the root system of white wood-rush to cleanly separate the plant without causing harm. Its slender blade allows for precise handling and minimal disruption to the surrounding earth, proving especially useful when dealing with the dense, fibrous roots characteristic of white wood-rush.
Sharp Knife
A sharp knife is essential for making clean cuts through the roots of white wood-rush during the division process. This ensures that divisions are made with minimal damage, encouraging quicker recovery and root development. The knife must be sanitized before use to prevent introducing pathogens.
Gardening Gloves
Gardening gloves safeguard the propagator's hands from potential irritants and minimize the risk of transmitting soil-borne diseases to white wood-rush during handling. Wearing gloves also offers improved grip and accuracy when separating dense root clumps.
Watering Can or Hose with a Gentle Spray Setting
Following replanting, white wood-rush needs gentle watering to help settle the soil around its roots and eliminate air pockets. A watering can or hose with a gentle spray setting ensures even and delicate water distribution, preventing soil erosion around the newly planted divisions.
How to Propagate White Wood-rush?
Propagation Type
Easy
Post-Propagation Care for Your White Wood-rush
Post-Propagation Care for Your White Wood-rush
After propagation, maintain consistently moist soil, but avoid saturation. White wood-rush thrives in partial shade, so ensure the environment doesn't expose plants to harsh, direct sunlight. For the initial weeks, monitor white wood-rush for stress indicators and adjust care as needed. Gradually decrease watering frequency as the plant establishes. Fertilization is generally unnecessary, but an annual application of organic compost can promote robust growth.
Common Errors to Avoid When Propagating White Wood-rush
Overwatering
Excessive watering can lead to root rot in white wood-rush, which prefers well-drained soil. Too much moisture restricts oxygen to the roots, stressing the plant and potentially causing fungal diseases.
Deep planting
Planting white wood-rush too deeply can impede the growth of new shoots and diminish the plant's overall vitality. The base of the stems should be at or slightly below the soil surface for proper development.
Ignoring clump division size
Dividing white wood-rush into excessively small clumps can hinder its establishment and lower its survival rate. Each division should possess a healthy root portion and multiple shoots to ensure vigor.
Tips for Propagating White Wood-rush
Soil preparation
Ensure the soil drains well and contains organic matter. White wood-rush prefers a moist yet aerated substrate to establish a healthy root system.
Clump division
Propagate white wood-rush by dividing clumps during replanting. Carefully separate the clumps to ensure each section retains sufficient roots and shoots. This method promotes faster establishment and healthier growth.
Aftercare
After planting, provide white wood-rush with consistent moisture but prevent waterlogging. A layer of mulch can help maintain soil moisture levels and temperature, supporting root development and overall plant health.


