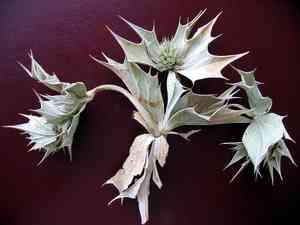
How to Propagate Sea holly?
Eryngium prospers when reproduced via seeding. To achieve successful sprouting, disperse the seeds in a substrate that drains efficiently, making sure they are thinly veiled since they require some illumination for proper germination. Maintain consistent dampness in the soil and offer a steady environment until the young plants are sufficiently strong for relocation. This technique harnesses the resilient characteristics of Eryngium, fostering vigorous growth and maturation in horticultural environments.
Optimal Time for Sea Holly Propagation
Propagation Method
Seeding
Propagation Period
Spring
Tools for Sea Holly Propagation
Seed trays
Seed trays are vital for germinating sea holly seeds. They offer controlled environmental conditions, which are critical due to sea holly's sensitivity during germination. The trays should have shallow compartments as sea holly seeds do not need deep soil for effective germination. This ensures uniform light and moisture distribution, essential for sea holly germination.
Perlite or sand
Incorporating perlite or sand into the sowing medium improves drainage and aeration, fostering healthier root development in sea holly. The coarse texture of perlite or sand prevents soil compaction, which could harm the delicate root systems of young sea holly seedlings.
Misting bottle
A misting bottle is essential for gently watering seeds without disturbing them. The fine mist provides necessary moisture for germination without causing erosion or seed displacement. Consistent moisture from regular misting is crucial for successful sea holly sprouting.
Heat mat
Since sea holly benefits from a consistent, slightly warmer environment to initiate germination, a heat mat can be very useful. It provides a steady heat source beneath seed trays, encouraging faster and more uniform germination across the tray.
Fungicide solution
To prevent damping-off and other fungal diseases common in humid conditions ideal for sea holly seed germination, a fungicide solution can be applied. This helps maintain seed and seedling viability by reducing disease risk, especially critical during delicate seed development stages.
How to Propagate Sea Holly?
Propagation Difficulty
Simple
Caring for Newly Propagated Sea Holly
Caring for Newly Propagated Sea Holly
Post-propagation, continue caring for sea holly by ensuring it's in full sun and well-drained soil, ideally sandy and not overly rich. Water moderately, allowing soil to dry between waterings to mimic sea holly's natural, drought-tolerant habitat. Minimal fertilizer is needed during the growing season. Protect young plants from extreme winter cold with mulch if in a frost-prone area.
Common Errors to Avoid When Propagating Sea Holly
Overwatering
Excessive watering of sea holly can lead to root rot, as the plant prefers drier, well-drained soils. Overwatering can suffocate roots and hinder successful propagation.
Insufficient sunlight
Sea holly needs full sun to thrive. Placing it in shaded or partially shaded areas can result in weak growth and poor flower development.
Using unsuitable soil
Choosing soil that retains too much moisture or lacks adequate drainage can be detrimental. Sea holly thrives in sandy, well-drained soils; dense clay or overly fertile soil can inhibit growth and lead to disease.
Tips for Propagating Sea Holly
Root cutting in early growth
Taking root cuttings from sea holly during its early growth stages can significantly improve propagation success. Carefully select healthy roots and cut them into sections for replanting.
Ensure adequate drainage
Plant sea holly in sandy or gravelly soil to ensure proper drainage. Good drainage is crucial to prevent waterlogging and root rot complications.
Provide full sun exposure
Ensure sea holly is planted in a location that receives ample sunlight. This exposure is essential for the plant's growth and vitality, facilitating robust development and blooming.


