How to Propagate Cape sundew?
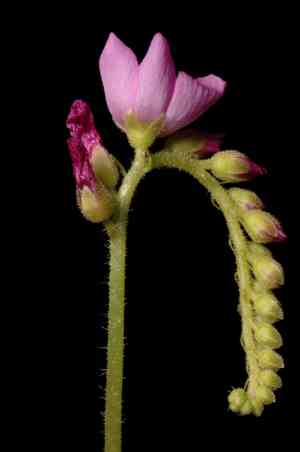
Drosera capensis, an intriguing carnivorous flora, is recognized for its adhesive, insect-capturing foliage. The primary method for multiplying Drosera capensis is through separation. Optimal parent specimens are chosen, verifying they possess vigorous root structures. Gently detach the plants at their root mass, minimizing root disturbance to alleviate shock. Every segment needs to contain at least one active growth point. Following division, place each new specimen into an appropriate potting medium, usually one deficient in nutrients, like sphagnum peat moss, to replicate Drosera capensis's native environment. Steady dampness and elevated atmospheric moisture aid in the successful rooting of nascent plants.
Optimal Time for Cape Sundew Propagation
Propagation Method
Division
Propagation Period
Spring,Autumn
Tools for Cape Sundew Propagation
Sharp, Sterile Scissors or Knife
This instrument is vital for making clean cuts through the root mass of cape sundew during the division process. A sharp, sterilized blade ensures a precise incision, minimizing harm to plant tissues and lowering infection risk. This is crucial as a clean cut aids cape sundew in recovering and regenerating more effectively post-propagation.
Watering Can with Fine Spray Setting
Following the division of cape sundew, the separated sections need gentle watering to help them settle into their new surroundings. A watering can equipped with a fine spray nozzle is perfect, as it provides a soft, even water distribution, mimicking the light, misty conditions cape sundew prefers. This gentle watering technique helps prevent dislodging newly planted sections or damaging their delicate leaves.
Humidity Dome or Clear Plastic Bag
Maintaining elevated humidity is essential when propagating cape sundew, particularly after division. A humidity dome or a transparent plastic bag can be placed over the freshly potted sections to trap moisture and create a humid microclimate. This tool significantly boosts cape sundew's survival rate by preventing excessive moisture loss, which is especially beneficial during the root establishment phase.
Peat Moss or Sphagnum Moss
Cape sundew requires an acidic, well-draining soil with excellent moisture retention to flourish. Utilizing peat or sphagnum moss as a planting medium provides these conditions. This substrate supports the delicate roots of cape sundew during the critical post-division recovery, ensuring they neither dry out nor become waterlogged, which could lead to root rot.
Labeling Sticks and Permanent Marker
Tracking the various sections of cape sundew after division is important for monitoring their growth and development. Labeling each pot with sticks and a permanent marker helps in identifying the sections and noting any specific care instructions or observations during the propagation process. This information is valuable for ongoing care and can assist in the successful establishment of new plants.
How to Propagate Cape Sundew?
Propagation Type
Easy
Caring for Your Newly Propagated Cape Sundew
Caring for Your Newly Propagated Cape Sundew
Cape sundew thrives in a moist and acidic environment after propagation. Keep the soil consistently damp using rainwater or distilled water, ensuring it never dries out. Provide bright, indirect light, being careful to avoid direct sunlight that can scorch the leaves. Feed cape sundew by allowing it to catch small insects, or if necessary, supplement with fish food or bloodworms. Do not use conventional plant fertilizers.
Common Propagation Mistakes for Cape Sundew
Overwatering
Excessively wet soil can lead to fungal infections and root rot in cape sundew, impeding its ability to establish roots during propagation.
Too much direct sunlight
Cape sundew enjoys bright light but can be harmed by intense midday sun, potentially causing sunburn to tender new growth.
Use of regular soil
Standard garden soil is often too dense and lacks the proper drainage cape sundew needs, which can result in poor root development and growth.
Neglecting humidity levels
Cape sundew's natural habitat is humid; low humidity during propagation can cause the cuttings to dry out and fail.
Tips For Propagating Cape Sundew
Rooting in water
Propagating cape sundew in water is a gentle method that prevents soil-borne diseases and maintains appropriate humidity levels for root formation.
Use of appropriate medium
Planting cape sundew in a mix of sand and peat or a carnivorous plant soil mix ensures proper drainage and mimics the plant's natural growing conditions.
Indirect sunlight
Placing cape sundew in bright, indirect sunlight supports healthy growth without causing damage from direct sun exposure.
Maintain high humidity
Enclosing the propagation setup in a plastic bag or using a humidity dome helps maintain the high humidity required for cape sundew cuttings to thrive.


