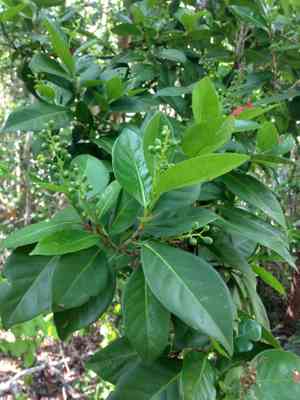
How to Propagate Pigeon plum?
Originating from littoral zones, pigeon plum is most effectively multiplied via stem sections. To achieve successful cultivation, choose robust, semi-lignified portions from the present or preceding year's development. Apply a rooting stimulant to the severed end to foster root formation, then embed it in a potting blend that drains efficiently. Sustaining elevated humidity and consistent, diffused illumination will aid this procedure, as will guaranteeing the substrate stays uniformly damp but not oversaturated. With perseverance, root systems ought to form, preparing the plant for eventual relocation.
Optimal Period for Pigeon Plum Propagation
Propagation Method
Cutting
Propagation Season
Autumn,Winter
Tools Required for Pigeon Plum Propagation
Sharp, clean pruning shears or a knife
These implements are crucial for achieving precise cuts when preparing pigeon plum cuttings. A keen edge ensures a clean, smooth incision, which aids in preventing infections and promotes superior root formation. Utilizing sanitized tools also prevents disease transmission among plants.
Rooting hormone
This product stimulates root growth in pigeon plum cuttings. By treating the base of the cuttings with rooting hormone, you can boost the likelihood of successful root initiation and development, which is vital for the robust establishment of new plants.
Propagation tray
A flat, shallow container employed to hold soil or a soilless growing medium where pigeon plum cuttings can be placed until roots emerge. Appropriate trays help maintain the necessary humidity and temperature to encourage rooting.
Sterile potting mix
A clean, well-draining growth medium is essential for propagating pigeon plum via cuttings. Sterile potting mix reduces the risk of soil-borne diseases affecting new cuttings and supports healthy root growth with adequate moisture retention and aeration.
Plastic dome or cover
Placing a transparent plastic cover over the propagation tray containing pigeon plum cuttings helps maintain high humidity around them. This is crucial for preventing the cuttings from drying out before they can establish roots.
Heat mat
Optional yet advantageous, a heat mat provides consistent bottom warmth which can significantly enhance rooting success in pigeon plum cuttings. Steady, gentle heat beneath the propagation tray encourages quicker root development.
How to Propagate Pigeon Plum?
Propagation Type
Moderately Difficult
Caring for Your Newly Propagated Pigeon Plum
Caring for Your Newly Propagated Pigeon Plum
Following propagation, gradually introduce the new pigeon plum plant to its typical growing conditions. Pigeon plum thrives in full sun to partial shade and requires well-draining, fertile soil. Consistent watering is vital, especially during dry periods. As the plant matures, switch to a balanced fertilizer to encourage vigorous growth. Prune as needed to maintain the plant's shape and health.
Common Errors to Avoid When Propagating Pigeon Plum
Overwatering cuttings
Excessive moisture can lead to rot for pigeon plum, hindering root development and potentially killing the cutting.
Using too large a pot
Oversized pots for pigeon plum cuttings can cause inconsistent soil moisture, potentially leading to root rot before establishment.
Ignoring pest management
Neglect during the vulnerable propagation phase can result in infestations that compromise pigeon plum health.
Cuttings too short
Insufficient leaf node inclusion can impede rooting due to a lack of adequate growth points on pigeon plum stem cuttings.
Forgetting to harden off
Failing to acclimate pigeon plum properly may result in shock when transitioning from indoor to outdoor environments, impacting growth.
Tips For Propagating Pigeon Plum
Correct moisture balance
Maintaining consistently moist but not waterlogged soil promotes healthy root growth for pigeon plum without inducing rot.
Use of rooting hormone
Applying rooting hormone enhances root development for pigeon plum, increasing the chances of successful propagation.
Pest and disease monitoring
Regularly inspecting pigeon plum prevents pest and disease issues, ensuring a healthy start for new plants.
Proper cutting length
Ensuring pigeon plum cuttings are long enough, with multiple leaf nodes, improves rooting potential.
Acclimation process
Gradually introducing pigeon plum to outdoor conditions minimizes transplant shock, allowing better adaptation to the growing environment.


