How to Propagate Golden chinquapin?
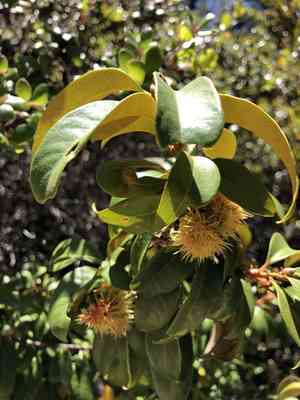
Chrysolepis chrysophylla, a robust evergreen tree or bush, flourishes in diverse settings, recognized by its golden-tinted leaves. To multiply chrysolepis chrysophylla, gather seeds carefully once the cones spontaneously open, making sure to cleanse and preserve them appropriately until planting. Cold stratification, simulating natural cold periods, enhances sprouting success, and can be performed prior to planting in a well-aerated, damp substrate. Precise management of hydration levels maximizes root formation, encouraging the prosperous growth of young specimens.
Optimal Period for Golden Chinquapin Propagation
Propagation Method
Cutting
Propagation Season
Autumn,Winter
Tools Required for Golden Chinquapin Propagation
Sharp Pruning Shears
These are crucial for making clean, precise cuts from golden chinquapin without harming the plant tissue. Sharp pruning shears ensure a smooth cut, aiding in rapid healing of the cutting, reducing infection risk, and boosting rooting success.
Rooting Hormone Powder
This enhances the probability of successful root formation in golden chinquapin cuttings. Dipping fresh stem ends into the rooting hormone encourages faster rooting, vital for cuttings to establish and flourish, especially for woody species like golden chinquapin.
Sterile Potting Mix
A well-draining, sterile potting mix offers an ideal environment for golden chinquapin cuttings to develop roots. It prevents common issues like disease/pest transfer and provides the necessary air and moisture balance for root growth.
Humidity Dome or Plastic Bag
Maintaining high humidity around golden chinquapin cuttings is essential to prevent them from drying out before root establishment. A humidity dome or a simple clear plastic bag can create a mini-greenhouse effect, helping to sustain the required humidity levels.
Heat Mat
For golden chinquapin, providing consistent and gentle bottom heat can significantly improve rooting success. A heat mat helps maintain an optimal soil temperature, stimulating root growth during the propagation's rooting phase.
How to Propagate Golden Chinquapin?
Propagation Type
Moderately Difficult
Post-Propagation Care for Golden Chinquapin
How to Care for Your Newly Propagated Golden Chinquapin?
Once golden chinquapin cuttings have rooted, gradually introduce them to less humid conditions by incrementally opening the plastic covering over several days. Transplant rooted cuttings into larger pots or their final outdoor spot, ensuring exposure to bright, indirect light. Water regularly to keep the soil moist, especially during dry spells. Golden chinquapin needs minimal fertilizer, but an annual application of a balanced, slow-release type can be beneficial during the growing season. Protect young plants from extreme temperatures and frost for healthy development.
Common Mistakes to Avoid When Propagating Golden Chinquapin
Improper cutting technique
Using incorrect methods to take cuttings can result in damaged or diseased tissue, hindering golden chinquapin's ability to root successfully. Poor cuts may encourage fungal infections or rot.
Overwatering
While golden chinquapin cuttings or seeds need moisture, excessive water can lead to root rot or fungal diseases, severely impacting germination and rooting success.
Deep planting
Golden chinquapin seeds or cuttings planted too deeply struggle to emerge or establish. This can result in reduced or failed germination and rooting, stunting the plant's growth.
Tips For Propagating Golden Chinquapin
Use healthy and mature material
Selecting mature, disease-free cuttings or seeds from golden chinquapin ensures a higher survival and growth rate. Young or unhealthy cuttings often lack the reserves needed to establish new roots.
Provide consistent moisture
Maintain a balanced moisture level for golden chinquapin's cuttings or seedlings. Ensure the soil is moist but not waterlogged to support healthy root development without risking fungal diseases.
Plant at the right depth
Sow golden chinquapin's seeds or plant its cuttings shallow enough to allow easy sprouting or rooting. This promotes stronger establishment and better access to light and air, crucial for growth.


