How to Propagate Sheathed sedge?
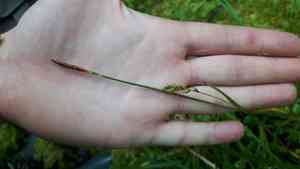
Sheathed sedge flourishes when multiplied via separation, a method perfectly suited for its clustered growth pattern. For successful establishment, separate the clumps during their inactive period, generally taking care to preserve the roots' structure. Following separation, promptly re-embed them in adequately draining soil, keeping the initial planting depth consistent to foster vigorous development. Consistent irrigation after replanting assists in recuperation and root formation.
When Is the Optimal Time to Propagate Sheathed Sedge?
Propagation Method
Division
Propagation Period
Spring,Autumn
What Implements Are Utilized in Sheathed Sedge Propagation?
Sharp Knife or Scissors
These are vital for making clean cuts through the root system of sheathed sedge. A keen blade ensures a precise cut, minimizing root damage, promoting faster recovery, and lowering disease risk.
Garden Spade or Fork
Used for excavating sheathed sedge from the ground with minimal disturbance to nearby plants. These tools also aid in loosening the soil around sheathed sedge before division, facilitating plant removal without root damage.
Watering Can with a Fine Rose
Essential for gently irrigating sheathed sedge post-propagation to maintain adequate soil moisture without dislodging newly planted divisions. Consistent hydration is crucial for successful plant establishment.
Rooting Hormone Powder
While not always necessary, applying rooting hormone to the cut surfaces of sheathed sedge's roots can boost root development and improve overall propagation success. This is especially beneficial for weaker or smaller divisions.
Horticultural Fleece or Mulch
These materials help maintain stable soil temperature and moisture levels around sheathed sedge, which is beneficial for root growth. Covering the soil with mulch or using fleece can shield freshly divided plants from extreme temperatures.
Label and Marker
Useful for tracking various sheathed sedge divisions, particularly when experimenting with different propagation methods or locations. Labels ensure accurate monitoring of each division's care and progress.
How to Propagate Sheathed Sedge?
Propagation Difficulty
Easy
How to Nurture Your Newly Propagated Sheathed Sedge?
How to Nurture Your Newly Propagated Sheathed Sedge?
Post-propagation care for sheathed sedge involves maintaining consistently moist soil without overwatering. Place newly planted divisions in partial shade, as sheathed sedge thrives in similar conditions. Monitor for stress signs in the initial weeks and protect from extreme temperatures. Regular, light feeding during the growing season can help establish robust plants.
Common Errors to Avoid When Propagating Sheathed Sedge
Overwatering
Excessive watering of sheathed sedge can lead to root rot, a condition where roots decay, hindering nutrient absorption. This results in poor growth and can ultimately kill the plant.
Deep Planting
Planting sheathed sedge's rhizomes or seeds too deeply can impede their ability to sprout, as they may not receive sufficient light or struggle to emerge through the soil surface.
Ignoring Soil Mix
Using an unsuitable soil mix for sheathed sedge can hinder proper root development. Sheathed sedge requires well-draining soil that retains moisture without becoming waterlogged.
Advice For Propagating Sheathed Sedge
Moisture Management
Maintaining balanced soil moisture is crucial for sheathed sedge. The soil should be moist but not saturated. Ensure proper drainage in the container to prevent water accumulation.
Shallow Planting
Plant sheathed sedge's rhizomes or seeds just beneath the soil surface. This allows for easy sprouting and ensures adequate light and air for growth.
Soil Adaptability
Utilize a soil mixture rich in organic matter yet well-draining. Incorporating sand or perlite can enhance drainage while keeping the soil suitable for root development.



