How to Propagate Sand sedge?
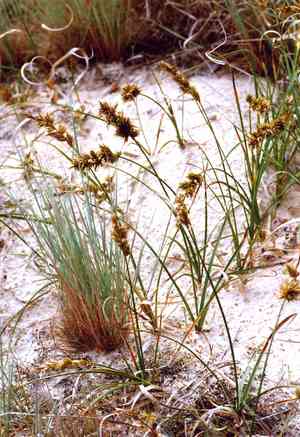
Coastal sand sedge flourishes in sandy coastal areas, playing a vital role in stabilizing these habitats. To achieve the best growth, cultivators ought to employ the technique of division, meticulously splitting the plant in late winter or early spring as root development begins. It is essential to confirm that every separated portion possesses sufficient roots and foliage to ensure successful replanting. Position these divisions in sandy, well-draining soil, replicating the sand sedge's native environment, and allow ample room for expansion.
Optimal Period for Sand Sedge Propagation
Propagation Method
Division
Propagation Period
Spring,Autumn
Tools Required for Sand Sedge Propagation
Garden Fork
A garden fork is vital for the division technique used to propagate sand sedge. It assists in gently lifting the plant from the ground while minimizing harm to the root system. The tines of the fork are perfect for loosening the soil around sand sedge, allowing for easier separation of the plant into smaller clumps without significant disturbance to the surrounding soil structure.
Sharp Knife or Secateurs
A sharp knife or a pair of secateurs are essential for making clean cuts through the rhizomes of sand sedge during division. This ensures that each section retains a portion of the root system, which is crucial for successful regeneration and growth. Clean cuts help prevent disease entry and reduce plant stress, promoting healthier regrowth.
Watering Can with a Fine Rose
After division and replanting, ensuring sufficient watering is critical for the establishment of sand sedge. A watering can with a fine rose attachment aids in delivering water gently and evenly, mimicking natural rainfall. This prevents soil compaction around the newly planted sections and helps maintain necessary soil moisture levels without eroding the soil or disturbing the plant.
Rooting Hormone Powder or Gel
Utilizing a rooting hormone can improve the rooting success rates of sand sedge after division. Applying a rooting hormone to the cut sections before replanting can stimulate root growth and enhance plant survival. This is particularly beneficial in ensuring that the new plants establish quickly and develop a robust root system.
Plant Labels and Marker
Plant labels and a permanent marker are necessary to keep track of the divided sections of sand sedge, especially if propagating multiple plants. Labeling helps in monitoring growth progress and maintaining proper care routines for each newly established plant. This organizational tool also assists in identifying the plant species and variety, which is crucial in nurseries or diverse gardens.
How to Propagate Sand Sedge?
Propagation Type
Easy
Caring for Your Newly Propagated Sand Sedge
Caring for Your Newly Propagated Sand Sedge
Position the newly potted sand sedge divisions in a spot that receives partial shade to emulate their natural environment. Keep the soil consistently moist, especially during dry spells, without over-saturating. A layer of mulch can help retain soil moisture and suppress weed growth. As sand sedge establishes, reduce watering but ensure the soil does not completely dry out. Observing the plant's response to its surroundings allows for adjustments in care, promoting healthy growth and spread.
Common Propagation Errors to Avoid with Sand Sedge
Overwatering
Excessive watering can lead to root rot for sand sedge, which prefers well-drained soil conditions. Too much moisture hinders adequate root development and reduces the plant's survival chances during propagation.
Insufficient Light
Sand sedge thrives in full sun. Inadequate light during propagation can result in weak, leggy growth and impair the plant's ability to establish itself once planted out.
Neglecting Soil Composition
Using heavy or clay-rich soil can impede the drainage that sand sedge requires. An unsuitable soil mix can halt root propagation and deprive the plant of necessary oxygen.
Tips For Propagating Sand Sedge
Rhizome Division Technique
Divide the rhizomes during the propagation process to encourage healthier and more vigorous growth. This approach respects sand sedge's natural spreading method and can help maintain healthy plant colonies.
Sandy Soil Mixture
Utilize a sandy soil mixture to improve drainage and mimic sand sedge's natural coastal environments. This promotes effective root development and helps prevent issues related to overwatering.
Regular Monitoring
Check the moisture levels and general health of the soil and plant frequently. This ensures that conditions remain optimal for root development and early growth stages of sand sedge, boosting overall propagation success.


