How to Propagate California spikenard?
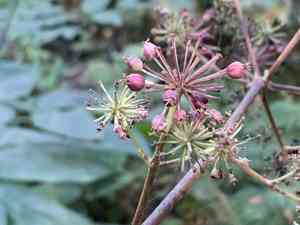
California spikenard flourishes when reproduced via seeding. Horticulturalists will achieve successful results by meticulously preparing a fertile and well-draining substrate. For peak performance, utilizing fresh, viable seeds significantly boosts germination success. Burying the seeds just beneath the soil's top layer and maintaining steady hydration without saturation encourages vigorous development. A protected location with diffused illumination aids the initial phases of growth.
Optimal Period for California Spikenard Propagation
Propagation Method
Seeding
Propagation Period
Spring
Tools Required for California Spikenard Propagation
Seed trays
Seed trays are crucial for initiating california spikenard from seeds, offering a contained space that aids in regulating soil and moisture consistency, vital for seed germination. Trays facilitate easier growth observation and simplify the maintenance of ideal conditions during early development.
Soil mix
A well-draining, nutrient-rich soil blend is essential for california spikenard seed germination and initial growth. The mixture should ideally be light for easy root penetration yet rich enough in organic matter to support development. The correct soil mix ensures the best environment for successful germination and robust early growth.
Watering can with a gentle spray
A watering can equipped with a gentle spray attachment helps in uniformly moistening the soil without disturbing or eroding the seed placement. This tool assists in maintaining the necessary moisture levels crucial for germination without compacting the soil or harming young seedlings.
Labels and markers
Employing labels or markers is important for monitoring california spikenard's progress during its germination and initial growth phases. Labels ensure that specific care routines are followed according to the species' requirements, aiding in systematic cultivation and minimizing errors during propagation.
How to Propagate California Spikenard
Propagation Type
Simple
Post-Propagation Care for California Spikenard
How to Care for Your Newly Propagated California Spikenard?
Following germination, gradually introduce young california spikenard plants to their permanent growing environment. California spikenard thrives in partially shaded areas with rich, well-draining soil. Water regularly to keep the soil moist, especially during dry spells, and apply a balanced fertilizer during the growing season to encourage strong growth. Regular checks for pests and diseases are vital, as young plants are particularly vulnerable.
Common Errors to Avoid When Propagating California Spikenard
Insufficient root space
Propagating california spikenard in containers that are too small can restrict root development, leading to stunted growth. This often results in weaker plants less likely to flourish when transplanted.
Overwatering
While california spikenard prefers damp soil, excessive water can cause root rot. This is particularly damaging during the propagation stage, as young roots are especially susceptible to decay.
Using old seeds
For seed propagation, utilizing old or improperly stored seeds can lead to poor germination rates. Since california spikenard's seeds have a short viability period, this can significantly impact propagation success.
Advice for Propagating California Spikenard
Pre-treat seeds
To improve germination, cold stratify california spikenard's seeds for several weeks before planting. This mimics natural winter conditions, helping to break seed dormancy.
Root prunings
Propagating california spikenard using root cuttings can be highly effective. Select healthy, thick root sections and plant them in a well-draining propagation medium.
Consistent moisture
Maintain steady soil moisture, avoiding waterlogging, to support healthy root and shoot development. Using a mix of peat and perlite can help balance moisture retention and aeration.



