Indian teasel (Dipsacus sativus)
Also known as: Common teasel, Fuller's teazle
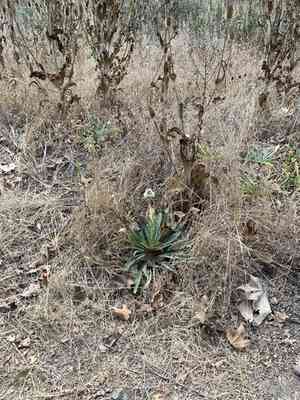
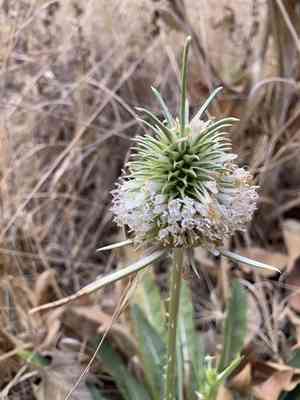
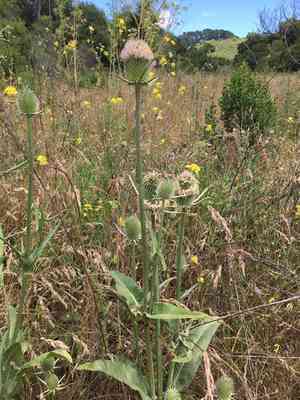
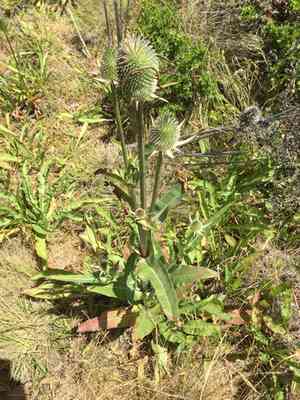
The plant you're referring to is the Indian Teasel (Dipsacus fullonum). This biennial herb features spiny dried flowerheads that are traditionally utilized in wool processing. Additionally, it is known for producing water-soluble blue and yellow dyes. Indian Teasel typically thrives along roadsides and in pastures.
In This Article
Attributes of Indian teasel
Lifespan
Biennial, Perennial, Annual
Plant Type
Herb
Plant Height
1.8 m
Spread
50 cm to 1 m
Leaf Color
Green
Flower Size
8 cm to 10 cm
Flower Color
White Purple Brown
Images of Indian teasel
Quickly Identify Indian teasel
1
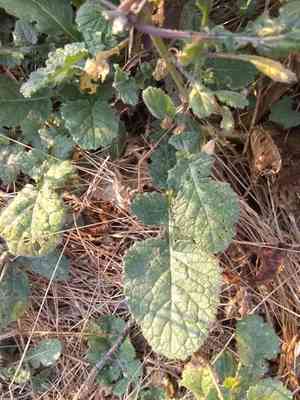
To identify Dipsacus sativus, look for its tall, erect stems that can reach up to 2 meters. It has prickly, lance-shaped leaves that clasp the stem. The flower heads are large, cylindrical, and covered in spines with pale purple or white flowers.
Scientific Classification of Indian teasel
Phylum
Vascular plants
Class
Dicotyledons
Order
Dipsacales
Family
Honeysuckle
Genus
Teasel
Species
Indian teasel
Planting and Growing of Indian teasel
Care Difficulty
Easy
Watering Schedule
Every 3 days
Sunlight Requirements
Full sun
Sunshine Duration
8-12 hours
Ideal Temperature
60-75℉
Soil Type
Potting Mix, Peat Mix
Soil pH
6.5-7.5
Fertilizer Type
Balanced
Pruning Season
Spring, Summer
Pruning Area
Branches, Leaves
Pruning Frequency
2 times a year
Repotting Season
Spring
Pot Type
Plastic, Ceramic
 How to Water Indian teasel?
Dipsacus sativus, or the teasel plant, requires around 500 ml of water each time it is watered. The key principle is to ensure the soil is moist yet not saturated. Water should be applied evenly around the base until it slightly seeps out of the drainage holes, indicating that the moisture has reached the root zone effectively.
What are the symptoms of an underwatered Indian teasel?
›
What should I do if my Indian teasel is not getting enough water?
›
What are the symptoms of an overwatered Indian teasel?
›
How to save an overwatered Indian teasel?
›
 What Are the Sunlight Requirements for Indian teasel?
Dipsacus sativus benefits from partial to full sun conditions, enabling robust health and optimal growth by enhancing its metabolic activities and boosting vigor, ensuring a lush, vibrant appearance.
More About Sunlight Requirements Techniques→
What is the ideal lighting condition for Dipsacus sativus?
›
How can I achieve ideal lighting for Dipsacus sativus?
›
What benefits does ideal lighting offer Dipsacus sativus?
›
 What Is the Ideal Temperature Range for Indian teasel?
Dipsacus sativus, commonly known as the cultivated teasel, thrives best in temperatures ranging from 60°F to 75°F. This range promotes optimal growth and flowering. Maintaining this temperature helps ensure robust foliage and overall plant vitality.
 What Soil is Best for Indian teasel?
Dipsacus sativus prefers well-drained soil to prevent waterlogging, which can cause root rot. Proper drainage ensures healthy root growth and nutrient absorption, critical for the plant's vitality and resilience. The optimal soil for Dipsacus sativus should retain moisture without becoming waterlogged. This balance ensures the plant receives enough water during dry periods while avoiding root damage in wetter conditions. A nutrient-rich soil supports robust growth and fortifies the plant's immune system against pests and diseases. Key nutrients like nitrogen, phosphorus, and potassium foster vigorous development and flowering.
 How to Fertilize Indian teasel?
For Dipsacus sativus, the ideal fertilizer amount consists of a moderate application, ensuring a balance between sufficient nutrients and plant health. Use approximately 1-2 tablespoons of liquid fertilizer diluted in 1 gallon of water per application. When applying slow-release fertilizer, distribute 3-4 ounces around the base of the plant, ensuring it is evenly spread over the root zone. Regular monitoring is important to adjust the quantity based on the plant's growth conditions and visible health.
 How to Prune Indian teasel?
Dipsacus sativus can have sharp spines along the stems and leaves, so wearing gloves and long sleeves is advisable to prevent injury while pruning. Handle with care to avoid any unnecessary cuts or scrapes, ensuring a safe gardening experience. This plant often attracts wildlife, such as butterflies and bees, as well as birds after flowers have gone to seed. When pruning, check for nests or activity and avoid disturbing any beneficial creatures living on or around the plant. This mindfulness helps maintain the local ecosystem balance.
More About Pruning Techniques→
 How to Propagate Indian teasel plant?
1
Soak Dipsacus sativus seeds in water for about 12 to 24 hours to help soften the seed coat and promote quicker germination. It's important because the seeds can have a tough outer layer.
2
Sow the seeds thinly across the surface of a pre-moistened, well-draining potting mix, ensuring they are lightly covered with soil. This ensures that seeds have a good connection with the moist soil and are in position for optimal growth.
3
Place the trays in a location with indirect sunlight and maintain temperatures around 15-20°C. Consistent temperatures and light are key factors that contribute to successful germination.
 How to Repot Indian teasel plant?
1
Repot Dipsacus sativus when you notice roots growing out of the drainage holes or when the plant seems too large for its pot. These signs indicate that the roots need more space and fresh soil nutrients.
2
Select a pot that is about 2-3 inches larger in diameter than the current one. Ensure it has adequate drainage holes. A pot with good drainage will prevent waterlogging and root rot, promoting healthier growth.
3
Opt for well-draining loamy soil, enriched with organic matter. This type of soil provides optimal nutrient availability while ensuring proper drainage, preventing issues like root rot, and supporting robust plant health.
Learn More About Indian teasel Diseases
Anthracnose
Bacterial Leaf Spot
Bacterial Soft Rot
Bacterial Wilt
Chemical Injury
Crown Gall
Cyst Nematode
Damping-off
Downy Mildew
Drought Stress
Fusarium Wilt
Gray Mold
Leaf Spot
Mosaic
Nutrient Deficiency
Nutrient Toxicity
Powdery Mildew
Root Rot
Root-knot Nematode
Rusts
Sooty Mold
Spider Mites
Temperature Stress
Thrips Damage
White Mold


