How to Transplant Indian yellow-eyed grass?
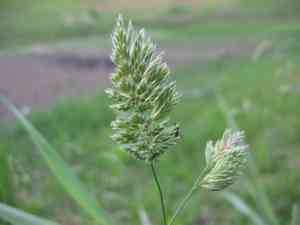
Relocating indian yellow-eyed grass is most effectively performed from the close of summer through mid-fall, allowing sufficient duration prior to its winter rest. Guarantee a bright, damp spot for its ideal development. Hydrate consistently and steer clear of excessively shaded zones to encourage robust rooting.
What Preparations are Needed Before Transplanting Indian Yellow-eyed Grass?
What is the Ideal Time for Transplanting Indian Yellow-eyed Grass?
The best time to move indian yellow-eyed grass is from late summer through mid-fall. This period offers cooler temperatures and increased soil moisture, aiding root development before winter. Transplanting indian yellow-eyed grass at this time reduces stress, improving survival rates and overall plant health. These seasonal conditions support strong root growth, preparing the plant for vigorous spring growth.
How Much Space Should You Leave Between Indian Yellow-eyed Grass Plants?
When relocating indian yellow-eyed grass, ensure each plant is spaced 12-18 inches (30-45 cm) apart. This provides ample room for comfortable growth and sufficient access to nutrients without excessive competition.
What is the Best Soil Mix for Indian Yellow-eyed Grass Transplanting?
Prepare well-draining soil, enriched with organic matter, for transplanting indian yellow-eyed grass. Incorporate a balanced base fertilizer before planting to give your plants a strong start. Loamy soil conditions are perfect for healthy development.
Where Should You Relocate Your Indian Yellow-eyed Grass?
Choose a sunny location for transplanting indian yellow-eyed grass. This plant thrives in full sun but can also tolerate partial shade. Aim for an area receiving at least 6 hours of daily sunlight to ensure vibrant and robust growth.
What Equipments Should You Prepare Before Transplantation Indian Yellow-eyed Grass?
Gardening Gloves
To safeguard your hands while handling soil and plants.
Trowel
For digging and loosening the earth around the plant.
Shovel or Spade
For excavating the hole in the ground where you will replant indian yellow-eyed grass.
Watering Can or Hose
To hydrate the plant before and after its relocation.
Gardening Fork
To assist in lifting the plant from containers or seedling trays.
Pruning Shears
To trim any damaged or overly long roots during the transplanting process.
Mulch
To help maintain moisture around the newly transplanted specimen.
Plant Labels
To mark the new spot, ensuring you remember the plant's identity.
How Do You Remove Indian Yellow-eyed Grass from the Soil?
How Do You Remove Indian Yellow-eyed Grass from the Soil?
From Ground: First, water the indian yellow-eyed grass plant to moisten the soil. Next, dig a wide trench around the plant using a shovel or spade, making sure the plant's root ball stays intact. Carefully work the spade beneath the root ball and gently lift the plant from its original spot, taking care not to harm the roots.From Pot: Water the indian yellow-eyed grass plant thoroughly several hours prior to transplanting. Gently tap the pot to loosen the soil and the plant's roots. Tilt the pot and carefully slide the plant out, supporting its base. If the roots are tightly coiled, gently separate them with your fingers or a gardening fork.From Seedling Tray: Water the indian yellow-eyed grass seedlings to make the soil easier to manage. Use a small trowel or gardening fork to lift each seedling from the tray, ensuring you retrieve as much of the root system as possible. Handle the seedlings delicately to avoid damaging their fragile roots.
Step-by-Step Guide for Transplanting Indian Yellow-eyed Grass
Site Preparation
Prepare the new planting location by digging a hole that is twice as wide and as deep as the root ball of indian yellow-eyed grass. This fosters an environment conducive to root expansion.
Acclimatization
Allow the indian yellow-eyed grass plant to adjust to its new surroundings by placing it in the new spot for a couple of days before transplanting. This helps minimize shock.
Plant Placement
Position the indian yellow-eyed grass plant in the center of the prepared hole. Ensure the top of the root ball is level with the surrounding soil surface. Adjust the soil at the bottom of the hole if necessary.
Backfilling
Refill the hole with the soil you removed, gently pressing it down around the root ball. Make sure there are no air pockets, as these can hinder root growth.
Watering
Water the indian yellow-eyed grass plant thoroughly immediately after transplanting to help settle the soil and reduce transplant shock.
Mulching
Apply a layer of mulch around the base of the indian yellow-eyed grass plant to retain moisture and regulate soil temperature. Be sure to leave a gap around the stem to prevent rot.
Staking
If the indian yellow-eyed grass plant is tall or has a slender stem, you might need to stake it to provide support while it establishes itself in the new location.
How Do You Care For Indian Yellow-eyed Grass After Transplanting?
Watering
Keep the soil around the indian yellow-eyed grass consistently moist, but not waterlogged, for the initial weeks after transplanting to encourage strong root development.
Monitoring
Regularly inspect the indian yellow-eyed grass for indications of transplant shock, such as wilting or yellowing leaves, and provide additional care as needed.
Weeding
Keep the area around the indian yellow-eyed grass free of competing weeds that can vie for nutrients and water.
Fertilizing
Feed the indian yellow-eyed grass with a balanced fertilizer approximately one month after transplanting to support its growth.
Troubleshooting Common Issues with Indian Yellow-eyed Grass Transplantation.
When is the best time to transplant indian yellow-eyed grass?
The optimal transplanting period for indian yellow-eyed grass is late summer to mid-fall for best growth.
How far apart should I space indian yellow-eyed grass plants?
Space indian yellow-eyed grass plants 12-18 inches (30-45 cm) apart to allow for healthy development.
What kind of soil does indian yellow-eyed grass need after transplanting?
Indian yellow-eyed grass prefers well-drained, slightly acidic to neutral soil for optimal results.
How do I avoid transplant shock in indian yellow-eyed grass?
Water indian yellow-eyed grass thoroughly before and after transplanting to minimize transplant shock.
What light conditions are ideal for newly transplanted indian yellow-eyed grass?
Place transplanted indian yellow-eyed grass in full sun to partial shade for ideal growth conditions.
Should I fertilize indian yellow-eyed grass after transplanting?
Apply a balanced fertilizer sparingly after transplanting indian yellow-eyed grass to boost growth.
How deep should I plant indian yellow-eyed grass after transplanting?
Plant indian yellow-eyed grass at the same depth it was previously growing to promote root stability.
How often should I water indian yellow-eyed grass after transplanting?
Water indian yellow-eyed grass regularly to keep the soil consistently moist until the plant is established.
Can I transplant indian yellow-eyed grass into a container?
Yes, indian yellow-eyed grass can be transplanted into a container with sufficient drainage and proper soil mix.
What should I do if indian yellow-eyed grass leaves start yellowing after transplanting?
Check for proper watering, avoid waterlogged soil, and ensure adequate sunlight to prevent yellowing.



