How to Transplant Rusty woodsia?
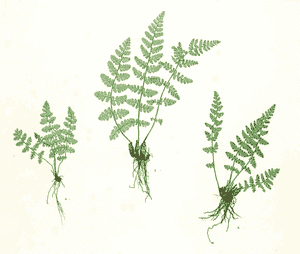
For rusty woodsia, the ideal period for relocation spans from the onset of spring's renewal to its concluding lushness, facilitating prime root development. Select a site that emulates its natural, stony habitats with dappled sunlight for effective acclimation.
What Preparations are Needed Before Transplanting Rusty Woodsia?
What is the Ideal Time for Transplanting Rusty Woodsia?
The best season for moving rusty woodsia is from the start of early spring to the peak of late spring. This period offers the mild temperatures and increasing daylight rusty woodsia needs for root development. Relocating rusty woodsia as nature awakens in spring ensures roots have ample time to establish before summer's heat, promoting robust, healthy growth. This timing also benefits from spring moisture, which aids root hydration. Remember, a gentle touch to the soil during this season sets rusty woodsia up for flourishing success!
How Much Space Should You Leave Between Rusty Woodsia Plants?
When preparing a new spot for your rusty woodsia, maintain a friendly distanceâapproximately 6-12 inches (15-30 cm) apart. This ensures they have sufficient room to thrive without overcrowding!
What is the Best Soil Mix for Rusty Woodsia Transplanting?
To prepare the ground for your rusty woodsia, incorporate organic material into well-draining soil. A small amount of compost or a starter fertilizer will make the earth welcoming for the young plants. Consider it a comfortable bed for their roots!
Where Should You Relocate Your Rusty Woodsia?
Your rusty woodsia enjoys some sun exposure but prefers not to be scorched. Find a location that provides partial shade, where they can enjoy the gentle morning sun and rest in the afternoon's filtered light.
What Equipments Should You Prepare Before Transplantation Rusty Woodsia?
Gardening Gloves
To safeguard your hands while handling soil and plants.
Shovel or Spade
For excavating the plant from its original spot and preparing the new planting site.
Hand Trowel
Useful for detailed tasks or when moving smaller specimens.
Watering Can or Hose
To hydrate the plant during and after its relocation.
Wheelbarrow or Garden Cart
To move the plant and soil if necessary.
Garden Fork
To loosen and aerate the soil in the planting area.
Pruning Shears
To trim any damaged roots or foliage.
How Do You Remove Rusty Woodsia from the Soil?
How Do You Remove Rusty Woodsia from the Soil?
From Ground: First, moisten the rusty woodsia's soil. Then, dig a wide trench around the plant with a shovel or spade, ensuring the root ball stays intact. Carefully work the spade beneath the root ball to lift the plant from its initial location.From Pot: Water the rusty woodsia thoroughly. Turn the pot on its side, tap the base, and gently slide the plant out while supporting the root ball. If it doesn't release easily, run a hand trowel along the inner edge to loosen it.From Seedling Tray: Water the seedling tray to dampen the soil, which facilitates the removal of the rusty woodsia. Gently press the bottom of each cell to push the seedling up and out, taking care not to harm the delicate roots.
Step-by-Step Guide for Transplanting Rusty Woodsia
Preparation
Water the rusty woodsia, especially if it's being moved from the ground, to minimize root damage during extraction.
Digging Up
Using a shovel or spade, carefully dig around and beneath the rusty woodsia to remove it with a substantial amount of soil, keeping the root system intact.
Transporting
Move the rusty woodsia to its new spot. A wheelbarrow can assist with heavier plants to prevent undue strain or harm.
Planting Hole
Dig a hole in the ground that is twice the width of the root ball and the same depth to encourage root expansion.
Adjustment
Position the rusty woodsia in the hole at the correct height. The top of the root ball should be level with the ground surface.
Backfilling
Carefully refill the hole with soil, gently firming it in place without excessive compaction, to allow for water and air circulation.
Watering In
Water the rusty woodsia thoroughly after planting to settle the soil around the roots and eliminate air pockets.
How Do You Care For Rusty Woodsia After Transplanting?
Supporting Stems
If the rusty woodsia has elongated stems, provide support with stakes or a trellis to prevent breakage.
Mulching
Apply a layer of mulch around the base of the rusty woodsia to retain moisture and suppress weeds.
Monitoring Health
Observe the rusty woodsia for indications of stress, such as wilting or yellowing leaves, and respond appropriately with necessary care.
Root Establishment
Allow the rusty woodsia to prioritize root establishment before encouraging top growth. Delay fertilizing until it has adapted to its new location.
Troubleshooting Common Issues with Rusty Woodsia Transplantation.
When is the best time to transplant rusty woodsia?
The ideal period for relocating rusty woodsia is from early to late spring, offering a combination of mild weather for root establishment.
How far apart should I space rusty woodsia plants?
For healthy development, space rusty woodsia approximately 6-12 inches (15-30 cm) apart to provide ample room for growth.
Why are my rusty woodsia plants wilting after transplanting?
Post-transplant wilting may be due to root shock. Keep the soil consistently moist and shield the plants from intense sun until they recover.
How deep should I plant rusty woodsia roots when transplanting?
The root ball should be planted at its original growing depth, avoiding excessive depth to prevent root rot.
Can I transplant rusty woodsia on a hot, sunny day?
Transplanting rusty woodsia on a cool, overcast day is preferable to reduce transplant stress and the risk of dehydration.
What type of soil is best for transplanting rusty woodsia?
Utilize well-draining soil rich in organic matter to provide rusty woodsia with the optimal medium for root growth.
How much water does rusty woodsia need after transplanting?
Immediately after transplanting, water rusty woodsia thoroughly and then maintain a consistent watering schedule to keep the soil moist but not waterlogged.
What should I do if rusty woodsia leaves turn yellow after transplanting?
Yellowing can indicate overwatering or nutrient deficiency. Ensure proper drainage and consider a balanced, slow-release fertilizer.
Is it necessary to fertilize rusty woodsia after transplanting?
Wait 4-6 weeks before fertilizing to allow rusty woodsia to settle and begin new growth, then feed sparingly with a balanced fertilizer.
How do I prepare rusty woodsia for transplanting?
Gently dig around rusty woodsia, preserving as much root as possible, prepare a hole at the new site, and transplant maintaining the original depth.



