How to Transplant Sandankwa viburnum?
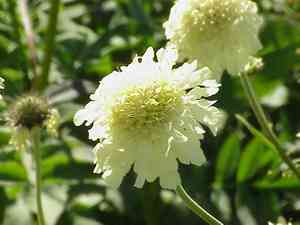
Promote vigorous development for sandankwa viburnum by relocating it during the revitalizing garden period of early to mid-spring. Select a location offering partial shade and soil that drains effectively. Tender handling and meticulous attention to the root system will guarantee a prosperous transfer.
What Preparations are Needed Before Transplanting Sandankwa Viburnum?
What is the Ideal Time for Transplanting Sandankwa Viburnum?
The best time to move sandankwa viburnum is when nature begins its renewal, specifically early to mid-spring. During this period, the mild climate encourages root development without the stress of extreme temperatures. Transplanting sandankwa viburnum at this time leverages the plant's natural growth cycle, giving it ample opportunity to settle into its new spot before the summer heat or winter cold. This offers sandankwa viburnum a strong start in its new home, boosting its chances for year-round vitality.
How Much Space Should You Leave Between Sandankwa Viburnum Plants?
When preparing to plant sandankwa viburnum, position the planting holes approximately 4-5 feet (1.2-1.5 meters) apart. This spacing provides enough room for the plants to expand without competing for space. Remember, these plants enjoy spreading out!
What is the Best Soil Mix for Sandankwa Viburnum Transplanting?
For your sandankwa viburnum, select soil that drains well, ideally a blend of sand, silt, and a small amount of clay. Before planting, incorporate a foundational layer of slow-release fertilizer to give your plant a nutrient-rich beginning.
Where Should You Relocate Your Sandankwa Viburnum?
Choose a location where your sandankwa viburnum will receive full to partial sunlight. While they can endure some shade, providing them with their daily sun exposure will result in a healthier, more attractive plant!
What Equipments Should You Prepare Before Transplantation Sandankwa Viburnum?
Gardening gloves
Offer protection for your hands when handling soil and the sandankwa viburnum plant, as root and soil manipulation will be necessary during the transplanting process.
Shovel or Spade
Essential for digging around and beneath the sandankwa viburnum plant, crucial for its removal from its original spot or container.
Garden Trowel
Useful for more precise removal from a seedling tray or for fine-tuning the transplant hole.
Garden Hose or Watering Can
Ensures the soil is adequately moistened before and after transplanting, aiding root extraction and subsequent settling.
Pruning Shears
May be needed to trim damaged roots or shape the plant following transplantation.
Wheelbarrow or Plant Dolly
Allows for effortless transportation of the plant from its initial location to the new site without physical strain.
How Do You Remove Sandankwa Viburnum from the Soil?
How Do You Remove Sandankwa Viburnum from the Soil?
From Ground: Start by thoroughly watering the sandankwa viburnum plant to loosen the soil around its root system. Carefully dig a trench around the plant using a shovel or spade, leaving ample room to keep the root ball intact. Once the trench is sufficiently wide and deep, slide the spade under the root ball to gently lift the plant, minimizing root damage.From Pot: Begin by watering the soil in the pot to moisten the root ball. Gently tilt the pot sideways while supporting the sandankwa viburnum plant at the base of its stem. Slide the plant out, taking care to keep the root ball whole.From Seedling Tray: Start by using a garden trowel to loosen the soil around the base of the sandankwa viburnum plant. Slip the trowel beneath the young plant, lifting it in one smooth motion, preserving as much root structure as possible to help it adapt to its new location.
Step-by-Step Guide for Transplanting Sandankwa Viburnum
Hole preparations
Dig a hole in your chosen spot that is at least twice the width of the root ball, and deep enough for the sandankwa viburnum plant to sit at the same soil level as it was previously. Ensure the hole's sides are sloped and not overly compacted.
Plant placement
Position your sandankwa viburnum plant in the middle of the hole, making sure the plant's top is level with the ground. Spread out the roots within the hole.
Soil backfill
Refill the hole with the soil you removed earlier, pressing gently to eliminate large air pockets, but avoid compacting the soil around the roots. Water lightly to help the soil settle.
Final Adjustments
Make any necessary adjustments to ensure the plant is upright and at the correct depth. Double-check that the root collar is level with the surrounding soil.
How Do You Care For Sandankwa Viburnum After Transplanting?
Watering
During the initial period after transplanting, keep the soil around the sandankwa viburnum consistently moist, but not waterlogged, to help the plant establish itself in its new environment.
Pruning
Remove any damaged or diseased branches to lessen stress on the sandankwa viburnum. Trim the plant, if needed, to maintain its compact form.
Mulching
Apply a generous layer of organic mulch around the sandankwa viburnum, ensuring it doesn't touch the trunk, to retain soil moisture and suppress weed growth.
Monitoring
Observe the sandankwa viburnum's progress in the weeks following the transplant. Look for any indications of transplant shock, such as wilting or yellowing leaves.
Troubleshooting Common Issues with Sandankwa Viburnum Transplantation.
When is the best time to transplant sandankwa viburnum?
The optimal period to move sandankwa viburnum is during its less active growth phases, typically from early spring to early summer.
What is the optimal distancing for sandankwa viburnum after transplantation?
For ideal growth, sandankwa viburnum should be spaced 4-5 feet (1.2 - 1.5 meters) apart. This ensures proper air circulation and development.
What ground preparation is essential before transplanting sandankwa viburnum?
You should ensure the planting site has well-drained soil, enriched with organic matter. The pH level should be between 5.5 and 6.5.
How deep should the transplant hole for sandankwa viburnum be?
The transplant hole for sandankwa viburnum should be twice as wide as the root ball and of a similar depth. This provides ample space for the roots.
What's the best way to remove sandankwa viburnum for transplanting?
Start by watering sandankwa viburnum, then carefully dig around its base, making sure not to harm any roots. Afterward, gently lift it from its current spot.
How do I handle sandankwa viburnum's roots during the transplantation?
Handle sandankwa viburnum's roots with care to prevent damage, untangle any circling roots, and trim any that are damaged before placing it in the new hole.
What care is necessary for sandankwa viburnum post-transplant?
Keep the soil around sandankwa viburnum consistently moist. Add a layer of mulch about 2 to 3 inches (5 - 7.6 cm) thick to help retain soil moisture.
How often should I water sandankwa viburnum after transplanting?
Initially, water sandankwa viburnum deeply once a week. However, adjust based on weather conditions. Ensure the soil remains consistently damp but not waterlogged.
Should sandankwa viburnum be pruned after transplanting?
Pruning is not immediately necessary after transplanting. However, after a year, you may begin light pruning to maintain sandankwa viburnum's shape and encourage growth.
Does sandankwa viburnum require any specific feed or fertilizer post-transplant?
After the first couple of weeks, feed sandankwa viburnum with a balanced slow-release fertilizer to support new growth and accelerate recovery from the transplantation process.



