How to Transplant Small white clover?
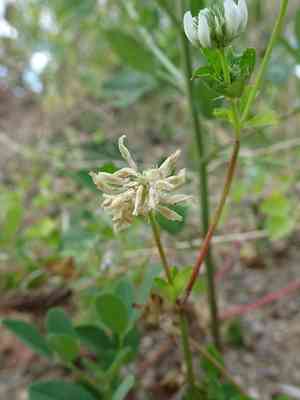
The optimal period for relocating diminutive white clover is as spring reaches its peak, offering temperate atmospheric conditions perfect for root development. Select a brightly lit location featuring soil that drains effectively to foster robust development. Bear in mind, careful manipulation guarantees a smooth relocation.
What Preparations are Needed Before Transplanting Small White Clover?
What is the Ideal Time for Transplanting Small White Clover?
The optimal period for relocating small white clover is as winter's chill recedes, giving way to the gentle warmth of the revitalizing season. Selecting this timeframe ensures the soil is perfectly conditioned for root development, which is crucial for the vigor and longevity of small white clover. This timing, in addition to fostering robust growth, allows the plant's root system to establish itself prior to the summer heat. It's a thoughtful and strategic decision to provide small white clover with the best possible start in its new environment. Another benefit is the moist spring soil, which facilitates a smooth transition for the delicate root system of small white clover, thereby reducing transplant shock and enhancing survival rates.
How Much Space Should You Leave Between Small White Clover Plants?
To allow your small white clover ample room to thrive, aim for a separation of approximately 6-8 inches (15-20 cm) between each specimen. This ensures each individual plant has adequate space to breathe and grow without excessive competition for nutrients.
What is the Best Soil Mix for Small White Clover Transplanting?
For your small white clover, you'll want to prepare a planting area with well-draining soil that is rich in organic matter. A suitable foundational fertilizer to incorporate is a balanced 10-10-10 blend, which you can apply according to package directions before planting.
Where Should You Relocate Your Small White Clover?
Your small white clover will flourish in a location in your garden that receives full sun to partial shade. Endeavor to find a spot that gets at least 4 to 6 hours of sunlight daily, allowing them to happily absorb the rays and prosper!
What Equipments Should You Prepare Before Transplantation Small White Clover?
Gardening Gloves
To safeguard your hands while handling soil and plants.
Shovel or Spade
For excavating and lifting the plant's root ball.
Watering Can
To hydrate the plant before and after its relocation.
Measuring Tape
To determine the correct spacing between plants.
Pruning Shears
To trim any damaged roots or foliage.
Garden Fork
To loosen and aerate the soil at the new planting site.
Mulch
To aid in moisture retention and soil temperature regulation after transplant.
Wheelbarrow or Plant Pot
For moving the plant from its original spot to the new location.
How Do You Remove Small White Clover from the Soil?
How Do You Remove Small White Clover from the Soil?
From Ground: First, moisten the soil around the small white clover plant by watering it. Next, excavate a wide trench around the plant using a shovel or spade, ensuring the plant's root ball remains intact. Carefully maneuver the spade beneath the root ball to lift the plant from its initial position.From Pot: Hydrate the soil in the pot to facilitate easier removal of the small white clover plant. Incline the pot sideways and gently tap or compress the sides to loosen the soil. Carefully tip the plant out while supporting the root ball.From Seedling Tray: Dampen the soil in the seedling tray to simplify removal. Using a fork or your fingers, gently dislodge the small white clover plantlet from its compartment, taking care not to harm the delicate roots.
Step-by-Step Guide for Transplanting Small White Clover
Preparation
Prior to transplanting your small white clover, thoroughly water the plant in its current location to ease the transition and minimize stress.
Digging the Hole
At the new site, excavate a hole that is twice the width of the small white clover's root ball and of equal depth. This will provide ample space for the roots to spread.
Root Ball Inspection
Gently remove any weeds or debris from around the root ball. If the roots are densely coiled, gently loosen them with your fingers to encourage outward growth.
Placing the Plant
Carefully position the small white clover into the hole, ensuring that the top of the root ball is level with the surrounding soil surface.
Refilling the Hole
Backfill the hole around the root ball with soil, gently firming it down to eliminate any significant air pockets.
Watering
Water the small white clover deeply immediately after planting to settle the soil and hydrate the roots. This is a crucial step for helping the plant establish.
Mulching
Apply a layer of mulch around the base of the small white clover, being careful to keep it away from the plant's stems to prevent rot. The mulch will help maintain soil moisture and temperature.
Supporting the Plant
If necessary, add a stake or plant support to help the small white clover maintain its posture and protect it against strong winds.
How Do You Care For Small White Clover After Transplanting?
Watering
Ensure your small white clover receives consistent moisture, especially during the initial weeks. However, avoid overwatering, which can be as detrimental as drought.
Support Maintenance
Inspect and adjust any stakes or supports as your small white clover grows to prevent damage to the plant.
Weed Control
Keep the area around your small white clover free of weeds, which can compete for nutrients and water.
Monitoring
Regularly check your small white clover for signs of stress, such as wilting or discolored leaves, and take prompt action to address any issues.
Troubleshooting Common Issues with Small White Clover Transplantation.
When is the best time to transplant small white clover?
Transplant small white clover from early to late spring for optimal root establishment before summer heat.
How far apart should I space small white clover for proper growth?
Space small white clover about 6-8 inches (15-20 cm) apart to give them enough room to flourish.
Can small white clover be transplanted during summer?
It's not ideal. Transplanting small white clover during cooler spring months helps minimize transplant shock and promotes better rooting.
What soil prep is needed before transplanting small white clover?
Enrich the soil with organic matter and ensure it is well-draining to provide a nurturing environment for small white clover.
How much should I water small white clover after transplanting?
Water small white clover thoroughly after transplanting to settle the soil and provide good contact with roots, then maintain even moisture.
What's the best way to handle small white clover during transplant?
Gently remove small white clover from its current container, taking care not to damage roots, and place it in a prepared hole.
After transplanting, why is my small white clover wilting?
Wilting may occur from root disturbance or lack of water. Ensure proper soil moisture and avoid root damage during transplant.
Should I use fertilizer when transplanting small white clover?
It's better to use compost rather than strong fertilizers which can harm delicate roots of small white clover during transplanting.
How deep should the hole be when transplanting small white clover?
The hole should be just deep enough for the root ball, allowing small white clover's crown to be level with the soil surface.
Why are my transplanted small white clover plants dying?
Check for root rot, pests, or disease. Ensure small white clover is in well-draining soil and not over-watered or under-watered.



