How to Transplant Zig-zag clover?
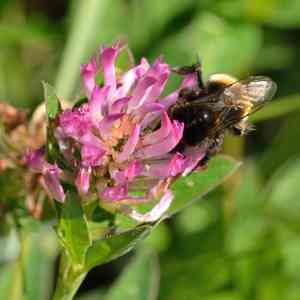
For optimal transplanting of zig-zag clover, aim for the pleasant temperatures of late spring through early summer, or the moderate chill of mid to late autumn, to ensure robust root development. Select a location bathed in sunlight with soil that drains effectively for your zig-zag clover's new placement. Should it be necessary, enrich the soil with organic material to boost its vitality.
What Preparations are Needed Before Transplanting Zig-zag Clover?
What is the Ideal Time for Transplanting Zig-zag Clover?
The best times to move 'zig-zag clover' are from the warmth of late spring into early summer, or during the cooler period of mid-autumn until late fall. Shifting 'zig-zag clover' during these seasons takes advantage of mild temperatures and good soil conditions, which are vital for root establishment without the strain of harsh weather. A helpful tip: these periods provide a gentle transition for 'zig-zag clover', helping it flourish in its new spot with minimal issues. Remember, a successful relocation at these times sets the stage for strong growth.
How Much Space Should You Leave Between Zig-zag Clover Plants?
For your zig-zag clover, aim to provide ample room to grow. Arrange each plant about 6-8 inches (15-20 cm) apart. This space gives each zig-zag clover enough room to flourish without competing for nutrients and sunlight.
What is the Best Soil Mix for Zig-zag Clover Transplanting?
Prepare a loamy and fertile soil for your zig-zag clover that's rich in organic matter. Mix in a base fertilizer like compost or a balanced slow-release granular fertilizer to give your zig-zag clover a steady diet as it establishes.
Where Should You Relocate Your Zig-zag Clover?
Choose a spot for your zig-zag clover that basks in partial sunshine. Although zig-zag clover enjoys sunlight, a little afternoon shade will be perfect, especially in hotter climates, to keep it thriving without stress.
What Equipments Should You Prepare Before Transplantation Zig-zag Clover?
Gardening Gloves
To protect your hands while working with the soil and plant.
Shovel or Spade
For digging around and lifting the zig-zag clover plant.
Watering Can or Hose
For watering the zig-zag clover before and after transplanting.
Trowel
To adjust the soil in the new planting hole and handle smaller root sections.
Pruners
For trimming any damaged roots or foliage as needed.
Wheelbarrow or Garden Cart
To transport the zig-zag clover and soil without straining your back.
Organic Mulch
To help retain soil moisture and suppress weeds around the new planting area.
How Do You Remove Zig-zag Clover from the Soil?
How Do You Remove Zig-zag Clover from the Soil?
From Ground: Water the zig-zag clover to dampen the soil, which will make it easier to work with. Carefully dig a wide perimeter around the plant using a shovel, being cautious not to damage the root system. Slide the spade beneath the root ball and gently lift the zig-zag clover from its original spot.From Pot: Ensure the soil is moist to prevent root damage. Tilt the pot sideways and gently tap the edges to loosen the root ball. Rotate and continue tapping until the zig-zag clover slides out with the root ball intact.From Seedling Tray: Moisten the soil to ensure roots don't stick to the tray. Use a trowel or your fingers to gently lift the zig-zag clover seedling, ensuring a good amount of soil remains around the roots to minimize stress.
Step-by-Step Guide for Transplanting Zig-zag Clover
Preparation
The day before transplanting, water your zig-zag clover thoroughly to hydrate it and make it easier to remove from its current location.
Digging the Hole
Dig a hole in the new location that is twice as wide as the root ball and equally deep allowing your zig-zag clover ample space to expand.
Root Ball
Prepare the zig-zag clover for the move by gently removing soil around the roots, and carefully untangle any roots if necessary using your fingers or a trowel.
Placing the Plant
Carefully place the zig-zag clover in the center of the hole. The top of the root ball should be level with the surrounding soil surface.
Filling In
Backfill the hole with native soil that was removed, gently firming it down around the roots to eliminate air pockets and provide support.
Watering
After planting, water the zig-zag clover generously to help settle the soil and provide adequate moisture for the roots.
Stabilizing
If the zig-zag clover appears unstable, stake it temporarily until its roots are established enough to support it.
Mulching
Apply a layer of organic mulch around the base of the zig-zag clover, keeping it away from the plant's stems to avoid rot.
How Do You Care For Zig-zag Clover After Transplanting?
Ongoing Watering
Water the zig-zag clover deeply and regularly to maintain consistent soil moisture, particularly during dry periods during the first growing season.
Checking Stakes
Occasionally check any supportive stakes to ensure they're not damaging the zig-zag clover or hindering its growth.
Mulch Inspection
Maintain the mulch layer to retain soil moisture and prevent weed growth, refreshing it if it degrades over time.
Observing Plant Health
Observe the zig-zag clover regularly for signs of transplant shock, such as wilting or yellowing leaves, and troubleshoot any issues promptly.
Pruning
Prune the zig-zag clover only to remove dead or damaged foliage, which will encourage healthy growth and shape the plant.
Troubleshooting Common Issues with Zig-zag Clover Transplantation.
What's the ideal time to transplant zig-zag clover?
The perfect window for transplanting zig-zag clover is from late spring to early summer or from mid-fall to late fall, allowing for stable growth.
How far apart should I space zig-zag clover when transplanting?
Give each zig-zag clover about 6-8 inches (15-20 cm) of space to encourage proper growth and airflow.
Why is my zig-zag clover wilting after transplanting?
Wilting can signal stress from a move. Ensure the soil is moist, and the plant is shaded from intense sun for a few days.
How deep should I plant zig-zag clover's roots?
The roots should be planted at the same depth they were growing previously to avoid stress on the plant.
Can I transplant zig-zag clover during the heat of summer?
Transplanting during extreme heat can stress zig-zag clover. It's best to wait for milder temperatures to ensure a successful move.
Why are my transplanted zig-zag clover plants not thriving?
Ensure they're getting enough water but not too much, and check if they are planted at the proper depth with adequate spacing.
What soil conditions does zig-zag clover require for successful transplanting?
Use well-draining soil rich in organic matter. Zig-zag clover prefers a balance between moisture retention and drainage.
How can I protect zig-zag clover after transplanting?
Mulch around the base with organic material to retain moisture, suppress weeds, and protect roots from temperature extremes.
Should I fertilize zig-zag clover after transplanting?
Wait a few weeks before fertilizing to allow zig-zag clover to establish. Then use a balanced fertilizer according to label instructions.
How do I acclimate zig-zag clover before transplanting?
Gradually expose zig-zag clover to outdoor conditions over a week to toughen up the plant before the actual transplant.



