How to Transplant Carolina clover?
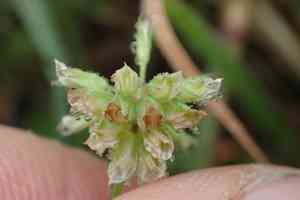
The most favorable period for relocating carolina clover is during the revitalizing span from early to late spring. Select a spot that receives full sun to partial shade and features soil with good drainage to encourage robust development. Should it be necessary, amend the planting area to aid in its establishment.
What Preparations are Needed Before Transplanting Carolina Clover?
What is the Ideal Time for Transplanting Carolina Clover?
For carolina clover, the perfect time for relocation spans from the start of early season growth to the peak of late season bloom. Moving them during this period ensures they have sufficient time to settle into their new environment before summer heat. By transplanting in this mild-weather timeframe, carolina clover benefits from cooler, damp soil that encourages root development, leading to a strong beginning. Gentle spring sunlight and increasing daylight hours offer the ideal balance for carolina clover to flourish post-transplant, guaranteeing a lush, vibrant display.
How Much Space Should You Leave Between Carolina Clover Plants?
Before planting your carolina clover, ensure they have ample room to thrive. Position them approximately 12 inches (30 cm) to 3 feet (91 cm) apart. This provides each plant enough space to reach its full potential without competing for nutrients.
What is the Best Soil Mix for Carolina Clover Transplanting?
For the healthiest carolina clover, prepare a well-draining soil bed enriched with organic matter. Incorporating a balanced, slow-release fertilizer will provide the necessary nutritional boost. Aim for soil that is loamy and rich, but not excessively heavy or clay-like.
Where Should You Relocate Your Carolina Clover?
When choosing a new spot for carolina clover, seek out a sunny area in your garden. Carolina clover prefer sunlight but can endure partial shade. The optimal location will receive at least 6 hours of sunlight daily to ensure your carolina clover flourish.
What Equipments Should You Prepare Before Transplantation Carolina Clover?
Gardening Gloves
To safeguard your hands while handling soil and plants.
Shovel or Spade
For excavating the plant and preparing the new planting site.
Watering Can or Hose
To hydrate the plant before and after its relocation.
Trowel
For more precise handling of smaller plants or in confined areas.
Garden Fork
To loosen the soil around the root ball during removal, if required.
Pruning Shears
To trim any damaged roots or foliage prior to transplanting.
Wheelbarrow or Garden Cart
To move the plant and soil without causing undue strain to the plant or gardener.
Bucket or Container
To hold the plant and its soil while moving it to the new spot.
How Do You Remove Carolina Clover from the Soil?
How Do You Remove Carolina Clover from the Soil?
From Ground: Hydrate the carolina clover plant to moisten the soil, facilitating easier and less stressful extraction for the plant. Then, carefully dig a wide circle around the plant with a shovel or spade, taking care not to harm the root ball. Gently work the tool beneath the roots to lift the plant from the ground.From Pot: Water the carolina clover plant to loosen the soil. Turn the pot on its side and gently tap it to dislodge the plant. Support the plant by its base and slowly ease it out, ensuring the root ball remains intact.From Seedling Tray: Water the carolina clover seedlings to ensure the soil is damp. Use a trowel or your fingers to carefully ease the seedlings from their compartments, being cautious not to damage their delicate roots.
Step-by-Step Guide for Transplanting Carolina Clover
Preparation
Start by watering the carolina clover plant in its original spot to lessen transplant shock. Ensure the plant's soil is moist but not waterlogged.
Digging Out
Using a shovel or spade, carefully dig around the plant's perimeter, creating a wide margin to protect the root system. Gently work your tool under the plant to free it from the ground.
Root Ball Care
Examine the root ball for any damaged roots and trim them with pruning shears. Try to keep as much of the root ball and surrounding soil intact as possible to minimize shock.
Transport
Lift the carolina clover plant with care and place it in a wheelbarrow, garden cart, or container to move it to the new planting location.
Planting Hole
Dig a hole in the new location. The hole should be twice as wide as the root ball and of equal depth so that the plant is at the same level it was previously growing.
Placement
Position the carolina clover plant in the center of the hole. Fill in around the root ball with soil, firming gently to eliminate air pockets.
Watering In
Water the carolina clover plant thoroughly after planting, ensuring the soil settles around the roots to provide good contact and reduce air pockets.
How Do You Care For Carolina Clover After Transplanting?
Initial Watering
Water the carolina clover plant generously immediately after transplanting to help settle the soil and remove air gaps around the roots.
Regular Monitoring
Check the plant daily for the first couple of weeks and water as needed to keep the soil consistently moist.
Mulching
Apply a layer of organic mulch around the base of the carolina clover to retain moisture and regulate soil temperature.
Pruning
Snip off any dead or damaged leaves to direct the carolina clover plant's energy towards root establishment.
Supporting
Provide support if the carolina clover plant shows signs of stress or cannot remain upright on its own.
Troubleshooting Common Issues with Carolina Clover Transplantation.
When is the best time to transplant carolina clover?
Ideally, transplant carolina clover during the pleasant days of early to late spring for optimal root establishment.
What spacing is recommended for carolina clover when transplanting?
Aim for a distance of 12 inches (30 cm) to 3 feet (91 cm) between plants for ample growth room.
How do I prepare the soil for carolina clover transplantation?
Enrich the soil with compost or well-rotted manure, ensuring it's loose and well-draining before transplanting.
How much should I water carolina clover after transplanting?
Water deeply right after transplanting, then maintain moderate moisture, especially during its initial growth phase.
What should I do if carolina clover wilts after transplanting?
Ensure the soil is moist and the plant is shielded from intense midday sun. Consider if the roots were adequately settled during planting.
Can transplant shock affect carolina clover, and how to mitigate it?
Transplant shock can occur. To minimize it, transplant on overcast days or in the evening, and water thoroughly.
Is it necessary to prune carolina clover when transplanting?
Pruning isn't usually required. However, removing damaged leaves can encourage healthier growth post-transplant.
How deep should the hole be for transplanting carolina clover?
Dig a hole twice as wide and the same depth as the root ball to allow roots to spread comfortably.
What are the signs of successful carolina clover transplantation?
Successful transplantation is indicated by new foliage growth and the absence of wilting or yellowing leaves.
How to protect transplanted carolina clover from pests?
Regularly inspect for pests and use appropriate organic pest control methods, encouraging a healthy start for carolina clover.



