How to Transplant Tosa spirea?
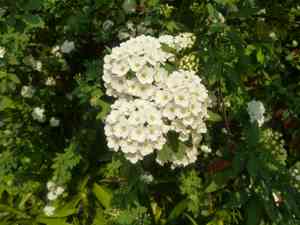
Tosa spirea thrives when relocated during the supportive period of mid-to-late spring or early summer, since warmer ground encourages root development. Select a site with full sun to partial shade. Steer clear of excessively hot environments for a smooth acclimation and a flourishing garden.
Necessary Preparations Before Relocating Tosa Spirea?
When is the Best Time to Move Tosa Spirea?
The perfect time for relocating tosa spirea is 'mid to late spring.' During this period, the ground warms up, and the danger of frost has passed, enabling stable root growth and minimizing transplant shock. Moving tosa spirea in spring ensures robust development and helps establish strong roots before the summer heat.
What Distance Should Be Maintained Between Tosa Spirea Plants?
Ensure each tosa spirea is positioned approximately 3-4 feet (0.9-1.2 meters) apart to provide ample room for growth and flourishing. This spacing promotes good air circulation and lessens competition for resources.
Which Soil Mixture is Best for Tosa Spirea Relocation?
Prepare well-draining soil, rich in organic material, for your tosa spirea. A blend of loam and compost works excellently. You can improve the soil by incorporating a balanced, slow-release fertilizer at the base before transplanting.
Where Should Your Tosa Spirea Be Replanted?
Tosa spirea thrives in full sun but can endure partial shade. Select a garden spot that receives at least 6 hours of direct sunlight daily to ensure vigorous growth and vibrant blooms.
What Tools Should You Prepare Before Moving Tosa Spirea?
Gardening Gloves
To safeguard your hands while handling soil and plants.
Hand Trowel
For excavating small holes and working around the plant's root system.
Spade or Shovel
To dig a larger hole and extract the plant from its original spot.
Pruning Shears
To trim any damaged or excessively long roots.
Watering Can or Hose
For hydrating the plant before and after its relocation.
Mulch
To help maintain moisture and regulate soil temperature around the newly transplanted plant.
Wheelbarrow
To transport the plant if it's large or if the new site is distant from the old one.
How Do You Extract Tosa Spirea from the Ground?
How Do You Extract Tosa Spirea from the Ground?
From Ground: First, moisten the soil around the tosa spirea plant. Then, using a shovel or spade, dig a wide trench around the plant, ensuring the root ball remains intact. Carefully work the spade beneath the root ball to lift the plant from its initial location.From Pot: Thoroughly water the tosa spirea plant. Gently tap the pot's sides and bottom to loosen the soil. Tilt the pot and carefully slide the plant out, holding it by the root ball to prevent damage.From Seedling Tray: Water the seedlings. Use a small trowel or your fingers to carefully lift each tosa spirea seedling from the tray, ensuring no harm to the delicate roots. Handle seedlings by their leaves or root ball, not the stem.
Step-by-Step Guide for Relocating Tosa Spirea
Prepare the New Planting Area
Excavate a hole twice as wide and as deep as the tosa spirea's root ball. Ensure it's sufficiently deep to comfortably accommodate the roots without compression.
Ready the Plant
Trim any damaged or overgrown roots using pruning shears. This helps lessen transplant shock and promotes new growth.
Plant the tosa spirea
Place the tosa spirea into the hole, making sure the top of the root ball is level with or slightly above the surrounding soil. Backfill the hole with soil, gently firming it around the roots to remove air pockets.
Water the Plant
Immediately water the newly planted tosa spirea thoroughly to help settle the soil around the roots and provide initial hydration for the plant.
How Do You Care For Tosa Spirea After Relocation?
Watering
Keep the soil around the tosa spirea consistently damp, but not waterlogged, for the initial weeks post-transplant to aid in root establishment.
Mulching
Apply a layer of mulch around the base of the tosa spirea to help retain moisture, suppress weeds, and regulate soil temperature.
Monitoring
Regularly inspect the tosa spirea for signs of transplant shock, such as wilting or yellowing leaves. If necessary, adjust watering or provide temporary shade.
Addressing Common Issues with Tosa Spirea Relocation.
When is the best time to move tosa spirea?
Relocate tosa spirea during mid to late spring or early to late summer for optimal outcomes.
What is the recommended spacing for tosa spirea plants?
Space tosa spirea plants 3 to 4 feet (90 to 120 cm) apart to allow for ample growth.
What is the initial step in moving tosa spirea?
Begin by choosing a site with well-drained soil and adequate sunlight for tosa spirea.
How do I prepare the soil for tosa spirea relocation?
Enhance the soil with organic compost to improve drainage and nutrient content for tosa spirea.
What should I do if tosa spirea shows stress after moving?
Maintain consistently moist, but not waterlogged, soil to help tosa spirea recover from transplant shock.
How deep should I plant tosa spirea in its new spot?
Plant tosa spirea at the same depth it was in its previous location to prevent stress.
Should I trim tosa spirea before moving it?
Yes, lightly prune tosa spirea to reduce water loss and facilitate easier relocation.
What watering routine should I follow after moving tosa spirea?
Water tosa spirea thoroughly right after transplanting, then maintain a regular watering schedule.
Can tosa spirea be moved during hot weather?
Avoid moving tosa spirea during extreme heat; opt for milder mid or late spring, or early or late summer.
Is mulching essential after moving tosa spirea?
Apply a layer of mulch around tosa spirea to retain soil moisture and reduce weed competition.



