How to Transplant Silverleaf nightshade?
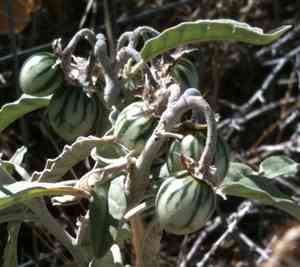
For silverleaf nightshade, the ideal period for relocation is during the spring, especially as temperatures rise but the ground retains its coolness. A location receiving ample sunlight and possessing good drainage is crucial. Careful management of the root system throughout this procedure guarantees effective establishment.
What Preparations are Needed Before Transplanting Silverleaf Nightshade?
What is the Ideal Time for Transplanting Silverleaf Nightshade?
The beginning of early to mid-spring, as the ground thaws from winter, offers an excellent chance for relocating silverleaf nightshade. During this period of mild temperatures and increasing daylight, silverleaf nightshade roots can establish more effectively in their new spot before summer's full intensity. Moving silverleaf nightshade at this time leverages the season's moderate warmth and moisture levels, giving your plant a strong start for vigorous development. Opting for this timing can ensure your silverleaf nightshade flourishes, with a transition smooth enough to delight any gardener.
How Much Space Should You Leave Between Silverleaf Nightshade Plants?
When relocating silverleaf nightshade, it's crucial to provide ample room for growth. Ideally, aim to position each plant approximately 2-3 feet (about 0.6-0.9 meters) apart. This generous spacing will allow each plant to thrive.
What is the Best Soil Mix for Silverleaf Nightshade Transplanting?
For silverleaf nightshade, a soil mixture that drains well provides an excellent habitat. Additionally, consider incorporating some decomposed organic material like cow manure or compost before transplanting for a nutrient-rich foundation, which serves as an ideal initial fertilizer.
Where Should You Relocate Your Silverleaf Nightshade?
Now, the placement! Silverleaf nightshade thrives in sunlight, so find a garden spot that receives abundant sun exposure throughout the day. If it's bathed in sun, it's suitable for silverleaf nightshade. Enjoy your gardening!
What Equipments Should You Prepare Before Transplantation Silverleaf Nightshade?
Gardening Gloves
To safeguard your hands during work.
Garden Spade or Shovel
These tools will be used to carefully excavate the silverleaf nightshade from its original position.
Pruning Shears
Utilize these to trim any damaged or diseased roots prior to transplanting.
Garden Trowel
This will be useful for digging the new hole for the silverleaf nightshade in its new location.
Watering Can
It is essential to hydrate the silverleaf nightshade following its relocation.
Mulch
This will aid in retaining soil moisture and suppressing weed growth.
How Do You Remove Silverleaf Nightshade from the Soil?
How Do You Remove Silverleaf Nightshade from the Soil?
From Ground: First, moisten the silverleaf nightshade to dampen the soil. Dig a wide circle around the plant with your garden spade or shovel, ensuring the plant's root ball remains undisturbed. Carefully work the spade beneath the root ball and gently lift the plant away to preserve as many roots as possible. Use your pruning shears to snip off any damaged or unhealthy-looking roots.From a Pot: If the silverleaf nightshade is in a container, water it first, then turn the pot on its side. Hold the silverleaf nightshade near its base and gently pull while tapping the pot's bottom to encourage it to slide out. Be careful not to yank the silverleaf nightshade, as this could harm the root system.From Seedling Tray: Water the tray initially, then cautiously push the silverleaf nightshade from below through the tray's hole. Support the plant and its root ball, being extra careful not to damage the delicate stem or roots.
Step-by-Step Guide for Transplanting Silverleaf Nightshade
Prepare the New Location
Dig a hole slightly wider and deeper than the silverleaf nightshade's root ball using a trowel. Place a layer of soil back into the hole, ensuring it is loose and not compressed.
Prepare the Plant
After carefully extracting the silverleaf nightshade from its initial spot, examine its root ball and use pruning shears to remove any damaged roots. This encourages robust growth after relocation.
Placing the Plant
Next, position your silverleaf nightshade in the hole, making sure it's neither too deep nor too shallow. The top of the root ball should be level with the ground surface.
Backfill
Carefully refill the hole, gently firming the soil around the silverleaf nightshade. Ensure there are no air pockets, which can lead to root dehydration.
Watering
Immediately after transplanting, thoroughly water the silverleaf nightshade. This will help the plant recover from the shock of relocation and settle into its new environment.
How Do You Care For Silverleaf Nightshade After Transplanting?
Watering
Continuously monitor the soil's moisture level. For the initial few weeks, keep the soil damp but not saturated. This is crucial for healthy root establishment.
Pruning
Trim any withered or dead foliage to redirect the silverleaf nightshade's energy towards new growth.
Mulching
Apply a layer of mulch around the plant's base, but avoid touching the stem. This aids in water retention and weed suppression.
Inspecting
Regularly check the silverleaf nightshade for signs of stress or illness, such as wilting or yellowing leaves, to address any potential issues promptly.
Troubleshooting Common Issues with Silverleaf Nightshade Transplantation.
When is the best time to transplant silverleaf nightshade?
The optimal period to relocate silverleaf nightshade is during the S1-S2 phase. This enhances its survival and growth rate.
What distance should I maintain between each silverleaf nightshade during transplantation?
To ensure adequate room for development, maintain a spacing of approximately 2-3 feet (60 - 91 centimeters) between each plant during relocation.
Why are my transplanted silverleaf nightshade's leaves wilting?
Wilting can occur due to transplant shock - a stress reaction to being moved. It's important to water them sufficiently after transplanting to alleviate this.
What's the best soil type for transplanting silverleaf nightshade?
Well-draining soil is the most suitable choice for relocating silverleaf nightshade. This ensures the roots receive ample water without becoming waterlogged, preventing root rot.
Why is my silverleaf nightshade not flowering after transplantation?
Silverleaf nightshade may not produce blooms immediately after being moved due to the stress of relocation. It should begin flowering once it adapts to its new environment.
Can I transplant silverleaf nightshade indoors?
Yes, you can relocate silverleaf nightshade indoors, but ensure they receive sufficient light, as they are sun-loving plants. Also, maintain the recommended 2-3 feet (60 - 91 centimeter) spacing.
How deep should I dig the hole when transplanting silverleaf nightshade?
The hole should be deep enough to comfortably accommodate the silverleaf nightshade's root ball. This typically means about 10 inches (25 centimeters) deep.
How often should I water silverleaf nightshade after transplantation?
Water silverleaf nightshade adequately immediately after relocation. Then maintain moderate watering until the plant adjusts to its new surroundings. Over-watering can lead to root rot.
Why are pests attacking my transplanted silverleaf nightshade?
Pests might be drawn to stressed silverleaf nightshade after relocation. Apply appropriate, eco-friendly pesticides and ensure your plant is healthy to reduce pest infestations.
Could frost affect my transplanted silverleaf nightshade?
Yes, silverleaf nightshade is vulnerable to frost. If you relocate in colder months, consider measures like covering the plant at night to shield it from frost damage.



