How to Transplant Swordleaf blue-eyed grass?
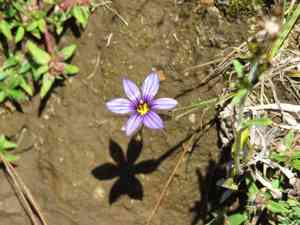
The optimal period for relocating swordleaf blue-eyed grass is from the mild warmth of late spring through early summer, or during the serene chill of late autumn into early winter. Select a location featuring soil that drains effectively and receives partial to full sunlight. Carefully manage the roots during the transplanting process to guarantee a successful transition.
What Preparations are Needed Before Transplanting Swordleaf Blue-eyed Grass?
What is the Ideal Time for Transplanting Swordleaf Blue-eyed Grass?
The optimal period for relocating swordleaf blue-eyed grass spans from late spring's thaw into early summer's warmth, or as autumn's colors fade into the gentle chill of early winter. Moving swordleaf blue-eyed grass during these calm periods provides a natural environment that supports root development without the harsh extremes of mid-summer or deep winter. Additionally, moderate temperatures and consistent moisture levels during these times create an inviting setting for swordleaf blue-eyed grass to flourish. Undertaking relocation during these seasonal windows will give swordleaf blue-eyed grass the nurturing care it needs to thrive anew, ensuring a smooth transition to its new home.
How Much Space Should You Leave Between Swordleaf Blue-eyed Grass Plants?
Hello, gardening enthusiast! Before settling your swordleaf blue-eyed grass into its new spot, allow each plant ample personal room - approximately 12-18 inches (30-46 cm) apart. This spacing enables them to spread their foliage and enjoy the sun without feeling cramped.
What is the Best Soil Mix for Swordleaf Blue-eyed Grass Transplanting?
For swordleaf blue-eyed grass, envision creating a comfortable bed: a well-draining soil rich in organic matter is ideal. Prior to planting, incorporate a general-purpose fertilizer to provide your green companion a hearty welcoming meal. It will show its appreciation with vigorous growth!
Where Should You Relocate Your Swordleaf Blue-eyed Grass?
Sunlight is a cherished companion for swordleaf blue-eyed grass, so select a location where the sun's rays can shine for most of the day. A spot with full to partial sunlight will have your swordleaf blue-eyed grass happily reaching for the sky in no time!
What Equipments Should You Prepare Before Transplantation Swordleaf Blue-eyed Grass?
Gardening Gloves
To safeguard your hands while handling soil and plants.
Spade or Garden Shovel
For excavating the plant and preparing the new planting site.
Garden Trowel
Useful for loosening soil around the root ball and digging smaller holes.
Watering Can or Hose
To hydrate the plant before and after its relocation.
Wheelbarrow or Garden Cart
For moving the plant and soil efficiently.
Pruning Shears
To trim any damaged roots or foliage if necessary.
How Do You Remove Swordleaf Blue-eyed Grass from the Soil?
How Do You Remove Swordleaf Blue-eyed Grass from the Soil?
From Ground: First, irrigate the swordleaf blue-eyed grass plant to moisten the soil, making it easier to manage. Dig a wide trench around the plant using a spade or garden shovel, ensuring the entire root ball remains intact. Gently sever any excessively long roots extending beyond the root ball. Carefully slide the spade beneath the root ball to loosen and lift the plant from its original position.From Pot: Water the swordleaf blue-eyed grass thoroughly to ensure the soil is damp. Turn the pot on its side and gently tap the sides and bottom to loosen the soil. Place your hand around the plant's base, and carefully extract the swordleaf blue-eyed grass from the pot, aiming to keep as much soil around the roots as possible.From Seedling Tray: Water the seedling tray to moisten the soil surrounding the swordleaf blue-eyed grass roots. Use a garden trowel or an appropriate tool to gently lift each swordleaf blue-eyed grass from its cell in the seedling tray, taking care not to harm the roots or stem during the process.
Step-by-Step Guide for Transplanting Swordleaf Blue-eyed Grass
Prepare the New Location
Excavate a hole in the ground that is twice as wide and equally deep as the swordleaf blue-eyed grass's root ball. Loosen the soil at the bottom of the hole and incorporate some organic material to aid root establishment.
Root Ball Preparation
Inspect the swordleaf blue-eyed grass's root ball, carefully removing any dead or damaged roots. If the roots are tightly packed, gently separate them to encourage spreading in the new site.
Transplant Placement
Position the swordleaf blue-eyed grass in the center of the prepared hole. Ensure the top of the root ball is level with the surrounding soil to prevent water accumulation around the stem.
Fill the Hole
Carefully backfill the hole with the excavated soil, gently firming it around the root ball to eliminate air pockets. Water the area thoroughly to help the soil settle.
Stabilize the Plant
If the swordleaf blue-eyed grass is tall or in a windy spot, stake the plant to provide support until its roots are established. Tie the stake loosely to the plant with a soft material to avoid stem damage.
How Do You Care For Swordleaf Blue-eyed Grass After Transplanting?
Initial Watering
Water the swordleaf blue-eyed grass generously immediately after transplanting to help reduce shock and settle any remaining air pockets.
Monitoring
Keep a daily watch on soil moisture, especially during the first couple of weeks, to ensure it's neither too dry nor waterlogged.
Mulching
Apply a layer of mulch around the base of the swordleaf blue-eyed grass to aid in moisture retention and temperature regulation. Be sure not to let the mulch touch the plant's stem.
Support & Protection
Verify that any stakes or protective barriers are secure, and adjust as needed as the plant grows and establishes.
Pruning
Remove any dead or damaged foliage to encourage healthy new growth. However, avoid extensive pruning immediately after transplanting.
Troubleshooting Common Issues with Swordleaf Blue-eyed Grass Transplantation.
What is the best time to transplant swordleaf blue-eyed grass?
The ideal transplanting seasons are late spring to early summer or fall to early winter to ensure swordleaf blue-eyed grass establishes well.
How far apart should I space swordleaf blue-eyed grass when transplanting?
Ideally, position swordleaf blue-eyed grass at least 12-18 inches (30-45 cm) apart to give ample room for growth.
Why is my swordleaf blue-eyed grass wilting after transplanting?
Wilting post-transplant can indicate shock. Minimize stress by ensuring proper soil moisture and partially shading for a few days.
How to choose a suitable location for transplanting swordleaf blue-eyed grass?
Select a spot with full to partial sunlight and well-draining soil to help swordleaf blue-eyed grass thrive after moving.
Can I transplant swordleaf blue-eyed grass during the hot summer months?
It's best to avoid the peak of summer due to intense heat. Transplanting in mild seasons helps swordleaf blue-eyed grass adapt better.
Should I water swordleaf blue-eyed grass immediately after transplanting?
Yes, water swordleaf blue-eyed grass deeply right after transplanting to settle the soil and alleviate transplant shock.
What should I do if the leaves of swordleaf blue-eyed grass turn yellow after transplanting?
Yellowing leaves can be due to overwatering or poor drainage. Verify soil conditions and adjust watering accordingly.
How do I prepare the soil before transplanting swordleaf blue-eyed grass?
Enrich the soil with compost and ensure it's loose and well-draining to facilitate easy root establishment.
How deeply should I plant swordleaf blue-eyed grass when transplanting?
Plant swordleaf blue-eyed grass such that the root ball sits level with or just below the surrounding soil line for best results.
What are signs swordleaf blue-eyed grass has successfully taken root post-transplant?
Look for new growth or stabilized, healthy looking foliage as a sign that swordleaf blue-eyed grass is settling in nicely.



