How to Transplant Hooker's silene?
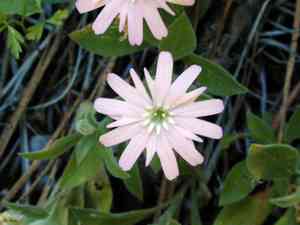
Hooker's silene flourishes when relocated from early spring into its perennial phase, thriving in moderate temperatures and consistent precipitation. Select a bright, adequately drained spot to guarantee robust development and longevity.
What Preparations are Needed Before Relocating Hooker's Silene?
What is the Ideal Time for Relocating Hooker's Silene?
The best time for moving hooker's silene is from the beginning to the end of spring. This timing allows the plant to establish its root system in mild conditions before summer's heat. Relocating during this period helps hooker's silene adapt and grow vigorously, leading to healthier flowers and foliage by summer. Additionally, the soil is typically easier to work with, simplifying the move and reducing root stress.
How Much Space Should You Leave Between Hooker's Silene Plants?
Ensure to space each hooker's silene approximately 12-18 inches (30-45 cm) apart. This will provide ample room for growth and spreading without competition for resources.
What is the Best Soil Mix for Hooker's Silene Relocation?
Prepare well-draining soil rich in organic material for hooker's silene. You can incorporate compost or a balanced base fertilizer to enrich the soil. Aim for a pH level between 6.0 and 7.5.
Where Should You Relocate Your Hooker's Silene?
Select a sunny location that receives full sunlight for about 6-8 hours daily. This will help hooker's silene flourish and produce beautiful blooms.
What Equipments Should You Prepare Before Relocating Hooker's Silene?
Gardening Gloves
To safeguard your hands while handling soil and plants.
Shovel or Spade
For excavating the plant and preparing the new planting site.
Garden Trowel
Useful for precise digging around smaller plants.
Wheelbarrow
To move the plant and soil if necessary.
Watering Can or Hose
For hydrating the plant before and after relocation.
Mulch
To aid in retaining soil moisture and regulating soil temperature.
Stakes and Ties
If the plant requires additional support post-relocation.
How Do You Remove Hooker's Silene from the Soil?
How Do You Remove Hooker's Silene from the Soil?
From Ground: First, hydrate the hooker's silene plant to moisten the soil. Then, excavate a wide trench around the plant using a shovel or spade, ensuring the plant's root ball remains intact. Carefully work the spade beneath the root ball to lift the plant from its original spot.From Pot: Water the hooker's silene thoroughly the day before relocating. Gently tilt the pot on its side and tap the bottom to loosen the root ball. Carefully slide the plant out, supporting the stem and roots.From Seedling Tray: Water the seedlings well before relocating. Use a small garden trowel or your fingers to gently lift the seedling from the tray, keeping as much soil around the roots as possible.
Step-by-Step Guide for Relocating Hooker's Silene
Preparations
Ensure the new planting site is ready before extracting the hooker's silene from its initial location. Dig a hole that is twice as wide and the same depth as the plantâs root ball.
Plant Removal
Carefully remove the hooker's silene from its original spot following the appropriate method as previously described.
Plant Placement
Position the hooker's silene in the prepared hole, ensuring it is upright and the top of the root ball is level with the surrounding soil.
Backfilling
Gently refill the hole with soil, pressing lightly to eliminate air pockets. Be careful not to compact the soil too much.
Watering
Water the plant thoroughly immediately after planting to help settle the soil around the roots.
Mulching
Apply a layer of mulch around the base of the plant to retain moisture and suppress weeds.
How Do You Care For Hooker's Silene After Relocation?
Watering
Keep the soil around the hooker's silene consistently moist, but not waterlogged, for the initial few weeks after relocation to help establish strong roots.
Monitoring
Watch for signs of relocation shock, such as wilting or yellowing leaves, and provide additional care if necessary.
Support
If the hooker's silene is tall or leggy, use stakes and ties to offer extra support until it establishes itself in the new location.
Pruning
Remove any damaged or withered leaves to help the plant direct its energy towards root establishment.
Troubleshooting Common Issues with Hooker's Silene Relocation.
When is the best time to relocate hooker's silene?
The optimal period to relocate hooker's silene is from early spring to late spring.
How much space should I leave between relocated plants?
Ensure a spacing of 12-18 inches (30-45 cm) between each hooker's silene plant.
What type of soil is best for relocating hooker's silene?
Use well-draining soil enriched with organic matter for optimal growth of hooker's silene.
How do I prevent relocation shock in hooker's silene?
Water the plant thoroughly before and after relocating to reduce shock.
Should I fertilize hooker's silene when relocating?
Apply a balanced fertilizer after relocating to help hooker's silene establish quickly.
How deep should I plant hooker's silene when relocating?
Plant hooker's silene at the same depth it was growing in its original container.
What watering schedule should I follow after relocating hooker's silene?
Keep soil consistently moist but not waterlogged for the first few weeks after relocating hooker's silene.
How do I know if hooker's silene is stressed after relocating?
Wilting leaves or slow growth indicate stress; ensure proper watering and avoid direct sun.
Can I relocate hooker's silene in the summer or fall?
It's best to relocate hooker's silene in early to late spring for optimal results.
Do I need to prune hooker's silene before relocating?
Pruning is not necessary but removing damaged leaves can help hooker's silene adjust better.



