How to Transplant Spikemoss?
Spikemoss flourishes when relocated from the beginning to the end of summer, benefiting from ideal warm temperatures. Select shaded, damp spots to guarantee successful rooting. Steer clear of direct sunlight to avert leaf scorching.
What Preparations are Needed Before Transplanting Spikemoss?
What is the Ideal Time for Transplanting Spikemoss?
The best time for relocating spikemoss is from the beginning to the end of summer. Moving it during this period allows the plant to benefit from warm weather and extended daylight, fostering vigorous development. Additionally, higher temperatures and increased humidity aid root establishment and lessen transplant shock, ensuring spikemoss adapts successfully.
How Much Space Should You Leave Between Spikemoss Plants?
For spikemoss, aim to position each plant with a separation of 6-12 inches (15-30 cm). This will provide them with sufficient room to expand and flourish without becoming overcrowded.
What is the Best Soil Mix for Spikemoss Transplanting?
Prepare a well-draining soil blend enriched with organic compost for spikemoss. This plant thrives in soil that is slightly acidic to neutral. Incorporating a phosphorus-rich base fertilizer will aid in developing strong root systems.
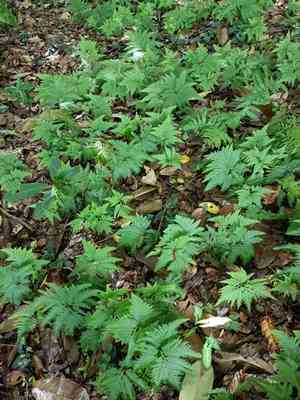
Where Should You Relocate Your Spikemoss?
Spikemoss prefers a location that is shaded or partially shaded. Steer clear of direct, intense sunlight, especially in the afternoon. Morning sun followed by afternoon shade is perfect for keeping spikemoss vibrant and healthy.
What Equipments Should You Prepare Before Transplantation Spikemoss?
Gardening Gloves
To safeguard your hands while working with soil and plants.
Shovel or Spade
For excavating around and beneath the plant to remove it from its current spot.
Trowel
To assist in digging smaller holes and making adjustments during planting.
Watering Can or Hose
To hydrate the plant before and after its relocation.
Pruning Shears
For trimming any damaged roots or foliage.
Mulch
To help maintain moisture in its new environment.
Wheelbarrow
If needed, for transporting the plant to its new site.
How Do You Remove Spikemoss from the Soil?
How Do You Remove Spikemoss from the Soil?
From Ground: First, moisten the spikemoss plant to dampen the soil. Then, excavate a wide trench around the plant using a shovel or spade, ensuring the plant's root ball remains intact. Carefully work the spade beneath the root ball to lift the plant from its original position.From Pot: Water the spikemoss plant thoroughly. Gently tilt the pot on its side and slide the plant out, using a trowel to assist if necessary. Be careful not to harm the root ball.From Seedling Tray: Water the seedlings well before extraction. Use a small trowel or your fingers to carefully lift each spikemoss seedling by its leaves rather than the stem, making sure to retrieve as much of the root system as possible.
Step-by-Step Guide for Transplanting Spikemoss
Site Selection
Choose a location with suitable conditions as specified for your spikemoss plant.
Prepare the Site
Dig a hole that is twice as wide and equally as deep as the plant's root ball.
Amend the Soil
Mix organic material such as compost into the soil removed from the hole.
Transplant the Plant
Place the spikemoss plant in the hole, ensuring the top of the root ball is level with the surrounding soil. Fill in around the root ball with the amended soil, pressing gently to remove air pockets.
Water the Plant
Thoroughly water the spikemoss plant to help the soil settle around the roots.
Add Mulch
Apply a layer of mulch around the plant's base to help retain moisture and suppress weeds.
How Do You Care For Spikemoss After Transplanting?
Watering
Keep the soil around the spikemoss consistently damp, but not waterlogged, for the initial weeks post-transplant to aid in establishing strong roots.
Monitoring
Regularly check the spikemoss for indications of stress, such as wilting or yellowing leaves, and confirm it is receiving adequate moisture.
Fertilizing
Wait several weeks after transplanting before applying any fertilizer to avoid stressing the plant.
Troubleshooting Common Issues with Spikemoss Transplantation.
When is the best time to transplant spikemoss?
Relocate spikemoss from early summer to late summer for optimal growth and establishment.
What spacing should I use when transplanting spikemoss?
Space spikemoss plants 6-12 inches (15-30 cm) apart to encourage healthy development.
How do I prepare the soil for spikemoss transplantation?
Ensure the soil is well-draining and rich in organic matter prior to transplanting.
Should I water spikemoss immediately after transplanting?
Yes, thoroughly water spikemoss after transplanting to help the roots settle.
How deep should the holes be for transplanting spikemoss?
Excavate holes that are just as deep and slightly wider than the root ball.
Can I transplant spikemoss in direct sunlight?
Spikemoss prefers partial to full shade, so avoid direct sunlight when relocating.
What should I do if spikemoss wilts after transplanting?
Increase watering and provide some shade to lessen transplant shock.
Is it necessary to fertilize spikemoss after transplanting?
A light application of balanced fertilizer can assist spikemoss in establishing post-transplant.
How do I handle spikemoss's roots during transplant?
Handle roots gently and prevent damage; spread them out within the hole.
What signs indicate successful transplanting of spikemoss?
New leaf growth and no wilting are indicators that spikemoss has successfully transplanted.


