How to Transplant Annual stonecrop?
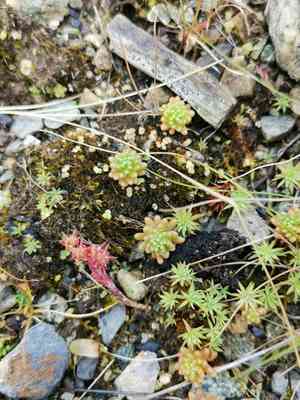
Sedum annuum flourishes optimally when relocated during its active development phase, spanning from the beginning to the end of spring. A bright spot with permeable earth guarantees superior rooting. Exercise caution during handling to minimize disruption to the root system.
What Preparations are Needed Before Transplanting Annual Stonecrop?
What is the Ideal Time for Transplanting Annual Stonecrop?
The best period for relocating annual stonecrop is from the beginning to the end of spring. This timing ensures the ground is sufficiently warm to encourage root development and offers the plant an extended growing season. By moving them during this window, you can maximize their growth potential and guarantee they flourish throughout the summer.
How Much Space Should You Leave Between Annual Stonecrop Plants?
When transplanting annual stonecrop, position each plant 6-12 inches (15-30 cm) apart. This provides them with adequate room to expand and prevents overcrowding.
What is the Best Soil Mix for Annual Stonecrop Transplanting?
Prepare a well-draining, sandy or gravelly soil mixture for annual stonecrop. Incorporate a foundational fertilizer, such as compost or a balanced 10-10-10 blend, to supply essential nutrients.
Where Should You Relocate Your Annual Stonecrop?
Select a sunny spot for annual stonecrop, where it will receive full sunlight for at least 6-8 hours daily. This promotes vigorous growth and vibrant foliage.
What Equipments Should You Prepare Before Transplantation Annual Stonecrop?
Gardening Gloves
To safeguard your hands while handling soil and plants.
Shovel or Spade
For excavating the planting hole and lifting the plant from its original position.
Watering Can
To hydrate the plant before and after its relocation.
Hand Trowel
Useful for smaller digging tasks and extracting seedlings from trays.
Wheelbarrow
Optional, but beneficial for transporting plants and tools around the garden.
How Do You Remove Annual Stonecrop from the Soil?
How Do You Remove Annual Stonecrop from the Soil?
From Ground: First, moisten the annual stonecrop plant to soften the soil. Next, dig a wide trench around the plant using a shovel or spade, ensuring the plant's root ball remains intact. Carefully work the spade beneath the root ball to lift the plant from its initial spot.From Pot: Start by thoroughly watering the plant to loosen the soil. Gently tap the pot's sides to separate the soil from the edges. Carefully slide the plant out of the pot, supporting its root ball to prevent damage.From Seedling Tray: Water the seedlings to make the soil easier to manage. Gently use a hand trowel to loosen the soil surrounding each seedling. Lift the seedlings carefully by their leaves or root ball, taking care not to harm the delicate roots.
Step-by-Step Guide for Transplanting Annual Stonecrop
Site Preparation
Clear the area of weeds and debris. Dig a hole slightly larger than the root ball of your annual stonecrop plant.
Plant Removal
Following the appropriate removal process, carefully transport the plant to its new location.
Plant Placement
Position the annual stonecrop plant in the hole, ensuring it is at the same depth it was originally growing. The top of the root ball should be level with the ground surface.
Soil Backfilling
Fill the hole with soil around the root ball, gently pressing down to eliminate air pockets. Ensure the plant stands firmly upright.
Watering
Water the plant thoroughly to settle the soil around the roots and provide initial hydration.
How Do You Care For Annual Stonecrop After Transplanting?
Mulching
Apply a layer of mulch around the base of the annual stonecrop plant to help retain soil moisture and suppress weeds.
Monitoring
Keep an eye on the plant for the first few weeks to ensure it is adapting well to its new location. Look for signs of stress such as wilting or yellowing leaves.
Support
If the annual stonecrop plant seems wobbly or unstable, consider using small stakes or supports to help it stay upright until it re-establishes.
Troubleshooting Common Issues with Annual Stonecrop Transplantation.
When is the best time to transplant annual stonecrop?
Early spring to late spring is the ideal time for transplanting annual stonecrop.
How should I space annual stonecrop when transplanting?
Maintain a spacing of 6-12 inches (15-30 cm) between each annual stonecrop for optimal growth.
How do I prepare the soil for annual stonecrop transplantation?
Loosen the soil and ensure itâs well-draining before transplanting annual stonecrop. Add compost if needed.
Should I water annual stonecrop immediately after transplanting?
Yes, water annual stonecrop gently right after transplanting to help settle the soil around the roots.
How deep should I plant annual stonecrop during transplantation?
Plant annual stonecrop at the same depth it was in its original pot for best results.
Can annual stonecrop tolerate root disturbance during transplant?
Yes, but handle annual stonecrop gently to minimize root damage during transplanting.
Should I use fertilizer when transplanting annual stonecrop?
Fertilizing is not necessary at transplant. Nutrients from the prepared soil will suffice.
Do I need to provide shade after transplanting annual stonecrop?
Provide partial shade initially if it's very sunny to help annual stonecrop adjust to its new spot.
What type of soil is best for annual stonecrop?
Well-draining sandy or gravelly soil is ideal for annual stonecrop when transplanting.
Is mulching necessary around transplanted annual stonecrop?
Mulch can help retain moisture but avoid direct contact with annual stonecrop stems to prevent rot.



