How to Transplant Kneed Wallaby-grass?
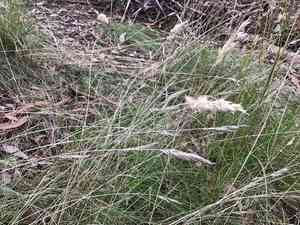
Kneed Wallaby-grass flourishes optimally when relocated in the latter part of winter or early spring, since the lower temperatures and elevated humidity foster root development. Select a bright, adequately drained spot. Steer clear of waterlogged zones to guarantee a successful transplant.
What Preparations are Needed Before Transplanting Kneed Wallaby-grass?
What is the Ideal Time for Transplanting Kneed Wallaby-grass?
Kneed Wallaby-grass, a 'Perennial' plant, should ideally be moved in early to mid-spring. This timing ensures the ground is warm enough for root development, while cooler air temperatures reduce plant stress. Relocating during this period allows the plant ample time to establish before the heat of summer, promoting healthier growth and a stronger root system.
How Much Space Should You Leave Between Kneed Wallaby-grass Plants?
Position each kneed Wallaby-grass approximately 12-24 inches (30-60 cm) apart. This provides sufficient room for the plants to grow and receive adequate sunlight.
What is the Best Soil Mix for Kneed Wallaby-grass Transplanting?
Utilize well-draining soil blended with compost or a balanced fertilizer to prepare the base. Kneed Wallaby-grass prefers soil that is not excessively clayey or sandy.
Where Should You Relocate Your Kneed Wallaby-grass?
Kneed Wallaby-grass thrives in full sun to partial shade. Select a location in your garden that receives at least 4-6 hours of direct sunlight daily.
What Equipments Should You Prepare Before Transplantation Kneed Wallaby-grass?
Gardening Gloves
To safeguard your hands while handling soil and plants.
Hand Trowel
For excavating small holes and carefully lifting plants.
Shovel or Spade
To dig larger holes for relocation.
Garden Fork
To assist in lifting and loosening roots from the ground.
Watering Can or Hose
To hydrate the plant before and after moving it.
Mulch
To retain moisture and regulate soil temperature around the newly planted specimen.
Stakes and Twine
To provide support for the plant if necessary after transplanting.
How Do You Remove Kneed Wallaby-grass from the Soil?
How Do You Remove Kneed Wallaby-grass from the Soil?
From Ground: First, irrigate the kneed Wallaby-grass to moisten the soil. Then, excavate a wide trench around the plant using a shovel or spade, ensuring the root ball remains intact. Carefully work the spade beneath the root ball and lift the plant from its original spot.From Pot: Water the kneed Wallaby-grass thoroughly. Gently tap the sides of the container to loosen the soil. Hold the base of the plant and carefully tip the pot to slide the plant out, supporting the root ball.From Seedling Tray: Water the seedlings gently before extraction. Use a pencil or similar tool to push up from the bottom of the tray, supporting the delicate roots as you lift the kneed Wallaby-grass from the tray.
Step-by-Step Guide for Transplanting Kneed Wallaby-grass
Prepositional Preparation
Select a site with adequate sunlight and room for your kneed Wallaby-grass to flourish. Prepare the soil by loosening it and removing any weeds.
Digging the New Hole
Excavate a hole that is twice as wide and the same depth as the root ball of the kneed Wallaby-grass. This allows ample space for root expansion.
Handling the Plant
Ensure the kneed Wallaby-grassâs root ball is damp. If the roots are tightly bound, gently separate them to encourage growth.
Planting
Position the kneed Wallaby-grass in the hole so that the base of the plant is level with the ground surface. Backfill the hole with soil, pressing gently around the roots to eliminate air pockets.
Watering
Water the kneed Wallaby-grass thoroughly immediately after transplanting to help settle the soil around the roots.
How Do You Care For Kneed Wallaby-grass After Transplanting?
Watering
Keep the soil around the kneed Wallaby-grass consistently moist, but not waterlogged, for the first few weeks after transplanting to help establish strong roots.
Mulching
Apply a layer of mulch around the base of the plant to retain moisture and regulate soil temperature.
Supporting
If the kneed Wallaby-grass is tall or has weak stems, use stakes and twine to provide support until it develops stronger roots.
Monitoring
Keep an eye on the kneed Wallaby-grass for signs of stress or wilting and adjust watering as necessary. Regularly check for pests and remove any weeds that appear.
Troubleshooting Common Issues with Kneed Wallaby-grass Transplantation.
When is the best time to transplant kneed Wallaby-grass?
The optimal times to relocate kneed Wallaby-grass are early to mid-spring and mid to late winter.
How far apart should I space kneed Wallaby-grass plants?
Space kneed Wallaby-grass plants 12 to 24 inches (30-60 cm) apart for optimal growth.
How do I prepare the soil for transplanting kneed Wallaby-grass?
Use well-draining soil mixed with compost to enhance nutrient content before transplanting kneed Wallaby-grass.
Should I water kneed Wallaby-grass before transplanting?
Yes, thoroughly water kneed Wallaby-grass a day before transplanting to ensure moist soil.
How deep should I plant kneed Wallaby-grass in the new location?
Plant kneed Wallaby-grass at the same depth it was previously growing to avoid stress.
What if kneed Wallaby-grass starts wilting after transplanting?
Keep the soil consistently moist but not soggy; wilting usually indicates transplant shock.
Can kneed Wallaby-grass be transplanted on a hot day?
Avoid transplanting kneed Wallaby-grass on hot days; pick cool, overcast days instead.
Do I need to fertilize kneed Wallaby-grass after transplanting?
Use a mild, balanced fertilizer after a few weeks to help kneed Wallaby-grass establish in the new spot.
What if the leaves of kneed Wallaby-grass turn yellow after transplanting?
Yellow leaves can indicate over-watering or poor drainage; ensure soil is well-draining.
How can I protect newly transplanted kneed Wallaby-grass from pests?
Use organic pest control methods like neem oil or insecticidal soap to protect kneed Wallaby-grass.



