How to Transplant Woodland buttercup?
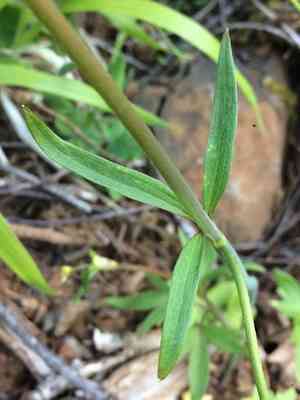
Woodland buttercup flourishes when relocated from the beginning of spring until its conclusion, as this timeframe enables the plant to become rooted prior to the summer's warmth. Select a partially shaded spot with damp, adequately draining earth for best outcomes.
Essential Preparations Before Moving Woodland Buttercup
Optimal Timing for Relocating Woodland Buttercup?
The best period for relocating woodland buttercup, a perennial, spans from early spring's start to its conclusion. Moving it during this window allows the plant to benefit from enhanced soil moisture and mild temperatures, fostering strong root growth before summer's heat. This timing ensures woodland buttercup establishes itself well in its new spot.
Required Spacing Between Woodland Buttercup Plants?
When relocating woodland buttercup, position plants 6-12 inches (15-30 cm) apart. This provides ample room for each plant to develop without overcrowding its neighbors.
Ideal Soil Blend for Woodland Buttercup Relocation?
Prepare loamy or sandy soil for woodland buttercup. Ensure proper drainage and incorporate compost or a balanced base fertilizer to supply necessary nutrients.
Selecting a New Location for Your Woodland Buttercup?
Choose a site that receives partial shade to filtered sunlight for woodland buttercup. This plant thrives best with some sun exposure but not intense, full sun throughout the day.
Tools to Gather Before Transplanting Woodland Buttercup
Gardening Gloves
To safeguard your hands while handling soil and the plant.
Spade or Shovel
To excavate around and lift the plant from its initial position.
Trowel
For more precise digging and careful handling of the plant.
Watering Can or Hose
To hydrate the plant before and after its relocation.
Garden Fork
To help loosen the soil without harming the roots.
Plant Markers
To identify and keep track of the woodland buttercup plants in their new spot.
Mulch
To aid in retaining soil moisture post-transplantation.
Method for Extracting Woodland Buttercup from the Ground
Method for Extracting Woodland Buttercup from the Ground?
From Ground: First, moisten the woodland buttercup plant to dampen the soil. Next, dig a wide trench around the plant using a shovel or spade, ensuring the plant's root ball remains intact. Carefully work the spade beneath the root ball to lift the plant from its original spot.From Pot: Gently water the woodland buttercup plant the day before relocating. Tap the pot's sides to loosen the soil and plant. Carefully turn the pot on its side and slide the plant out, supporting the root ball and soil as you do so.From Seedling Tray: Water the woodland buttercup seedlings prior to transplanting. Use a trowel to gently ease out the seedlings along with their accompanying soil. Hold the seedlings by their leaves to prevent stem damage.
Step-by-Step Guide for Relocating Woodland Buttercup
Prepare the New Location
Dig a hole in the ground that is twice as wide and the same depth as the root ball of your woodland buttercup plant.
Remove the Plant from Its Original Spot
Follow the appropriate removal method to carefully lift the woodland buttercup plant from its initial location.
Plant Positioning
Place the woodland buttercup plant in the prepared hole, ensuring the top of the root ball is level with the surrounding ground.
Backfill and Firm the Soil
Fill the hole with soil around the root ball, gently compacting it to remove air pockets.
Watering
Thoroughly water the woodland buttercup plant to help settle the soil around its roots.
Apply Mulch
Spread mulch around the base of the woodland buttercup plant to retain moisture and suppress weeds.
Post-Transplantation Care for Woodland Buttercup
Watering
Keep the soil around the woodland buttercup consistently moist, but not waterlogged, for the initial weeks after transplanting to aid in strong root establishment.
Mulching
Replenish the mulch as needed to maintain a layer around the plants, which helps retain moisture and regulate temperature.
Monitoring
Regularly check the relocated woodland buttercup for signs of stress, such as wilting or yellowing leaves, and address issues promptly.
Addressing Common Issues with Woodland Buttercup Relocation.
When is the best time to transplant woodland buttercup?
Early to late spring is ideal for relocating woodland buttercup to ensure optimal growth.
How should I prepare the soil for woodland buttercup?
Ensure well-draining soil rich in organic matter for optimal root development of woodland buttercup.
What is the ideal spacing for transplanting woodland buttercup?
Maintain a spacing of 6-12 inches (15-30 cm) for healthy growth and air circulation.
How do I avoid transplant shock in woodland buttercup?
Water deeply before moving and handle roots gently to reduce stress on woodland buttercup.
How deep should I plant woodland buttercup?
Plant woodland buttercup at the same depth it was growing in its original location.
How often should I water woodland buttercup after transplanting?
Water woodland buttercup thoroughly immediately after transplanting, then regularly to keep the soil moist.
What type of fertilizer is best for woodland buttercup after transplanting?
Use a balanced, slow-release fertilizer to provide steady nutrients for woodland buttercup's growth.
Should woodland buttercup be mulched after transplanting?
Yes, apply a light mulch to retain moisture and regulate soil temperature for woodland buttercup.
Can I transplant woodland buttercup during hot weather?
Relocate woodland buttercup in cooler spring conditions to avoid stress from high temperatures.
What should I do if woodland buttercupâs leaves wilt after transplanting?
Increase watering and provide shade to help woodland buttercup recover from transplant shock.



