How to Transplant Turpentine wavewing?
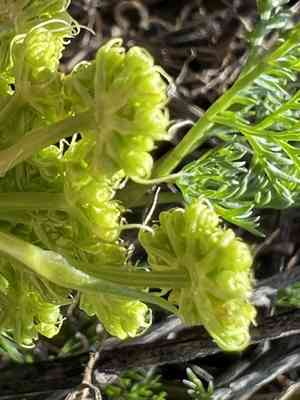
Turpentine wavewing flourishes when relocated from early spring through its conclusion, capitalizing on prime growing circumstances. Select a bright, adequately drained spot to foster robust expansion. Execute the transplant with precision to preserve root structure for effective settling.
Necessary Preparations Before Relocating Turpentine Wavewing?
Optimal Period for Moving Turpentine Wavewing?
Relocating turpentine wavewing is best done during the transition from early to late spring. This timeframe allows new growth to establish prior to summer's heat. Milder temperatures and increased soil moisture in spring aid root adaptation and robust development. This timing ensures the plant's improved establishment and resilience.
Required Spacing Between Turpentine Wavewing Plants?
When moving turpentine wavewing, ensure an 18-24 inch (45-60 cm) gap between each plant. This prevents overcrowding and promotes adequate air circulation.
Best Soil Blend for Turpentine Wavewing Relocation?
For turpentine wavewing, prepare well-draining soil enriched with compost or a balanced base fertilizer. Steer clear of heavy clay or excessively sandy soils. An ideal soil pH is 6.0-7.0.
Where to Replant Your Turpentine Wavewing?
Select a sunny spot for replanting turpentine wavewing. It flourishes best in full sunlight, receiving at least 6-8 hours of direct light daily.
Equipment to Prepare Before Transplanting Turpentine Wavewing?
Gardening Gloves
To safeguard your hands while handling soil and the plant.
Shovel or Spade
For excavating around the plant and preparing the new planting site.
Trowel
For more precise digging and managing smaller plants.
Watering Can or Hose
To thoroughly hydrate the plant before and after its relocation.
Pruning Shears
To trim any damaged roots or stems during the transplant process.
Method for Extracting Turpentine Wavewing from the Ground?
Method for Extracting Turpentine Wavewing from the Ground?
From Ground: First, moisten the soil around the turpentine wavewing plant. Then, dig a wide trench around the plant with a shovel or spade, ensuring the root ball remains intact. Carefully work the spade beneath the root ball to lift the plant from its original spot.From Pot: Water the turpentine wavewing plant thoroughly before removal. Gently tap and squeeze the pot's sides to loosen the soil. Tilt the pot sideways and carefully slide the plant out, supporting the root ball with your hand.From Seedling Tray: Water the seedlings in the tray to help the soil adhere to the roots. Use a trowel or your fingers to gently lift each seedling, aiming to keep as much soil around the roots as possible.
Detailed Steps for Transplanting Turpentine Wavewing
Site Preparation
Prepare the new planting location by digging a hole twice the size of the turpentine wavewing's root ball. Ensure the hole is deep enough to accommodate the entire root system.
Root Examination
Before planting, inspect the roots of the turpentine wavewing. Trim any damaged or excessively long roots using pruning shears.
Placement
Position the plant in the hole, making sure it sits at the same depth it was previously growing. Adjust the hole depth if necessary.
Backfilling the Hole
Fill the hole with the excavated soil, gently pressing it down around the roots to eliminate air pockets. Be careful not to over-compact the soil.
Watering
Immediately water the turpentine wavewing thoroughly to help settle the soil and establish good root-to-soil contact.
Post-Transplant Care for Turpentine Wavewing?
Watering
Keep the soil around the turpentine wavewing consistently moist, but not waterlogged, for the initial weeks after transplanting to encourage strong root development.
Mulching
Apply a layer of mulch around the plant's base to retain moisture and suppress weeds. Keep the mulch a few inches away from the stem to prevent rot.
Monitoring
Regularly check the plant for signs of stress, such as wilting or yellowing leaves, and adjust care as needed.
Support
If the turpentine wavewing is tall or tends to droop, consider staking it for additional support until it is well-established.
Resolving Common Issues with Turpentine Wavewing Transplantation.
When is the best time to transplant turpentine wavewing?
Move turpentine wavewing from early to late spring when the soil is workable and temperatures are mild.
How should I prepare the soil before transplanting?
Loosen soil to a depth of 12 inches (30 cm) and incorporate organic compost for nutrients.
What is the ideal spacing between turpentine wavewing plants?
Space turpentine wavewing plants 18-24 inches (45-60 cm) apart to ensure proper air circulation and growth.
How do I avoid transplant shock for turpentine wavewing?
Water thoroughly before and after transplanting, and minimize root disturbance to reduce transplant shock.
Should I trim turpentine wavewing before transplanting?
Trim damaged or dead leaves but avoid significant pruning, as it can stress turpentine wavewing.
How deep should I plant turpentine wavewing in its new location?
Plant turpentine wavewing at the same soil depth it was growing in its original location to avoid stress.
How often should I water turpentine wavewing after transplanting?
Water turpentine wavewing regularly for the first few weeks, keeping the soil consistently moist but not waterlogged.
Can I transplant turpentine wavewing in hot weather?
Avoid transplanting turpentine wavewing in hot weather as it can cause stress; aim for mild spring temperatures.
What type of mulch is best for turpentine wavewing?
Use organic mulch like shredded leaves or bark to retain moisture and regulate soil temperature for turpentine wavewing.
How do I support turpentine wavewing after transplanting?
Stake tall plants if necessary and ensure they are sheltered from harsh winds to support turpentine wavewing.



