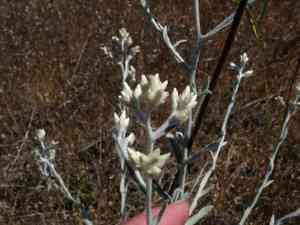
How to Transplant Wright's cudweed?
The most suitable period for relocating wright's cudweed spans from the beginning to the end of spring, owing to advantageous ground and atmospheric circumstances. Select a sunny spot with good drainage for optimal outcomes. Provide steady hydration to aid in root development.
What Preparations are Needed Before Transplanting Wright's Cudweed?
What is the Ideal Time for Transplanting Wright's Cudweed?
Wright's cudweed is best moved in the initial to mid-spring period. This timing allows the plant to settle before summer heat, benefits from ideal moisture, and promotes vigorous growth during its active season. Relocating at this time maximizes root development and prepares the plant for year-round thriving.
How Much Space Should You Leave Between Wright's Cudweed Plants?
For transplanting wright's cudweed, position each plant 18-24 inches (45-60 cm) apart. This provides ample room for growth without resource competition.
What is the Best Soil Mix for Wright's Cudweed Transplanting?
Prepare well-draining soil for wright's cudweed by incorporating compost or a balanced slow-release fertilizer. This supplies essential nutrients and prevents roots from sitting in saturated soil.
Where Should You Relocate Your Wright's Cudweed?
Select a site that receives full sun to partial shade for transplanting wright's cudweed. They flourish with approximately 6-8 hours of daily sunlight, which aids in strong, healthy development.
What Equipments Should You Prepare Before Transplantation Wright's Cudweed?
Gardening Gloves
To safeguard your hands while handling soil and the plant.
Shovel or Spade
To excavate around and extract the wright's cudweed plant from its current spot.
Trowel
For precise digging and placement in its new location.
Watering Can or Hose
To keep the plant hydrated both before and after relocation.
Pruners
To trim any damaged roots or foliage.
Compost
To enrich the soil in the new planting area.
How Do You Remove Wright's Cudweed from the Soil?
How Do You Remove Wright's Cudweed from the Soil?
From Ground: First, moisten the wright's cudweed plant to damp the soil. Then, dig a wide trench around the plant using a shovel or spade, ensuring the plant's root ball remains intact. Carefully work the spade beneath the root ball to lift the plant from its original position.From Pot: Water the wright's cudweed plant thoroughly an hour prior to transplanting. Gently tilt the pot and tap its sides to loosen the soil. Carefully slide the plant out while supporting the root ball.From Seedling Tray: Water the seedlings well to facilitate removal. Use a small trowel or your fingers to gently lift each seedling from the tray, ensuring the root ball stays intact.
Step-by-Step Guide for Transplanting Wright's Cudweed
Site Preparation
Choose a location with well-drained soil that has been enriched with compost. Dig a hole twice the width and the same depth as the wright's cudweed plant's root ball.
Plant Preparation
If the roots are encircling the root ball, gently separate them. Trim any damaged roots with pruners.
Planting
Position the wright's cudweed plant in the hole so the top of the root ball is level with the surrounding soil surface. Fill the hole with soil, gently firming it around the roots.
Watering
Thoroughly water the plant immediately after planting to settle the soil around the roots and eliminate air pockets.
How Do You Care For Wright's Cudweed After Transplanting?
Watering
Keep the soil around the wright's cudweed consistently moist, but not waterlogged, for the initial weeks post-transplant to aid in strong root establishment.
Mulching
Apply a layer of mulch around the plant's base to retain moisture and regulate soil temperature.
Monitoring
Regularly inspect the plant for signs of transplant shock, such as wilting or yellowing leaves, and adjust care as necessary.
Pruning
Remove any dead or damaged leaves to redirect the plant's energy towards root establishment and new growth.
Troubleshooting Common Issues with Wright's Cudweed Transplantation.
When is the best time to transplant wright's cudweed?
Relocate wright's cudweed between early and late spring for optimal outcomes and minimal stress.
How much space should be between transplanted wright's cudweed?
Space wright's cudweed 18-24 inches (45-60 cm) apart to allow for healthy development and air circulation.
What kind of soil is best for wright's cudweed?
Utilize well-draining soil rich in organic matter to ensure proper root development after transplanting.
How to prepare the soil for transplanting wright's cudweed?
Loosen the soil to a depth of 10 inches (25 cm) and incorporate compost for nutrients.
How to water wright's cudweed after transplanting?
Water thoroughly immediately after transplanting, then maintain consistently moist but not saturated soil.
Do wright's cudweed need fertilizer after transplanting?
Adding a balanced, slow-release fertilizer can support growth, but excessive fertilization should be avoided.
How to handle wright's cudweed roots during transplanting?
Be gentle with the roots. Avoid breaking them to minimize transplant shock.
What common issues arise when transplanting wright's cudweed?
Root damage, incorrect spacing, and insufficient watering are common problems that can impede plant success.
How to lessen transplant shock in wright's cudweed?
Transplant on a cool, overcast day and water thoroughly to reduce stress on the plant.
What signs indicate successful transplanting of wright's cudweed?
Look for new growth and healthy, vibrant leaves as indicators of successful transplanting.


