How to Transplant Hollyleaf cherry?
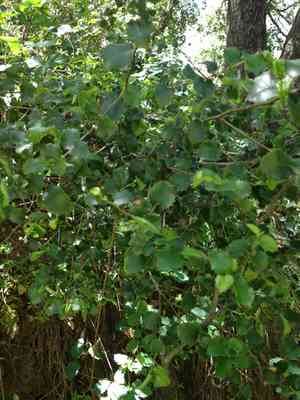
The ideal period for relocating hollyleaf cherry is in the spring, as moderate temperatures facilitate root development without the strain of intense warmth. It is best to choose a bright spot with soil that drains effectively. Careful management of the root system during transplantation is recommended.
What Preparations are Needed Before Transplanting Hollyleaf Cherry?
What is the Ideal Time for Transplanting Hollyleaf Cherry?
The perfect time for moving hollyleaf cherry is during the vibrant spring. This season promotes strong root development due to mild temperatures and ample rainfall. Relocating hollyleaf cherry in this revitalizing period ensures a smooth adjustment, as the gentle weather helps the plant settle in before summer's heat arrives. It offers the best balance of warm soil and cool air, encouraging successful root growth. Choosing this timing will result in a flourishing hollyleaf cherry, as nature's rhythm supports its fresh start.
How Much Space Should You Leave Between Hollyleaf Cherry Plants?
First, consider appropriate spacing for hollyleaf cherry. Make sure to leave 10-12 feet (3-3.7 metres) between each plant. This allows them to develop and thrive without competing for resources. Execute this carefully; your future hollyleaf cherry grove depends on it!
What is the Best Soil Mix for Hollyleaf Cherry Transplanting?
Next, get the soil ready. Hollyleaf cherry prefers well-drained soil rich in organic material. A foundational fertilizer with high phosphorus content would be perfect for stimulating root growth. Just remember to thoroughly loosen the soil before planting.
Where Should You Relocate Your Hollyleaf Cherry?
Finally, let's examine the perfect spot for transplanting hollyleaf cherry. These plants love sunlight! Select a location that offers full sun exposure or partial shade. This will help your hollyleaf cherry grow robust and healthy.
What Equipments Should You Prepare Before Transplantation Hollyleaf Cherry?
Shovel
To excavate a hole in the ground where the hollyleaf cherry will be replanted.
Gardening Gloves
To safeguard your hands while handling soil and the plant.
Wheelbarrow or Bucket
A simple implement to transport the hollyleaf cherry from its original spot to the new transplant area.
Garden Scissors or Pruners
May be required to trim dead or overgrown branches during the transplant process.
Watering Can or Hose
To hydrate the hollyleaf cherry once it has been placed in its new location.
Mulch
To cover the plant's base for maintaining soil moisture and suppressing weeds.
Stake and Ties
These might be necessary to offer support to the hollyleaf cherry after planting it in the ground.
How Do You Remove Hollyleaf Cherry from the Soil?
How Do You Remove Hollyleaf Cherry from the Soil?
From Ground: Carefully dig around the hollyleaf cherry with your shovel, ensuring you are far enough away to avoid damaging the roots. Aim to dig beneath the root ball and lift the entire plant out of the ground, minimizing potential stress to the plant.From Pot: Place your hand on top of the soil with the hollyleaf cherry stem between your fingers. Quickly and gently invert the pot, holding the hollyleaf cherry securely. Tap the pot's rim against the edge of a firm surface (like a bench), allowing the hollyleaf cherry and its root ball to slide out.From Seedling Tray: Gently lift the hollyleaf cherry by its leaves (never pull on the stem). If the root and soil do not easily come out, push up gently from the bottom of the cell.
Step-by-Step Guide for Transplanting Hollyleaf Cherry
Hole Preparation
Excavate a hole that is twice the size of the hollyleaf cherry's root ball. The additional space will allow the roots to spread and develop.
Initial Positioning
Place the hollyleaf cherry into the prepared hole. Ensure it is positioned at a similar depth level to its previous location.
Backfilling
Refill the hole with soil, gently firming it around the base of the hollyleaf cherry. Do not cover the stem or leaves, as this could lead to rot.
Watering
Thoroughly water the hollyleaf cherry immediately after its transplantation.
Mulching and Staking
Apply a layer of organic mulch around the plant's base to retain soil moisture and regulate ground temperature. If needed, stake the plant to provide support.
How Do You Care For Hollyleaf Cherry After Transplanting?
Regular Monitoring
During the initial weeks, regularly check on your hollyleaf cherry to ensure it is adapting well to its new surroundings.
Pruning
Remove any dead or damaged branches that may have occurred during transplant to encourage new growth.
Watering
Water the hollyleaf cherry consistently until it is well-established, gradually reducing the watering frequency. Be careful not to create waterlogged soil, as this can cause root rot.
Protection
Depending on your location, consider measures to safeguard your newly transplanted hollyleaf cherry from extreme weather conditions, pests, or wildlife that could harm it.
Troubleshooting Common Issues with Hollyleaf Cherry Transplantation.
What's the best time of year to transplant hollyleaf cherry?
The most appropriate times to relocate hollyleaf cherry are from late Winter to early Spring (S1-S3), when its growth is at its slowest.
How to prepare the new spot for hollyleaf cherry before transplanting?
The new site should offer full sun and possess well-drained soil. Space plants 10-12 feet (3-3.7 meters) apart to allow for adequate growth.
Should I water hollyleaf cherry before transplanting?
Yes, you should thoroughly water hollyleaf cherry 1-2 days prior to transplanting. This facilitates removal from the ground and lessens transplant shock.
How deep should I dig to uproot hollyleaf cherry without harming it?
Dig a circle approximately 2 feet (60 cm) in diameter around hollyleaf cherry. The aim is to extract as much of the root ball as possible without causing damage.
What is the proper way to remove hollyleaf cherry from its current spot?
Gently loosen the soil around hollyleaf cherry with a spade and carefully lift the plant, ensuring its root system remains undamaged.
How should I handle hollyleaf cherry during the moving process?
When moving hollyleaf cherry, handle it by the root ball, not by its trunk or branches. This minimizes stress and the risk of injury to the plant.
How big should the hole be in the new location for hollyleaf cherry?
Dig a hole twice as wide and as deep as the root ball of hollyleaf cherry. This provides ample space for roots to spread and grow.
What should I do after placing hollyleaf cherry in the new hole?
Once hollyleaf cherry is in the new hole, backfill with soil, gently firm it down, and water deeply to settle the soil and eliminate air pockets.
How often should I water hollyleaf cherry after transplanting?
Water hollyleaf cherry thoroughly immediately after transplanting, then regularly about once a week. Monitor soil moisture to ensure it doesn't remain waterlogged.
What to do if hollyleaf cherry shows signs of transplant shock?
If hollyleaf cherry exhibits signs of transplant shock, such as wilting or yellowing leaves, ensure it's receiving sufficient water and consider a transplant tonic to aid root establishment.



