How to Transplant European dwarf cherry?
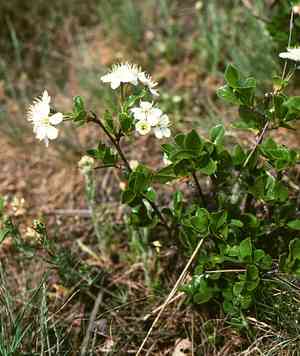
The optimal period for transplanting european dwarf cherry is during nature's revitalization, specifically from early to mid-spring, allowing for smooth adaptation. Select a location bathed in sunlight with soil that drains effectively, and consider its eventual size to prevent future congestion.
What Preparations are Needed Before Transplanting European Dwarf Cherry?
What is the Ideal Time for Transplanting European Dwarf Cherry?
The best time to move european dwarf cherry is as spring begins. As winter's cold recedes, the softer soil and milder weather create an ideal setting for the young european dwarf cherry to develop strong roots before summer's full intensity. Moving european dwarf cherry during these promising early to mid-spring weeks allows it ample time to adjust to its new spot, benefiting from the natural growth cycle while avoiding harsh conditions. Think of it as giving european dwarf cherry a comfortable new home just when it's ready to thrive!
How Much Space Should You Leave Between European Dwarf Cherry Plants?
First, mark out the planting area. For each young european dwarf cherry plant, allow a generous distance of about 4-6 feet (1.2-1.8 meters) between them. This ensures they have adequate room to grow without competing for resources.
What is the Best Soil Mix for European Dwarf Cherry Transplanting?
The soil should drain well, being either loamy or sandy. Before transplanting european dwarf cherry, incorporate some foundational fertilizer into the soil. A slow-release granular fertilizer would be highly effective here, supplying nutrients over an extended period.
Where Should You Relocate Your European Dwarf Cherry?
Now, regarding the best spot for sun exposure: european dwarf cherry loves sunlight. Find a location that provides at least 6 hours of direct sunlight daily. Partial shade can also work if full sun isn't an option.
What Equipments Should You Prepare Before Transplantation European Dwarf Cherry?
Gardening Gloves
To safeguard your hands while handling the plants and their root systems.
Gardening Shovel
Primarily used for digging the planting hole and carefully removing the european dwarf cherry plant from its original spot.
Pruning Shears
For trimming any damaged roots or branches during the relocation process.
Wheelbarrow or Plant Dolly
For easier movement of the plant from its initial position to the new planting site.
Garden Hose or Watering Can
Crucial for hydrating the plant both before and after the transplant.
Organic Compost
Required for additional nutrients once the transplant is successful, promoting stronger growth.
Mulch
Helps maintain soil moisture after the transplant.
How Do You Remove European Dwarf Cherry from the Soil?
How Do You Remove European Dwarf Cherry from the Soil?
From Ground: To begin, water the european dwarf cherry plant to ensure the surrounding soil is moist. This facilitates easier removal. Using a gardening shovel, dig carefully around the plant, taking care not to harm the roots. The excavated area should be wider than the plant's spread. Gently pry with the shovel to lift the plant, keeping the root ball intact.From a Pot: Water the plant. Then, grasp the european dwarf cherry plant at its base and invert the pot. Tap the bottom gently to loosen; if needed, carefully jiggle it out.From a Seedling Tray: Using a small gardening tool or a spoon, carefully scoop out the european dwarf cherry seedling, making sure to retain as much of the root structure and surrounding soil as possible. Lift it with care; it's important not to rush as the seedling is very delicate at this stage.
Step-by-Step Guide for Transplanting European Dwarf Cherry
Preparation
Have the transplant hole ready before removing the plant. The hole should be twice as wide and as deep as the plant's root ball. Add a layer of organic compost at the bottom of the hole to provide nutrients.
Transfer
Carefully place the european dwarf cherry plant into the hole, ensuring it sits at the same depth as it was in its previous location. Backfill the hole with garden soil, gently pressing around the plant's base.
Watering
After transplanting, water the plant thoroughly. This helps the soil settle and provides essential moisture for the plant's recovery.
Mulching
Apply a layer of mulch around the base of the european dwarf cherry plant; this will help retain soil moisture and suppress weeds.
How Do You Care For European Dwarf Cherry After Transplanting?
Watering
Water the european dwarf cherry consistently, especially during dry spells. The soil should not completely dry out, but be careful not to overwater, as this could lead to root rot.
Pruning
Any fallen or withered leaves should be trimmed to encourage new growth.
Observation
Closely monitor the european dwarf cherry after transplanting to observe its adjustment. Signs of stress include wilting or discolored leaves and slow growth. If these symptoms persist, consider consulting a local nursery or gardening expert.
Protection
Shield the european dwarf cherry from strong winds and pests until it is well established.
Feeding
Use a balanced plant food to nourish your european dwarf cherry regularly. Remember, do not overfeed your plant.
Troubleshooting Common Issues with European Dwarf Cherry Transplantation.
What's the best time of year for transplanting european dwarf cherry?
The ideal time to move european dwarf cherry is during S1-S2 when the plant is inactive. This timing allows the plant to establish roots before its active growth phase begins.
What's the ideal spacing when transplanting multiple european dwarf cherry plants?
For optimal growth, plant european dwarf cherry 4-6 feet (1.2-1.8 meters) apart. This provides ample space for the plants to develop and spread without competing for resources.
How deep should I plant european dwarf cherry during transplantation?
Keep the root ball of european dwarf cherry at the same soil level as it was in its original spot. Planting it deeper may lead to suffocation.
How should I prepare the transplant site for european dwarf cherry?
Choose a well-draining location and loosen the soil about 10 inches (25 cm) deep. Enrich the soil with organic matter if it's sandy or clayey. This promotes root development.
How should I water european dwarf cherry after transplanting?
Water european dwarf cherry deeply immediately after transplanting. Afterward, water generously when the top 2 inches (5 cm) of soil feel dry. However, avoid overwatering as it can cause root rot.
What's the best way to handle european dwarf cherry's root ball during transplantation?
Handle gently to prevent root damage. If the root ball is tightly packed, gently separate the roots with your fingers to encourage growth into the surrounding soil.
Do I need to prune european dwarf cherry before or after transplanting?
Only minimal pruning, if any, is necessary. Excessive pruning at transplant time can stress european dwarf cherry. Just trim damaged or dead branches.
Can european dwarf cherry be damaged during transplanting?
Yes, transplant shock can occur, typically shown by yellowing leaves. To reduce shock, water well and provide shade for the first week or two post-transplant.
Do I need to fertilize european dwarf cherry right after transplanting?
No. Wait until you observe new growth before fertilizing to prevent burning. A slow-release, organic fertilizer is recommended for european dwarf cherry.
What should I do if european dwarf cherry doesn't show signs of growth after transplantation?
Patience is crucial. European dwarf cherry can take some time to establish its roots. Keep it well-watered, protect it from harsh weather, and ensure the soil is enriched. New growth should appear eventually.



