How to Transplant Wedge-leaf primrose?
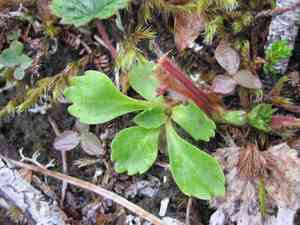
Wedge-leaf primrose flourishes when relocated at the onset of spring, benefiting from mild temperatures for successful rooting. Select a cool, partly shaded spot to preserve ground dampness. Verify that the substrate drains effectively but is also fertile to encourage robust development.
What Preparations are Needed Before Transplanting Wedge-leaf Primrose?
What is the Ideal Time for Transplanting Wedge-leaf Primrose?
The best time to move wedge-leaf primrose, a perennial, is during early to mid-spring. This timing allows the plant to develop roots before its active growth phase, leading to better establishment and vigorous development. Spring transplanting maximizes the benefits of mild temperatures and consistent moisture, promoting healthier rooting.
How Much Space Should You Leave Between Wedge-leaf Primrose Plants?
When transplanting wedge-leaf primrose, ensure a spacing of 15-18 inches (38-46 cm) between them. This provides ample room for each plant to grow and flourish, preventing overcrowding and ensuring good air circulation.
What is the Best Soil Mix for Wedge-leaf Primrose Transplanting?
Prepare well-draining soil, rich in organic material, for wedge-leaf primrose. Incorporate compost or a balanced, slow-release fertilizer to supply essential nutrients for the plant's development. Aim for soil pH levels that are slightly acidic to neutral.
Where Should You Relocate Your Wedge-leaf Primrose?
Select a spot that receives partial to full sunlight for wedge-leaf primrose. Morning sun with afternoon shade is perfect to shield the plant from intense midday heat while still providing sufficient light for healthy growth.
What Equipments Should You Prepare Before Transplantation Wedge-leaf Primrose?
Gardening Gloves
To safeguard your hands while handling soil and the plant.
Shovel or Spade
For excavating both the original and new planting sites.
Hand Trowel
To aid in lifting the plant and for precise digging tasks.
Watering Can or Hose
To hydrate the plant before and after its relocation.
Compost or Organic Matter
To enrich the new planting medium.
Mulch
To help retain moisture around the newly moved plant.
Bucket or Wheelbarrow
To transport the plant if necessary.
How Do You Remove Wedge-leaf Primrose from the Soil?
How Do You Remove Wedge-leaf Primrose from the Soil?
From Ground: First, water the wedge-leaf primrose plant to moisten the soil. Then, dig a wide trench around the plant using a shovel or spade, making sure the plant's root ball stays intact. Carefully work the spade beneath the root ball to lift the plant from its initial spot.From Pot: Water the wedge-leaf primrose thoroughly a few hours prior to transplanting. Gently squeeze the pot's sides to loosen the soil. Carefully tilt the pot and ease the plant out, keeping the root ball whole.From Seedling Tray: Water the seedlings well before transplanting. Use a hand trowel or your fingers to gently lift the seedlings from the tray, taking care not to harm their roots.
Step-by-Step Guide for Transplanting Wedge-leaf Primrose
Preparation
Prepare the new planting location by digging a hole approximately twice the width of the root ball and equally deep. Mix compost into the soil to enhance drainage and fertility.
Removal
Follow the instructions from the 'removal process' section based on where the wedge-leaf primrose was originally located.
Placing the Plant
Position the wedge-leaf primrose into the new hole, ensuring it sits at the same depth as it was previously growing. Fill in around the root ball with soil, gently firming to eliminate air pockets.
Watering
Water the newly transplanted wedge-leaf primrose thoroughly to help settle the soil around its roots.
Mulching
Apply a 2-3 inch layer of mulch around the plant's base, keeping it away from the stem. Mulch helps maintain moisture and regulate soil temperature.
How Do You Care For Wedge-leaf Primrose After Transplanting?
Watering
Keep the soil around the wedge-leaf primrose consistently moist, but not waterlogged, for the initial weeks after transplanting to aid in developing strong roots.
Mulching
Maintain the mulch layer to preserve soil moisture and control weeds.
Monitoring
Regularly check the plant for signs of stress, such as wilting or yellowing leaves, and water as needed.
Fertilizing
Begin a light fertilizing regimen after a few weeks, once the wedge-leaf primrose shows signs of new growth, following the recommended fertilizer guidelines for this plant.
Troubleshooting Common Issues with Wedge-leaf Primrose Transplantation.
When is the best time to transplant wedge-leaf primrose?
Early to mid-spring is optimal for moving wedge-leaf primrose.
How should I prepare the soil for wedge-leaf primrose?
Loosen soil and add compost for improved aeration and nutrients.
What is the ideal spacing for wedge-leaf primrose during transplantation?
Space wedge-leaf primrose plants 15-18 inches (38-46 cm) apart.
How deep should I plant wedge-leaf primrose?
Plant wedge-leaf primrose at its original growing depth.
How do I keep wedge-leaf primrose from wilting after transplanting?
Water thoroughly post-transplant and keep soil consistently moist.
Can I transplant wedge-leaf primrose in hot weather?
It's best to avoid transplanting wedge-leaf primrose during hot weather to minimize stress.
What if the leaves of wedge-leaf primrose turn yellow after transplanting?
Ensure proper watering and avoid over-fertilizing to prevent leaf yellowing.
Should I prune wedge-leaf primrose before transplanting?
Prune dead or damaged leaves but avoid extensive pruning before transplanting.
How do I improve drainage for wedge-leaf primrose?
Incorporate sand or gravel into the soil to enhance drainage.
How long will it take wedge-leaf primrose to establish after transplanting?
Wedge-leaf primrose typically establishes within a few weeks with proper care.



