How to Transplant Little spurflower?
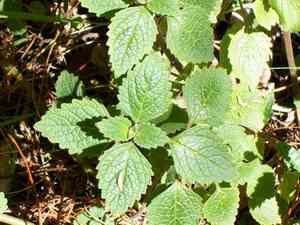
Little spurflower flourishes when transplanted between early and mid-spring, since moderate temperatures and consistent humidity foster the development of new roots. Select a location with partial shade and soil that drains effectively for best outcomes. Ensure the soil contains ample organic material.
Necessary Preparations Before Relocating Little Spurflower?
Optimal Period for Little Spurflower Relocation?
Little spurflower, a perennial, flourishes best when moved from early to mid-spring. This timeframe ensures the soil is sufficiently warm for root establishment and minimizes transplant stress. Relocating little spurflower then encourages robust growth and improves its resilience to summer heat, promoting strong plant development.
Recommended Spacing Between Little Spurflower Plants?
Allow approximately 12-18 inches (30-45 cm) between little spurflower plants. This provides each plant ample room to expand, preventing resource competition and facilitating air circulation, which lowers disease risk.
Best Soil Blend for Little Spurflower Relocation?
Prepare soil that drains well and is rich in organic material. Incorporate compost to enrich the soil and mix in a balanced slow-release fertilizer as per package directions. This will supply little spurflower with the necessary nutrients for vigorous growth.
Ideal New Location for Your Little Spurflower?
Select a site for little spurflower that receives partial to full shade, as excessive direct sunlight can scorch its leaves. Ideally, choose a spot that gets 4-6 hours of morning sun, offering a perfect balance for healthy development.
Equipment to Prepare Before Transplanting Little Spurflower?
Gardening Gloves
To safeguard your hands while handling soil and the plant.
Shovel or Spade
For excavating holes and trenches.
Trowel
Useful for smaller, precise digging tasks.
Watering Can or Hose
To hydrate the plant before and after relocation.
Garden Fork
To loosen the soil surrounding the plant.
Mulch
To aid in retaining soil moisture post-transplant.
Pruners
For trimming any damaged roots or foliage.
How to Extract Little Spurflower from the Ground?
How to Extract Little Spurflower from the Ground?
From Ground: First, moisten the little spurflower plant's soil. Then, dig a wide trench around the plant with a shovel or spade, ensuring the root ball remains intact. Carefully work the spade beneath the root ball to lift the plant from its original spot.From Pot: Gently water the little spurflower plant a few hours prior to removal. Lay the pot on its side and tap the edges to loosen the soil. Carefully slide the plant out, supporting the root ball to prevent damage.From Seedling Tray: Water the seedlings to facilitate removal. Gently loosen the soil with a trowel and lift the seedlings by their leaves, not the stem, to avoid harming the plant.
Detailed Guide for Relocating Little Spurflower
Prepare New Site
Ensure the new planting location is ready before extracting the little spurflower plant from its initial spot. Dig a hole twice as wide and as deep as the plant's root ball.
Remove Plant
Follow the removal procedure based on the plant's original location, minimizing root disturbance.
Inspect the Roots
Examine the little spurflower plant's roots for any damage or decay. Trim away any unhealthy sections with pruners.
Plant in New Location
Position the little spurflower plant in the center of the hole at the same depth it was previously growing. Backfill the hole with soil, gently firming it around the roots.
Water Thoroughly
After relocation, thoroughly water the little spurflower plant to help settle the soil and eliminate air pockets.
Apply Mulch
Spread a layer of mulch around the base of the little spurflower plant to help retain moisture and regulate soil temperature.
Post-Transplant Care for Little Spurflower?
Watering
Keep the soil around the little spurflower consistently damp, but not waterlogged, for the initial weeks after transplanting to encourage strong root development.
Pruning
Remove any dead or damaged leaves to allow the plant to focus its energy on adapting to its new environment.
Monitoring
Observe for signs of transplant shock, such as wilting or yellowing foliage, and provide additional care if necessary. Ensure little spurflower receives adequate sunlight and water.
Weeding
Maintain the area around the little spurflower plant free of weeds, which can compete for nutrients and water.
Resolving Common Issues with Little Spurflower Relocation.
When is the optimal time to move little spurflower?
The best time is early to late spring, offering ideal growth conditions.
What spacing should I use for little spurflower when relocating?
Space plants 12-18 inches (30-45 cm) apart for proper air circulation and growth.
What soil type does little spurflower prefer?
Little spurflower thrives in well-draining soil enriched with organic matter, promoting healthy root growth.
How deep should I plant little spurflower?
Plant at the same depth as in their original containers to lessen transplant shock.
What are key indicators of transplant shock in little spurflower?
Wilting, yellowing, and leaf drop can signal transplant shock. Maintain consistent watering to aid recovery.
How much water does little spurflower require after transplanting?
Water thoroughly post-transplant and keep soil consistently moist, but not saturated, for the first few weeks.
Is pruning necessary for little spurflower during transplanting?
Prune any damaged roots and trim back excessive foliage to reduce water loss and stress.
How do I prepare little spurflower for relocation?
Water the plants well the day before transplanting and gently loosen the roots prior to planting.
What are the temperature requirements for relocating little spurflower?
Ensure temperatures are between 60-75°F (16-24°C) for optimal transplanting conditions.
What mulch should I use for little spurflower after transplanting?
Apply a layer of organic mulch around little spurflower to retain soil moisture and suppress weeds.



