How to Transplant pariparoba?
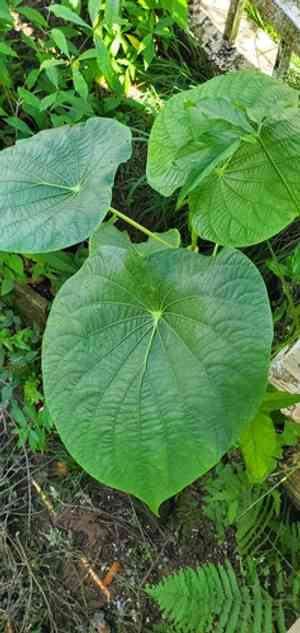
Relocating pariparoba is most effectively carried out during the invigorating period from the beginning to the end of spring, leveraging ideal cultivation circumstances. Choose a spot with partial shade and ensure the soil drains properly. Provide a mild feeding following the transplant to foster robust root development.
What Preparations are Needed Before Transplanting Pariparoba?
What is the Ideal Time for Transplanting Pariparoba?
Moving pariparoba during early to late spring, when the ground is warming, promotes excellent root establishment and robust development. This period avoids harsh temperature extremes, allowing the plant to adapt better and thrive throughout the growing season.
How Much Space Should You Leave Between Pariparoba Plants?
When relocating pariparoba, ensure a spacing of 36-48 inches (91-122 cm) between plants. This provides ample room for growth and good air circulation, minimizing disease risk.
What is the Best Soil Mix for Pariparoba Transplanting?
For pariparoba, prepare well-draining soil rich in organic matter. A balanced base fertilizer, such as 10-10-10, is highly effective. Mix thoroughly to enhance soil fertility and structure.
Where Should You Relocate Your Pariparoba?
Place pariparoba in a spot that receives partial to full sunlight. Morning sun with afternoon shade is perfect, ensuring the plant gets approximately 4-6 hours of daily sunlight.
What Equipments Should You Prepare Before Transplantation Pariparoba?
Gardening Gloves
To safeguard your hands while handling soil and plants.
Shovel or Spade
For excavating and lifting the plant from its original spot.
Hand Trowel
For digging smaller holes and working in confined areas.
Pruners
To trim any damaged or dead root structures.
Garden Hose or Watering Can
For hydrating the plant before and after its relocation.
Mulch
To help maintain soil moisture and regulate ground temperature.
How Do You Remove Pariparoba from the Soil?
How Do You Remove Pariparoba from the Soil?
From Ground: First, moisten the pariparoba plant's soil. Then, dig a wide trench around the plant using a shovel or spade, ensuring the root ball remains intact. Carefully work the spade beneath the root ball to lift the plant from its initial location.From Pot: Gently water the soil to facilitate removal, then tip the pot and tap its sides to loosen the soil. Support the plant's base with one hand and carefully pull the plant out with the other, ensuring the root ball stays intact.From Seedling Tray: Water the seedling tray to moisten the soil. Use a small tool like a hand trowel to lift the seedlings, being careful to support the root ball. Handle the seedlings by their leaves rather than stems to prevent damage.
Step-by-Step Guide for Transplanting Pariparoba
Site Selection
Choose a location with adequate sunlight and space for your pariparoba plant to reach its mature size.
Prepare Hole
Dig a hole that is twice as wide and the same depth as the pariparoba's root ball to provide ample room for root expansion.
Enrich Soil
Optionally, you can incorporate some organic compost into the hole to enrich the soil and aid the plant's establishment.
Place Plant
Carefully position the pariparoba plant in the hole, ensuring it sits at the same depth as it was in its previous location. The top of the root ball should be level with or slightly below the soil surface.
Backfill Soil
Fill the hole with soil, gently pressing down to eliminate air pockets. Be careful not to over-compact the soil, as this can hinder root growth.
Water Thoroughly
Water the plant thoroughly immediately after transplanting to help settle the soil and reduce transplant shock.
How Do You Care For Pariparoba After Transplanting?
Watering
Keep the soil around the pariparoba consistently moist but not waterlogged for the initial weeks post-transplant to encourage strong root development.
Mulching
Apply a layer of mulch around the plant's base to help retain moisture and regulate soil temperature.
Monitoring
Regularly check the plant for signs of stress such as wilting or leaf discoloration, and ensure it receives sufficient water.
Avoiding Fertilizer
Refrain from fertilizing the plant for the first few weeks after transplanting. Allow the plant to adapt to its new environment first.
Troubleshooting Common Issues with Pariparoba Transplantation.
When is the best time to transplant pariparoba?
The ideal period is early to late spring, ensuring optimal growth and minimal stress.
How much spacing should I leave between each pariparoba plant?
Space each plant 36-48 inches (91-122 cm) apart to facilitate healthy development.
How should I prepare the soil before transplanting pariparoba?
Loosen the soil to a depth of 12 inches (30 cm) and incorporate compost for added nutrients.
How do I remove pariparoba from its original spot without damage?
Gently dig around the base, maintaining a root ball size of at least 8 inches (20 cm).
What is the proper way to water pariparoba after transplanting?
Water thoroughly but ensure the soil drains well to prevent root rot and waterlogging.
How can I help pariparoba adjust to its new location?
Keep the soil consistently moist and provide partial shade to lessen transplant shock.
Should I fertilize pariparoba immediately after transplanting?
Wait 2-3 weeks before applying a balanced fertilizer to avoid nutrient burn on new roots.
How deep should I plant pariparoba in its new location?
Plant pariparoba at the same depth it was previously growing to prevent stem rot.
What should I do if pariparoba wilts after transplanting?
Ensure adequate moisture and provide temporary shade; wilting is often a stress response.
Can I transplant pariparoba in the summer or fall?
Transplanting is best reserved for early to late spring for optimal plant recovery.



