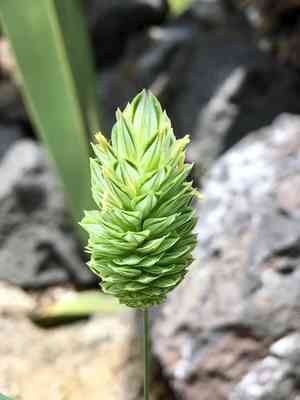
How to Transplant Annual canarygrass?
The ideal moment to transfer annual canarygrass outside is during the season of rejuvenation and developmentâfrom the departure of frost until flowers flourish in the sunlight. Select a brightly lit location with soil that drains effectively. Careful handling is crucial during transplantation to protect its fragile root system.
What Preparations are Needed Before Transplanting Annual Canarygrass?
What is the Ideal Time for Transplanting Annual Canarygrass?
The perfect window for moving annual canarygrass spans from early spring's onset to the beginning of summer. Relocating during this period ensures annual canarygrass benefits from prime growing conditions, including extended daylight and mild temperatures. Roots establish comfortably before summer heat, promoting vigorous growth and abundant seed production, which makes annual canarygrass a valued crop. Utilizing this timeframe maximizes the potential for a thriving growth season, allowing these annuals to display their best.
How Much Space Should You Leave Between Annual Canarygrass Plants?
Greetings, gardener! For your annual canarygrass plants, aim to provide ample room by spacing them approximately 6-12 inches (15-30 cm) apart. This personal space allows each plant to thrive and reach its full potential!
What is the Best Soil Mix for Annual Canarygrass Transplanting?
For your annual canarygrass, you'll want to place them in a comfortable bed of well-draining soil, rich in organic matter. Before planting, incorporate a balanced, slow-release fertilizer to give your annual canarygrass a nourishing start. Healthy soil leads to a happy plant!
Where Should You Relocate Your Annual Canarygrass?
Your annual canarygrass loves soaking up the sun, so choose a location where they can receive at least 6 hours of direct sunlight daily. By positioning your annual canarygrass in a bright, cheerful spot, you're setting them up for a brilliant future!
What Equipments Should You Prepare Before Transplantation Annual Canarygrass?
Gardening Gloves
To safeguard your hands while handling soil and plants.
Shovel or Spade
For excavating the plant and preparing the new planting site.
Watering Can or Hose
To hydrate the plant before and after relocation to minimize stress.
Hand Trowel
To assist with more precise digging, especially for smaller plants or confined areas.
Wheelbarrow
For moving the plant and soil if necessary.
Pruning Shears
To trim any damaged roots or foliage.
Soil Amendment
As required, if the new site's soil needs enhancement (details in previous sections).
Mulch
To help maintain soil moisture after transplanting.
Stakes or Plant Supports
If annual canarygrass needs assistance to remain upright post-transplant.
How Do You Remove Annual Canarygrass from the Soil?
How Do You Remove Annual Canarygrass from the Soil?
From Ground: First, water the annual canarygrass plant to moisten the soil, making it easier to manage. Then, use a shovel or spade to dig a wide circle around the plant, deeper than the root ball. Gently pry the plant up, keeping as much soil around the roots as possible.From Pot: Water the annual canarygrass plant to ensure the root ball is damp. Tilt the pot sideways and gently tap or press its sides to loosen the soil and roots. Carefully slide the plant out, supporting the soil and roots with your hand.From Seedling Tray: Dampen the soil in the tray to prevent root damage. Use a hand trowel or similar flat tool to gently lift the plant by its root ball from the individual cell of the seedling tray.
Step-by-Step Guide for Transplanting Annual Canarygrass
Preparation
Gather all necessary tools and ensure the new location is ready for transplanting, considering previous instructions on spacing and sun requirements for annual canarygrass. Water the annual canarygrass plant at its original spot to hydrate the roots before moving.
Removal
Employ the appropriate method from the removal process to carefully extract the annual canarygrass plant from its initial location.
Transplant Hole
Dig a hole in the new location that is twice as wide and the same depth as the root ball of annual canarygrass. This provides ample space for roots to spread into the surrounding soil.
Planting
Place the annual canarygrass plant in the center of the hole. Adjust the depth so the plant sits at the same level as its previous spot. Gently spread the roots outward and fill around the plant with soil, lightly tamping down to eliminate air pockets.
Watering
Water the annual canarygrass plant thoroughly after transplanting to settle the soil around the roots and help reduce transplant shock. Use a watering can or hose to provide a gentle, steady flow of water.
Mulching
Apply a layer of mulch around the base of annual canarygrass to conserve moisture and regulate soil temperature, but avoid piling mulch against the plant's stem to prevent rot.
Supporting
If needed, provide stakes or other plant supports to help annual canarygrass stand upright and protect it from wind or accidental damage.
Cleanup
Clean your tools and tidy the area to prevent disease spread and maintain a pleasant gardening space.
How Do You Care For Annual Canarygrass After Transplanting?
Monitoring
Regularly inspect the annual canarygrass plant for signs of stress, such as wilting or discolored leaves, and adjust care as needed.
Watering
Establish a watering routine that keeps the soil around annual canarygrass consistently moist for the initial few weeks, then adapt based on the plant's requirements and local weather.
Pruning
Trim away any damaged or dead foliage to encourage new growth and maintain the health and form of annual canarygrass.
Protection
Guard annual canarygrass from pests and diseases by watching for any signs of trouble and acting promptly.
Adaptation
Allow time for annual canarygrass to adjust to its new environment, being patient as the plant establishes its root system and begins to grow.
Community
If planting multiple annual canarygrass plants, ensure they have sufficient space to grow without competing for resources, adhering to the previously provided spacing guidelines.
Troubleshooting Common Issues with Annual Canarygrass Transplantation.
What's the best time to transplant annual canarygrass for optimal growth?
The ideal period to transplant annual canarygrass is from early to late spring, ensuring strong establishment before summer.
How far apart should I space annual canarygrass when transplanting?
Space annual canarygrass approximately 6-12 inches (15-30 cm) apart, allowing them ample room to thrive without overcrowding.
What soil conditions favor annual canarygrass after transplanting?
Aim for well-draining soil, rich in organic matter, with a slightly acidic to neutral pH for healthy annual canarygrass growth.
Why are my annual canarygrass seedlings wilting after transplant?
Wilting may indicate shock or insufficient water. Keep the soil consistently moist and provide shade if necessary for recovery.
How deep should I plant annual canarygrass seedlings?
Transplant annual canarygrass at the same depth they grew in pots or trays to prevent burying stems, which can lead to rot.
Can I transplant annual canarygrass in containers?
Absolutely, ensure the container is adequately sized with proper drainage holes and use a high-quality potting mix for annual canarygrass.
How can I prevent transplant shock in annual canarygrass?
Gradually acclimate annual canarygrass to outdoor conditions, transplant on cloudy days or late afternoon, and water thoroughly after planting.
How do I know if annual canarygrass has enough water after transplanting?
The soil should feel moist about 1 inch (2.5 cm) deep. Water if the soil feels dry to ensure annual canarygrass roots don't dehydrate.
Should I fertilize annual canarygrass right after transplanting?
Wait 2-4 weeks after transplanting annual canarygrass, then use a balanced fertilizer to support healthy growth while avoiding root burn.
What if annual canarygrass leaves turn yellow post-transplant?
Yellow leaves might suggest overwatering or nutrient deficiency. Adjust watering and consider a soil test to guide fertilization for annual canarygrass.


